Building a full-stack web app using only Java, in 5 small classes

A Java team can usually ship a backend without drama. The trouble starts when the app needs screens. Suddenly there is a JavaScript framework to pick, a REST layer to feed it and a second build to keep alive.
This article skips all of that. We build a small customer app with a side menu, a sortable table on top of a database and a validated form, and every line we write is Java. It comes to five classes and one test, about 240 lines. Here is where we end up:
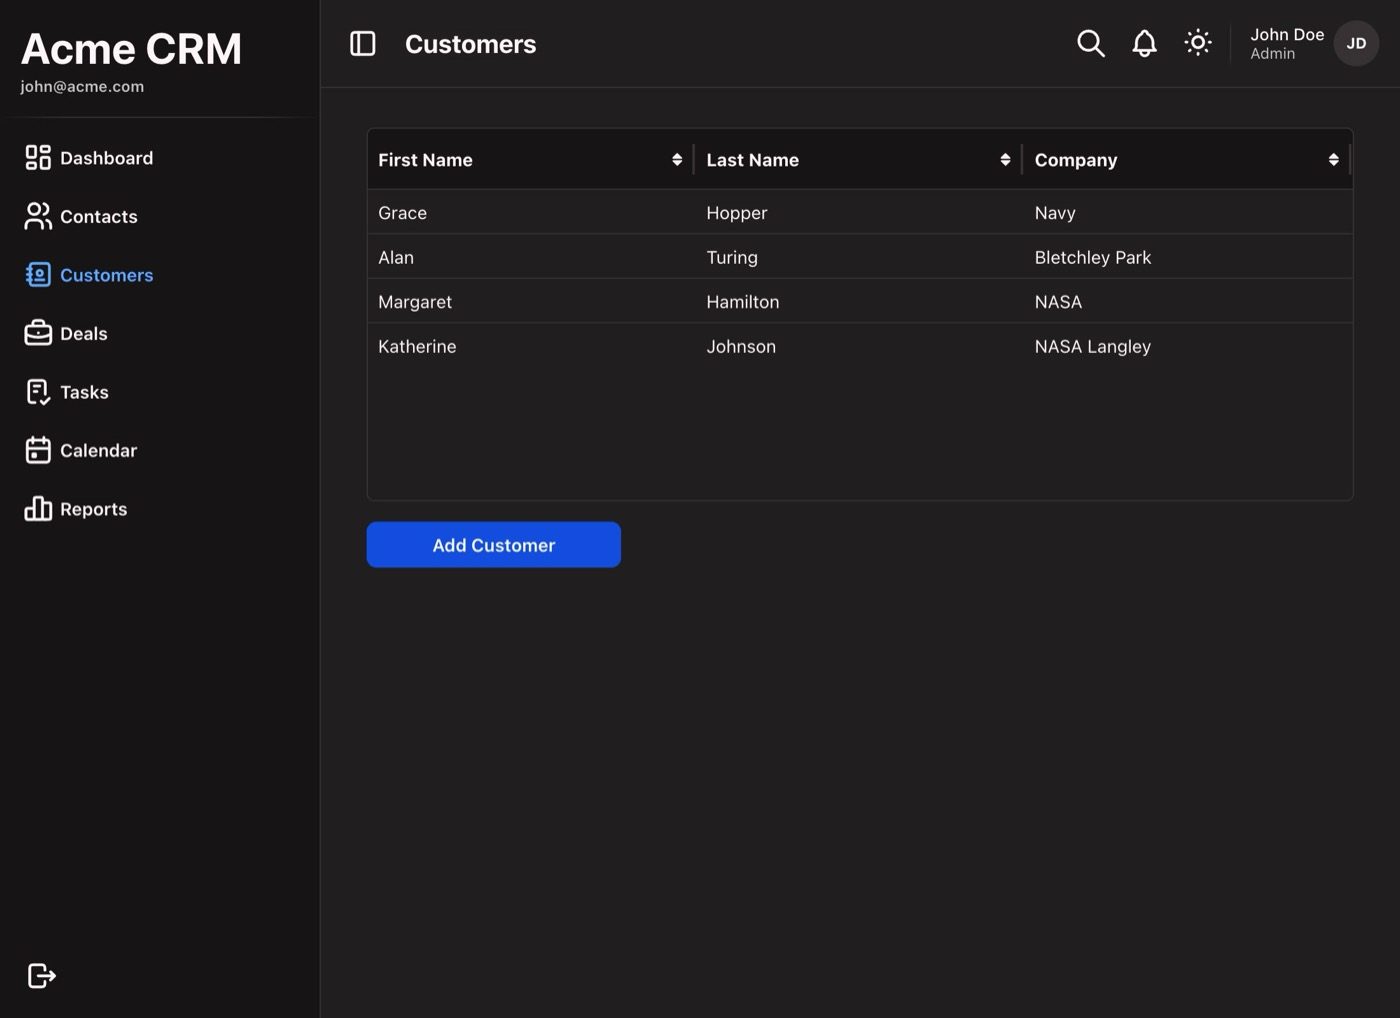
The framework is webforJ, the full-stack Java framework for business web apps: you build the whole app, screens included, in Java. I work at webforJ, and this is the tour I give Java teams who ask what working with it looks like. All the code below comes from the working app in that screenshot.
What you need
- Java 21 or higher
- Maven
- A terminal and a browser
The prerequisites page has the details.
Generate the project
The SideMenu archetype gives you an app shell on the first run. The webforj-spring flavor makes it a Spring Boot app. Run this command:
mvn -B archetype:generate \
  -DarchetypeGroupId=com.webforj \
  -DarchetypeArtifactId=webforj-archetype-sidemenu \
  -DarchetypeVersion=LATEST \
  -DgroupId=org.example \
  -DartifactId=my-app \
  -Dversion=1.0-SNAPSHOT \
  -Dflavor=webforj-spring \
  -DappName=MyApp
At the time of writing, that gives you webforJ 26.03 on Spring Boot 4.1.0. Go into my-app and run mvn with no arguments. The project sets a default Maven goal that compiles the app, starts the frontend watch and runs the app. Open http://localhost:8080. The small button floating over the app opens craftforJ. We come back to it after the tutorial.
The archetype sets up live reload and hot swap for you, so you do not restart for every edit. Stylesheet and image changes are applied to the open page in place, with no reload, on any JDK. Java changes work like this: when a changed class is compiled, it is applied to the running app and the browser updates on its own. Edits inside a method work on any JDK too. Only changes to the structure of a class, such as a new field or a new method, need the JetBrains Runtime. Without it the browser shows a one-time notice saying so, and those structural changes wait for a restart. The deploy and reload docs have the details.
What the archetype gives you
Before adding anything, it is worth five minutes to see what the command produced. The interesting part is small:
my-app/
├── pom.xml
└── src/
    ├── main/
    │   ├── frontend/app.css
    │   ├── java/org/example/
    │   │   ├── Application.java
    │   │   ├── components/   DrawerHeader, Explore, ThemeToggle, UserBadge
    │   │   └── views/        MainLayout, DashboardView, ContactsView,
    │   │                     DealsView, TasksView, CalendarView, ReportsView
    │   └── resources/        application.properties
    └── test/java/org/example/views/DashboardViewTest.java
Three of these files explain how the whole app hangs together.
Application.java starts the app. It is a normal Spring Boot main class that also extends the webforJ App:
@SpringBootApplication
@Routify(packages = "org.example.views")
@BundleEntry("app.css")
@AppTheme("system")
@AppProfile(name = "MyApp", shortName = "MyApp")
public class Application extends App {

  public static void main(String[] args) {
    SpringApplication.run(Application.class, args);
  }
}
@Routify tells webforJ which package to scan for views, so every view we add goes into org.example.views. @BundleEntry loads the stylesheet from src/main/frontend, @AppTheme("system") follows the light or dark setting of your operating system, and @AppProfile sets the app name.
MainLayout.java is the shell. This is the class that draws the side menu and the header you saw in the browser. It wraps an AppLayout component, and its constructor fills in the parts:
@Route
public class MainLayout extends Composite<AppLayout> {
  private AppLayout self = getBoundComponent();
  private H1 title = new H1();
  private ListenerRegistration<NavigateEvent> navigateRegistration;

  public MainLayout() {
    setHeader();
    setDrawer();
    setDrawerFooter();
    navigateRegistration = Router.getCurrent().onNavigate(this::onNavigate);
  }
The @Route annotation has no path here. That makes MainLayout a layout: it has no URL of its own, and other views render inside it. The side menu is built in setDrawer(), one AppNavItem per view, each with a label, the view class it opens and an icon:
  private void setDrawer() {
    AppNav appNav = new AppNav();
    appNav.addItem(new AppNavItem("Dashboard", DashboardView.class, TablerIcon.create("layout-dashboard")));
    appNav.addItem(new AppNavItem("Contacts", ContactsView.class, TablerIcon.create("users")));
    // ...
    self.addToDrawer(appNav);
  }
The view classes are the pages. Each menu entry points at a class in views/. Here is ContactsView, complete:
@Route(value = "/contacts", outlet = MainLayout.class)
@FrameTitle("Contacts")
public class ContactsView extends Composite<FlexLayout> {
  private FlexLayout self = getBoundComponent();

  public ContactsView() {
    self.setHeight("100%");
    self.setAlignment(FlexAlignment.CENTER);
    self.add(new Explore("No contacts yet", "users", "Add contact"));
  }
}
That is the whole view. No template, no HTML file. Two things in it connect it to the shell. outlet = MainLayout.class says “render me inside that layout”, which is why the side menu stays in place while the content changes. @FrameTitle supplies the page title, and MainLayout copies it into the header on every navigation.
All six views the archetype ships are placeholders like this one, and DashboardView sits on the root route. We leave them alone and add our own next to them. So the recipe for a new page is short: write a class in org.example.views, give it a @Route with MainLayout as the outlet, and add one AppNavItem line. The routing documentation covers the rest, including route patterns such as user/:id.
Switch on the database
The pom.xml from the archetype already contains the validation starter and the TestBed test dependency. It also contains the JPA and H2 dependencies, but commented out. Uncomment them:
    <dependency>
      <groupId>com.h2database</groupId>
      <artifactId>h2</artifactId>
    </dependency>

    <dependency>
      <groupId>org.springframework.boot</groupId>
      <artifactId>spring-boot-starter-data-jpa</artifactId>
    </dependency>
The same goes for the datasource and JPA lines in src/main/resources/application.properties:
spring.datasource.url=jdbc:h2:mem:testdb
spring.datasource.driverClassName=org.h2.Driver
spring.datasource.username=sa
spring.datasource.password=

# JPA configuration
spring.jpa.hibernate.ddl-auto=update
spring.jpa.open-in-view=false
That gives us an in-memory H2 database. Stop the app and run mvn again after this change. Hot swap handles code, but new dependencies in the pom.xml need a fresh start.
The entity, the repository and the service
The tutorial in the docs builds the same kind of customer app, and the next classes follow it. The entity goes in org.example.data and the service in org.example.service. The entity is an ordinary JPA class. It carries the Jakarta validation constraints that the form uses later, and each annotation holds the message the user will see. Imports come from jakarta.persistence and jakarta.validation.constraints. The getters and setters for firstName, lastName and company are the usual ones:
@Entity
@Table(name = "customers")
public class Customer {

  @Id
  @GeneratedValue(strategy = GenerationType.IDENTITY)
  private Long id;

  @NotEmpty(message = "Customer first name is required")
  @Pattern(regexp = "[a-zA-Z]*", message = "Invalid characters")
  private String firstName = "";

  @NotEmpty(message = "Customer last name is required")
  @Pattern(regexp = "[a-zA-Z]*", message = "Invalid characters")
  private String lastName = "";

  @Pattern(regexp = "[a-zA-Z0-9 ]*", message = "Invalid characters")
  private String company = "";

  public Customer() {
  }

  public Customer(String firstName, String lastName, String company) {
    this.firstName = firstName;
    this.lastName = lastName;
    this.company = company;
  }
  // ...
}
The no-argument constructor matters. JPA needs it, and the form view calls it. The repository is a Spring Data interface:
@Repository
public interface CustomerRepository
    extends JpaRepository<Customer, Long>, JpaSpecificationExecutor<Customer> {
}
The service wraps it. The one webforJ-specific line is SpringDataRepository, imported from com.webforj.data.repository.spring. It is an adapter that lets a UI component read from a Spring Data repository:
@Service
@Transactional
public class CustomerService {
  private final CustomerRepository repository;

  public CustomerService(CustomerRepository repository) {
    this.repository = repository;
  }

  public Customer createCustomer(Customer customer) {
    return repository.save(customer);
  }

  public SpringDataRepository<Customer, Long> getRepositoryAdapter() {
    return new SpringDataRepository<>(repository);
  }
}
The Customers view
A view takes the service through constructor injection, like any Spring bean. It builds a Table, names the columns, makes them sortable and hands the table the repository adapter. The route uses the same outlet as the placeholder views:
@Route(value = "/customers", outlet = MainLayout.class)
@FrameTitle("Customers")
public class CustomersView extends Composite<FlexLayout> {

  private final FlexLayout self = getBoundComponent();
  private final Table<Customer> table = new Table<>();

  private final Button addCustomer = new Button(
      "Add Customer",
      ButtonTheme.PRIMARY,
      e -> Router.getCurrent().navigate(CustomerFormView.class));

  public CustomersView(CustomerService customerService) {
    table.setSize("100%", "294px");

    table.addColumn("firstName", Customer::getFirstName).setLabel("First Name");
    table.addColumn("lastName", Customer::getLastName).setLabel("Last Name");
    table.addColumn("company", Customer::getCompany).setLabel("Company");

    table.setColumnsToAutoFit();
    table.getColumns().forEach(column -> column.setSortable(true));

    table.setRepository(customerService.getRepositoryAdapter());

    addCustomer.setWidth(200);

    self.setDirection(FlexDirection.COLUMN).setSpacing("var(--dwc-space-m)");
    self.setPadding("var(--dwc-space-l)");
    self.add(table, addCustomer);
  }
}
Now the menu entry. In MainLayout, add one line to the existing list of items:
    appNav.addItem(new AppNavItem("Contacts", ContactsView.class, TablerIcon.create("users")));
    appNav.addItem(new AppNavItem("Customers", CustomersView.class, TablerIcon.create("address-book")));
    appNav.addItem(new AppNavItem("Deals", DealsView.class, TablerIcon.create("briefcase")));
The Spring Data JPA guide describes the adapter in more detail, including paging, sorting and filtering with JPA Specifications.
The customer form
Forms are where hand-written event listeners tend to pile up. webforJ has data binding for this. A BindingContext connects the fields of a view to the properties of a bean, and it can use the Jakarta Bean Validation annotations from the bean.
BindingContext.of(this, Customer.class, true) matches each field of the view to a bean property by name, and the true turns on the Jakarta validation. The onValidate listener keeps the submit button disabled while the form is invalid. write() copies the values into the bean and returns the validation result. The imports to look out for are com.webforj.data.binding.BindingContext and com.webforj.data.validation.server.ValidationResult:
@Route(value = "/customers/new", outlet = MainLayout.class)
@FrameTitle("New customer")
public class CustomerFormView extends Composite<FlexLayout> {
  private final CustomerService customerService;
  private final BindingContext<Customer> context;
  private final Customer customer = new Customer();
  private final FlexLayout self = getBoundComponent();
  private final TextField firstName = new TextField("First Name");
  private final TextField lastName = new TextField("Last Name");
  private final TextField company = new TextField("Company");
  private final Button submit = new Button("Submit", ButtonTheme.PRIMARY, e -> submitCustomer());
  private final Button cancel =
      new Button("Cancel", ButtonTheme.OUTLINED_PRIMARY, e -> navigateToCustomers());

  public CustomerFormView(CustomerService customerService) {
    this.customerService = customerService;
    context = BindingContext.of(this, Customer.class, true);
    context.onValidate(e -> submit.setEnabled(e.isValid()));

    self.setDirection(FlexDirection.COLUMN).setSpacing("var(--dwc-space-m)");
    self.setPadding("var(--dwc-space-l)").setMaxWidth(400);
    self.add(firstName, lastName, company, submit, cancel);
  }

  private void submitCustomer() {
    ValidationResult results = context.write(customer);
    if (results.isValid()) {
      customerService.createCustomer(customer);
      navigateToCustomers();
    }
  }

  private void navigateToCustomers() {
    Router.getCurrent().navigate(CustomersView.class);
  }
}
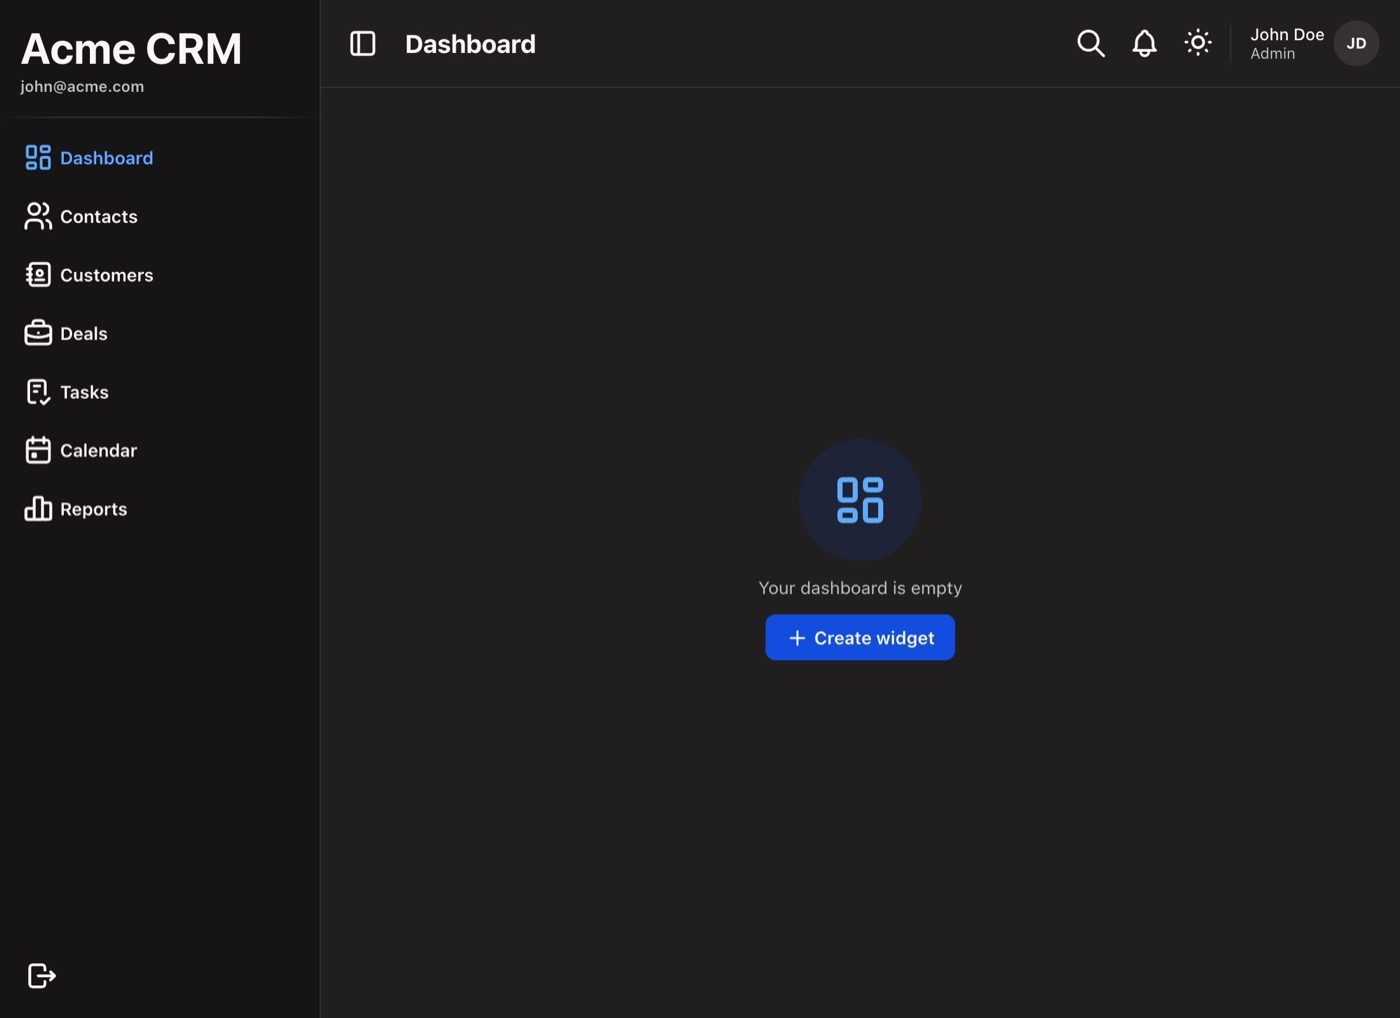
With both views in place, the side menu has the new entry:
Click Customers and you get the view from the top of this article. The rows in that screenshot are demo records seeded for the picture, so your table starts empty. Press Add Customer, type a first and a last name, press Submit and the table shows the new row. Type a digit into the first name instead and the field reports “Invalid characters” while Submit switches off. That behavior comes from the annotations on the entity and the one onValidate line.
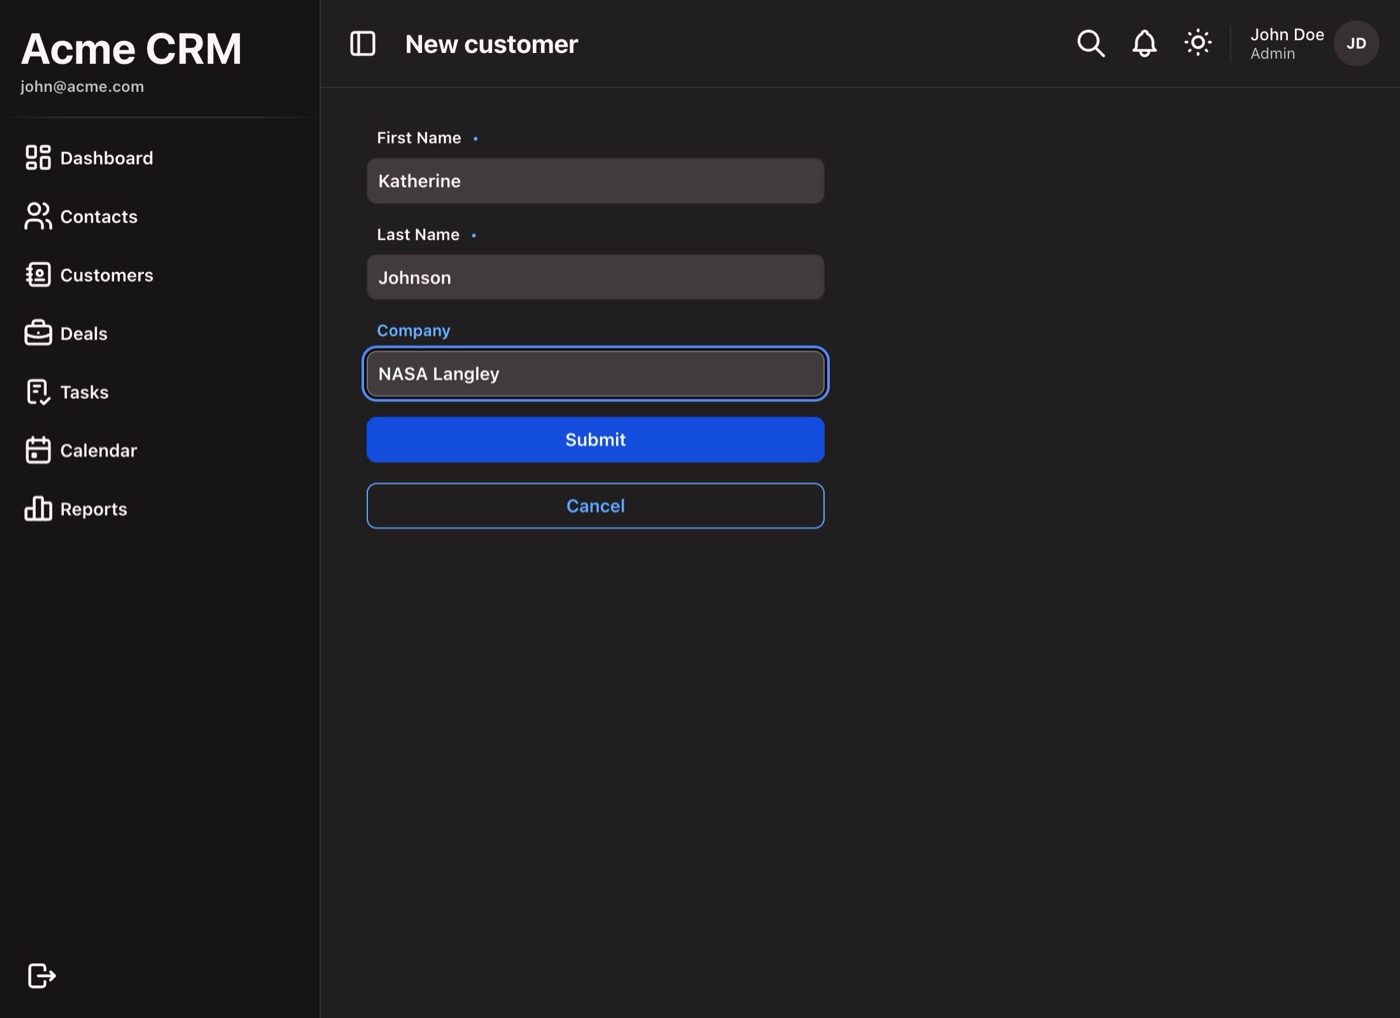
The data binding docs cover custom validators and transformers.
Test it without a browser
The archetype added the Spring TestBed dependency for us. The TestBed runs views in plain JUnit tests without a browser or a server. The archetype’s DashboardViewTest uses the same annotations as the test below. This one opens the form, types a name, clicks Submit and reads the result from the repository. It is the sixth and last class of this article:
@SpringBootTest
@ActiveProfiles("test")
@WebforjTest(app = Application.class)
class CustomerFormViewTest {

  @Autowired
  CustomerRepository repository;

  @Test
  void shouldSaveTheCustomerTheUserTyped(WebforjTestbed context) {
    context.navigate(CustomerFormView.class);

    var firstName = ComponentLocator.of(TextField.class).byLabel("First Name").locate();
    var lastName = ComponentLocator.of(TextField.class).byLabel("Last Name").locate();
    var submit = ComponentLocator.of(Button.class).byText("Submit").locate();

    UserInteraction.type(firstName, "Ada");
    UserInteraction.type(lastName, "Lovelace");
    UserInteraction.click(submit);

    Customer saved = repository.findAll().get(0);
    assertEquals("Ada", saved.getFirstName());
    assertEquals("Lovelace", saved.getLastName());
  }
}
mvn test now runs two tests, this one and the one the archetype shipped. Both pass, and no browser opens.
Edit the running app with craftforJ
There is one more thing in the app you just built, and you did not have to add it. craftforJ is the visual development environment that ships with webforJ. The archetype turns it on in development mode, which is why a small button has been floating over the app the whole time. Click it, or press Alt + Shift + D.
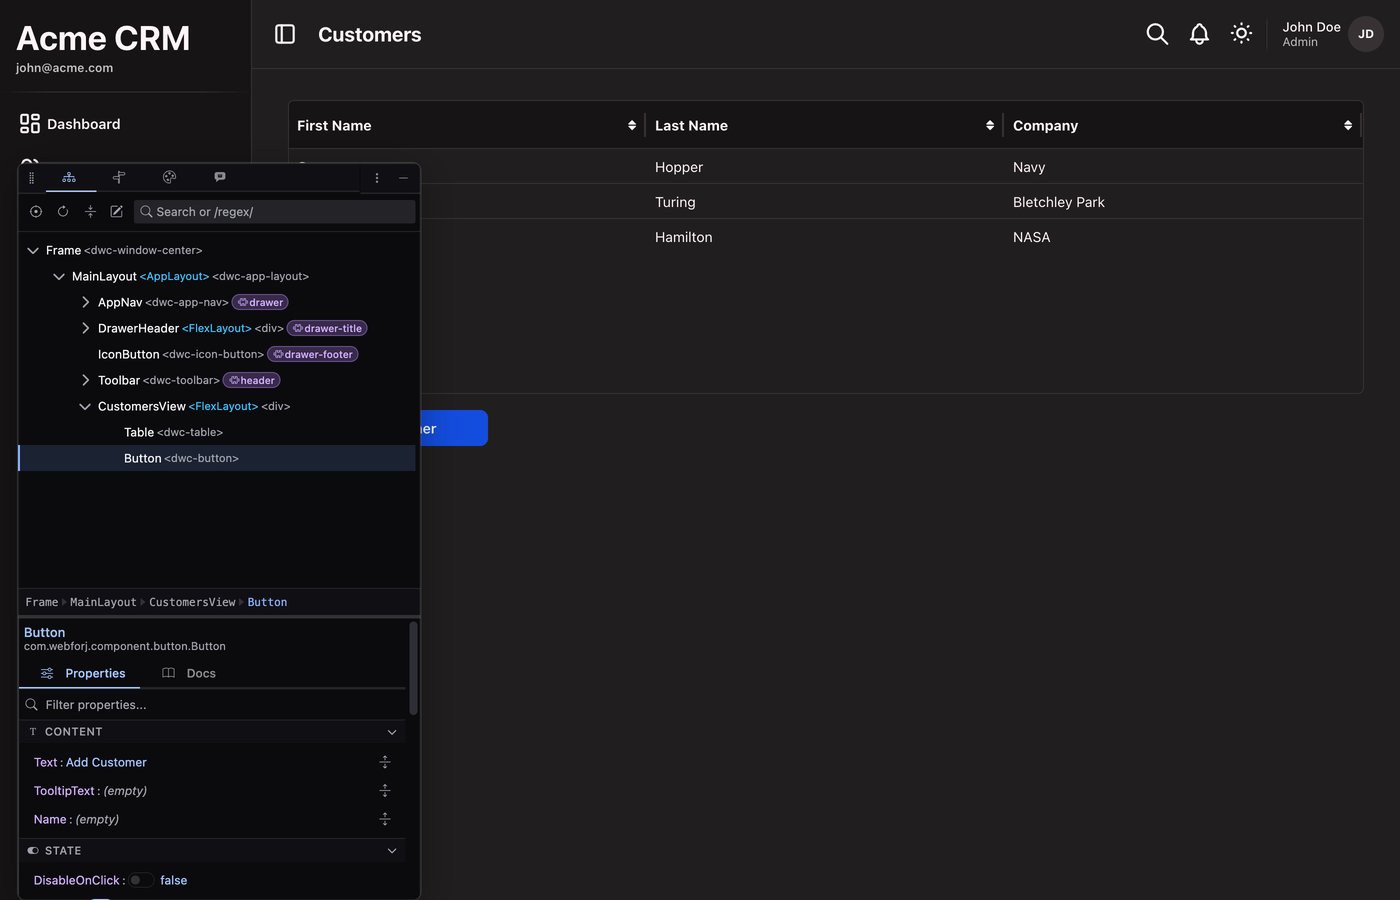
What you see is your own app, in your own terms. The tree lists MainLayout, CustomersView, the Table and the Button, the classes we wrote, and not the markup the browser rendered. Select the button and its properties are right there, including the “Add Customer” text from our constructor.
From here you work on the app while it runs:
- Change a property and the running app updates at once. Text, theme, size, layout, all without leaving the browser.
- Keep what you like. craftforJ shows the pending changes and writes the ones you keep back into the Java file that created the component.
- Look at routes and theme. The other tabs list the routes the router registered and let you adjust the theme with a live preview.
The last tab is the craftforJ assistant, a coding agent that works on the running app instead of in your editor. You give it a goal. It inspects the live component tree and your source, writes Java, and sends every edit through a real Java compiler before you see it. What reaches your review already compiles against your app.
Three things the tutorial did not show
A table and a form are the everyday part. These three are what we built webforJ for.
AI assistants that check their work
AI coding assistants guess at framework conventions they do not know. The webforJ AI plugin installs an MCP server that lets the assistant look things up in the docs and scaffold projects, and Agent Skills that tell it when to use those tools and how to validate its result. For Claude Code the install is two commands:
claude plugin marketplace add webforj/webforj-ai
claude plugin install webforj@webforj-ai
The plugin page covers GitHub Copilot CLI, Codex and other clients. Assistants still make mistakes, so generated code needs a check. The TestBed test above is that check. It needs no browser and finishes in seconds, so an assistant can run it after every change. Together with the craftforJ assistant above, that gives generated code three checks: the real API, the compiler and a test.
Existing Swing, JavaFX and SWT apps
Many teams have a Java desktop application that holds years of business logic. The Webswing integration runs a Swing, JavaFX or SWT app in the browser without changes to its source, and a WebswingConnector component embeds it in a webforJ view. You can then build new screens around it and replace the old ones one at a time.
Any backend
In this article the data came from Spring Data JPA. When your data lives somewhere else, such as a REST API, you can write a custom repository by supplying three functions to DelegatingRepository: one to find data, one to count it and one to look up an entity by key. The same Table then works on top of it. The Spring integration page lists what else Spring covers, and webforJ apps can also run in a plain servlet container.
Where to go next
The webforJ documentation has the full tutorial and the component reference. The code lives at github.com/webforj/webforj. For the wider choices in building a web app in Java, read How to build a web app in Java.
Build something with it, and when you hit a rough edge or miss a feature, open an issue on the webforJ GitHub repository. That is how the framework gets better.
Found a mistake, or something to add? Edit this page on GitHub

Hyyan Abo Fakher
Hyyan Abo Fakher works at webforJ and BASIS Europe.