
Build Your First SaaS with MongoDB Ephemeral Clusters

It’s a new world. A prototype that once meant hours or days of setup can now be up and running in minutes. With one API call, an AI agent can create a MongoDB Atlas cluster from your IDE, so you can start building without stopping to navigate account setup, cloud choices, regions, or cluster configuration.
In this tutorial, you will use an Atlas Ephemeral Cluster to build a polished job-application tracker: a small SaaS where a user manages applications on a Kanban board. The application is deliberately simple. The point is the workflow: give an agent a real database immediately, validate an idea quickly, and claim the cluster only when the prototype is worth keeping.
What you’ll learn
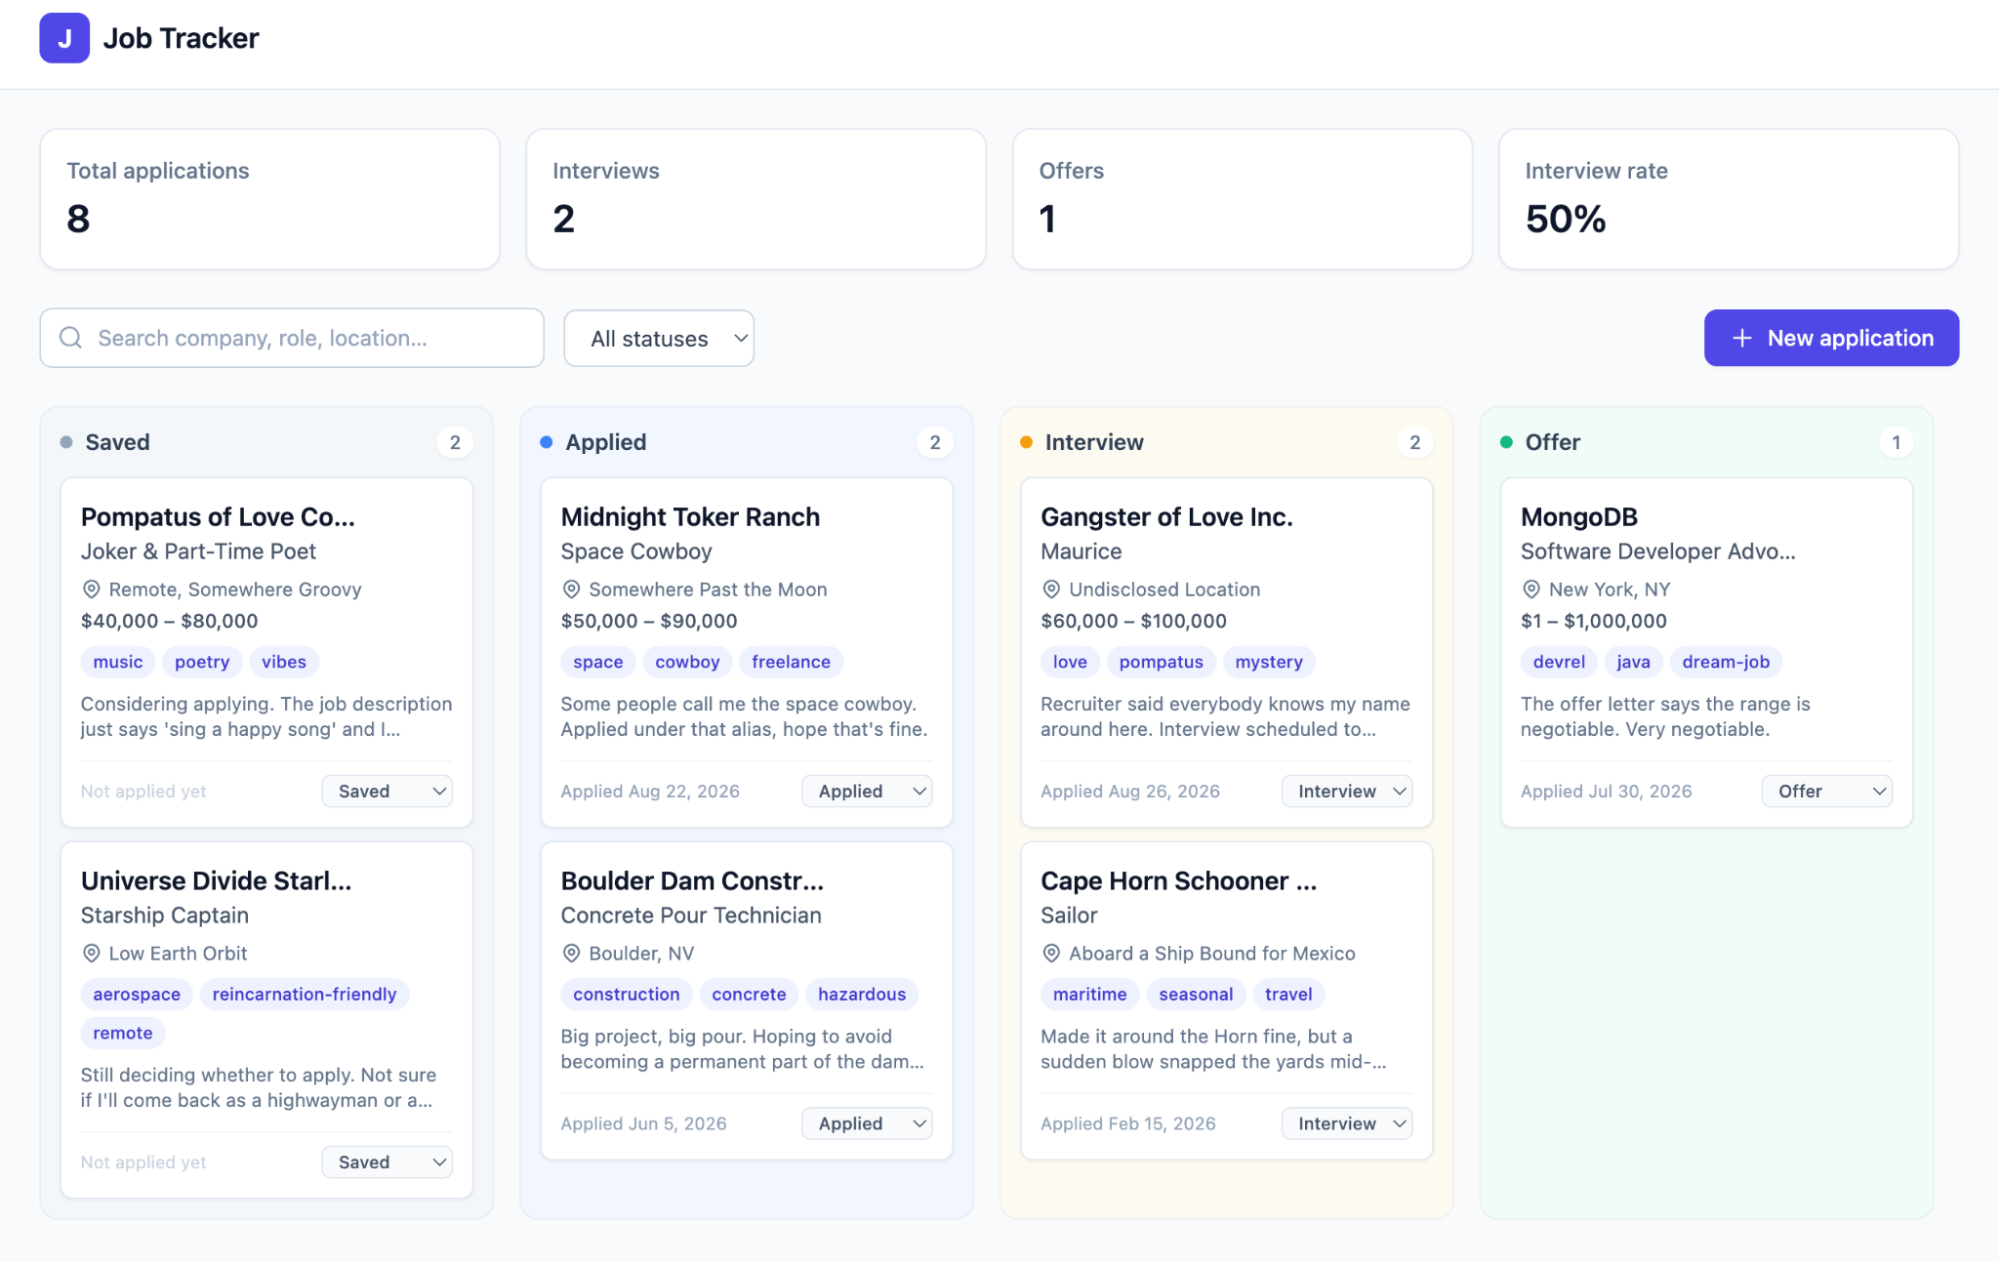
- What an Atlas Ephemeral Cluster is and when to use one
- How an agent can provision a database with a single API call
- How to give the returned connection details to an agent and build a full-stack SaaS
- How to claim the cluster in Atlas once the prototype is worth keeping
Why ephemeral clusters?
Early-stage building is about learning, not infrastructure decisions. Before you have validated an idea, it is usually premature to decide all your database needs, which cloud provider to use, or how it will be operated in general. Those decisions can interrupt the creative loop between an idea and a working product.
MongoDB Atlas Ephemeral Clusters (currently in public preview) removes that interruption. They are temporary, free Atlas M0 clusters created through an unauthenticated API endpoint. The response contains a live connection string with scoped credentials and a claim URL, letting a person or an agent start building immediately. When the prototype has value, you can claim the cluster into your MongoDB Atlas organization.
An ephemeral cluster stays active for 48 hours and can be claimed for 7 days from creation before it is cleaned up. Treat it as a fast, disposable environment for experiments and prototypes, not as a production deployment.
The workflow at a glance
- Provision an ephemeral cluster.
- Give the connection details to your coding agent.
- Build and test the smallest useful SaaS workflow.
- Claim the cluster if you want to keep the prototype.
- Continue building in Atlas with normal ownership and controls.
Prerequisites
- curl for the provisioning call
- An AI coding agent or IDE assistant that can create files and run your application
- I use Claude Code in this example
- Java 21+ and Maven for the backend
- Node.js for the React frontend
- A browser only when you are ready to claim the cluster
You do not need an Atlas account to start the ephemeral-cluster workflow.
1. Provision a cluster (optional step)
This step is optional for this tutorial, as we can just get the agent to provision our cluster, but it’s good to understand how to get your ephemeral cluster working. Run this request from your terminal, or instruct your agent to run it and store the response securely.
curl -sS -X POST 'https://cloud.mongodb.com/api/atlas/v2/unauth/ephemeralClusters:create' \
  -H 'Accept: application/vnd.atlas.preview+json' \
  -H 'Content-Type: application/json' \
  -d '{"clusterName": "Cluster0"}'
And the response you get should look like this:
{
  "claimUrl": "https://account.mongodb.com/account/register?claimId={claimId}",
  "clusterId": "{clusterId}",
  "connectionString": "mongodb+srv://{username}:{password}@{host}/",
  "expiresAt": "{timestamp}",
  "status": "PROVISIONING",
  "termsOfService": "By using this API and any resources provisioned through it, you agree to be bound by MongoDB's Cloud Terms of Service at https://www.mongodb.com/legal/terms-and-conditions/cloud; and Privacy Policy at https://www.mongodb.com/legal/privacy/privacy-policy."
}
This request requires no login flow. Save the response somewhere your agent can access locally, but never commit it to source control: the connectionString field contains the credentials your application needs to begin building, while claimUrl lets you later convert the ephemeral cluster into a permanent Atlas cluster.
It also gives some important information about when the Ephemeral Cluster will expire (expiresAt), the clusterId, the status of the cluster, and the terms of service for these clusters.
2. Hand the database to your agent
Creating the cluster is only the first half of the workflow. The next step is to give your coding agent a clear, secure path from the ephemeral-cluster response to a running application.
Below, I have provided a detailed prompt for my agent to use when building the application. It defines the architecture, the functional requirements, the data model, the development boundaries, and the order of work. Being explicit up front gives the agent less room to guess and means less course-correction once files, dependencies, and API contracts exist.
I also give detailed instructions on how to set up the MongoDB Ephemeral Cluster and handle the return. The provisioning response contains two pieces of information with different jobs:
connectionStringis the temporary database connection string. Your agent uses it to configure the Spring Boot backend so the API can create collections, insert sample data, and persist application changes from the first run.claimUrlis for you, not the application. Keep it somewhere safe; it is the link you will use later to move a successful prototype into your Atlas organization.
Do not paste either value into source files. Instead, have the agent put MONGODB_URI in a local .env file or your shell environment, add that file to ../../../../../../.gitignore, and commit a .env.example containing only the variable name. This keeps the generated project reproducible without exposing the credentials that grant access to the ephemeral cluster.
Copy the following prompt into your coding agent. It tells the agent to provision the cluster before it writes application code, inspect the response, preserve the claim URL, and use the connection string exclusively through MONGODB_URI.
Use this prompt to generate the Spring, React + Vite, and MongoDB application for tracking job applications:
I want to build a full-stack SaaS job application tracker using Java 21+, Spring Boot,
Spring Web, Spring Data MongoDB, Maven, MongoDB, React with Vite, JavaScript, and
Tailwind CSS.

## Database provisioning

Before writing any application code, provision a MongoDB Atlas database using the
MongoDB Atlas Ephemeral Clusters feature for AI prototyping. Run:

curl -sS -X POST 'https://cloud.mongodb.com/api/atlas/v2/unauth/ephemeralClusters:create' \
  -H 'Accept: application/vnd.atlas.preview+json' \
  -H 'Content-Type: application/json' \
  -d '{"clusterName": "Cluster0"}'

This endpoint returns JSON containing the MongoDB Atlas connection string to use for
prototyping, a claim URL for converting the cluster to a permanent free Atlas cluster,
an expiry date for an unclaimed cluster, terms of service, and other metadata.

Walk me through the returned information, store the connection details securely for
later, and use the returned connection string as MONGODB_URI. Do not commit credentials
or the response payload to source control. Only after the database is provisioned,
create the application described below.

## Application

Create a simple, polished SaaS interface where a user can track job applications.

Each application should contain:
* Company
* Role
* Location
* Status: Saved, Applied, Interview, Offer, or Rejected
* Salary range and currency
* Job URL
* Notes
* Tags
* Applied date

The main page should show applications as a Kanban board with columns for each status.
Users should be able to create, edit, delete, search, filter, and change the status of
applications.

At the top, show simple statistics for total applications, interviews, offers, and
interview rate.

Use a Spring Boot REST API with a straightforward controller -> service -> repository
structure. Use Spring Data MongoDB, DTOs for API requests/responses, validation, and
sensible error handling. Store salary as a nested document and tags as an array.

Use MONGODB_URI for the MongoDB connection. The frontend should run on port 5173 and
the backend on 8080.

Keep the UI modern, clean, responsive, and similar to a small developer-focused SaaS
product.

Keep the application deliberately simple. Do not add authentication, payments, AI,
microservices, Kafka, Redux, GraphQL, or unnecessary abstractions.

Structure the project as:
backend/ — Spring Boot application
frontend/ — React application

Include some sample job applications for development and a README explaining how to
run the project.
When the agent has finished generating the project, set the connection string in the terminal session that will run the backend. Spring Boot reads MONGODB_URI at startup; this is what connects the generated API to the ephemeral cluster rather than a local database.
# Terminal 1: backend
cd backend
export MONGODB_URI='paste-the-ephemeral-connection-string-here'
./mvnw spring-boot:run
Keep that terminal running, then open a second terminal for the frontend:
# Terminal 2: frontend
cd frontend
npm install
npm run dev
The frontend runs on http://localhost:5173 and calls the backend on http://localhost:8080. The agent should configure the local development experience accordingly, including any required CORS settings. This prompt is deliberately precise about the product and deliberately light on infrastructure: the agent can create the collections, REST API, Kanban UI, and sample data while the ephemeral cluster provides a live persistence layer from the first run.
3. What the agent should build
The application needs only one primary collection: applications. Each document represents one job application and should capture the fields the UI needs without unnecessary joins or services.
{
  "_id": "...",
  "company": "MongoDB",
  "role": "Developer Advocate",
  "location": "London, UK",
  "status": "Interview",
  "salary": {
    "min": 85000,
    "max": 105000,
    "currency": "GBP"
  },
  "jobUrl": "https://example.com/jobs/developer-advocate",
  "notes": "Technical screen scheduled for next Tuesday.",
  "tags": ["developer-relations", "hybrid"],
  "appliedDate": "2026-09-01",
  "createdAt": "...",
  "updatedAt": "..."
}
And in the ephemeral cluster, we can even ask the agent to add indexes that reflect the application’s most common queries:
@Document("applications")
@CompoundIndex(name = "status_applied_date_idx", def = "{'status': 1, 'appliedDate': -1}")
public class JobApplication {
    // fields omitted
}
For a first prototype, this model gives the agent everything it needs for a Kanban view, text search and filtering, status moves, and headline statistics. It also demonstrates a useful document-modeling pattern: values that belong together, such as a salary range and its currency, live together as a nested document; tags work naturally as an array.
4. Run and verify the prototype
Your agent’s README should provide the exact commands, but the development workflow should be simple:
# Terminal 1: backend
cd backend
export MONGODB_URI='paste-the-ephemeral-connection-string-here'
./mvnw spring-boot:run

# Terminal 2: frontend
cd frontend
npm install
npm run dev
Open the frontend at http://localhost:5173. The API should run at http://localhost:8080.
Exercise the core workflow:
- Confirm the seeded sample applications appear in their Kanban columns.
- Create an application with a salary range and a few tags.
- Move it from Saved to Applied, then Interview.
- Search by company and filter by status or tag.
- Edit its notes, then delete it.
- Confirm the total, interview, offer, and interview-rate statistics update correctly.
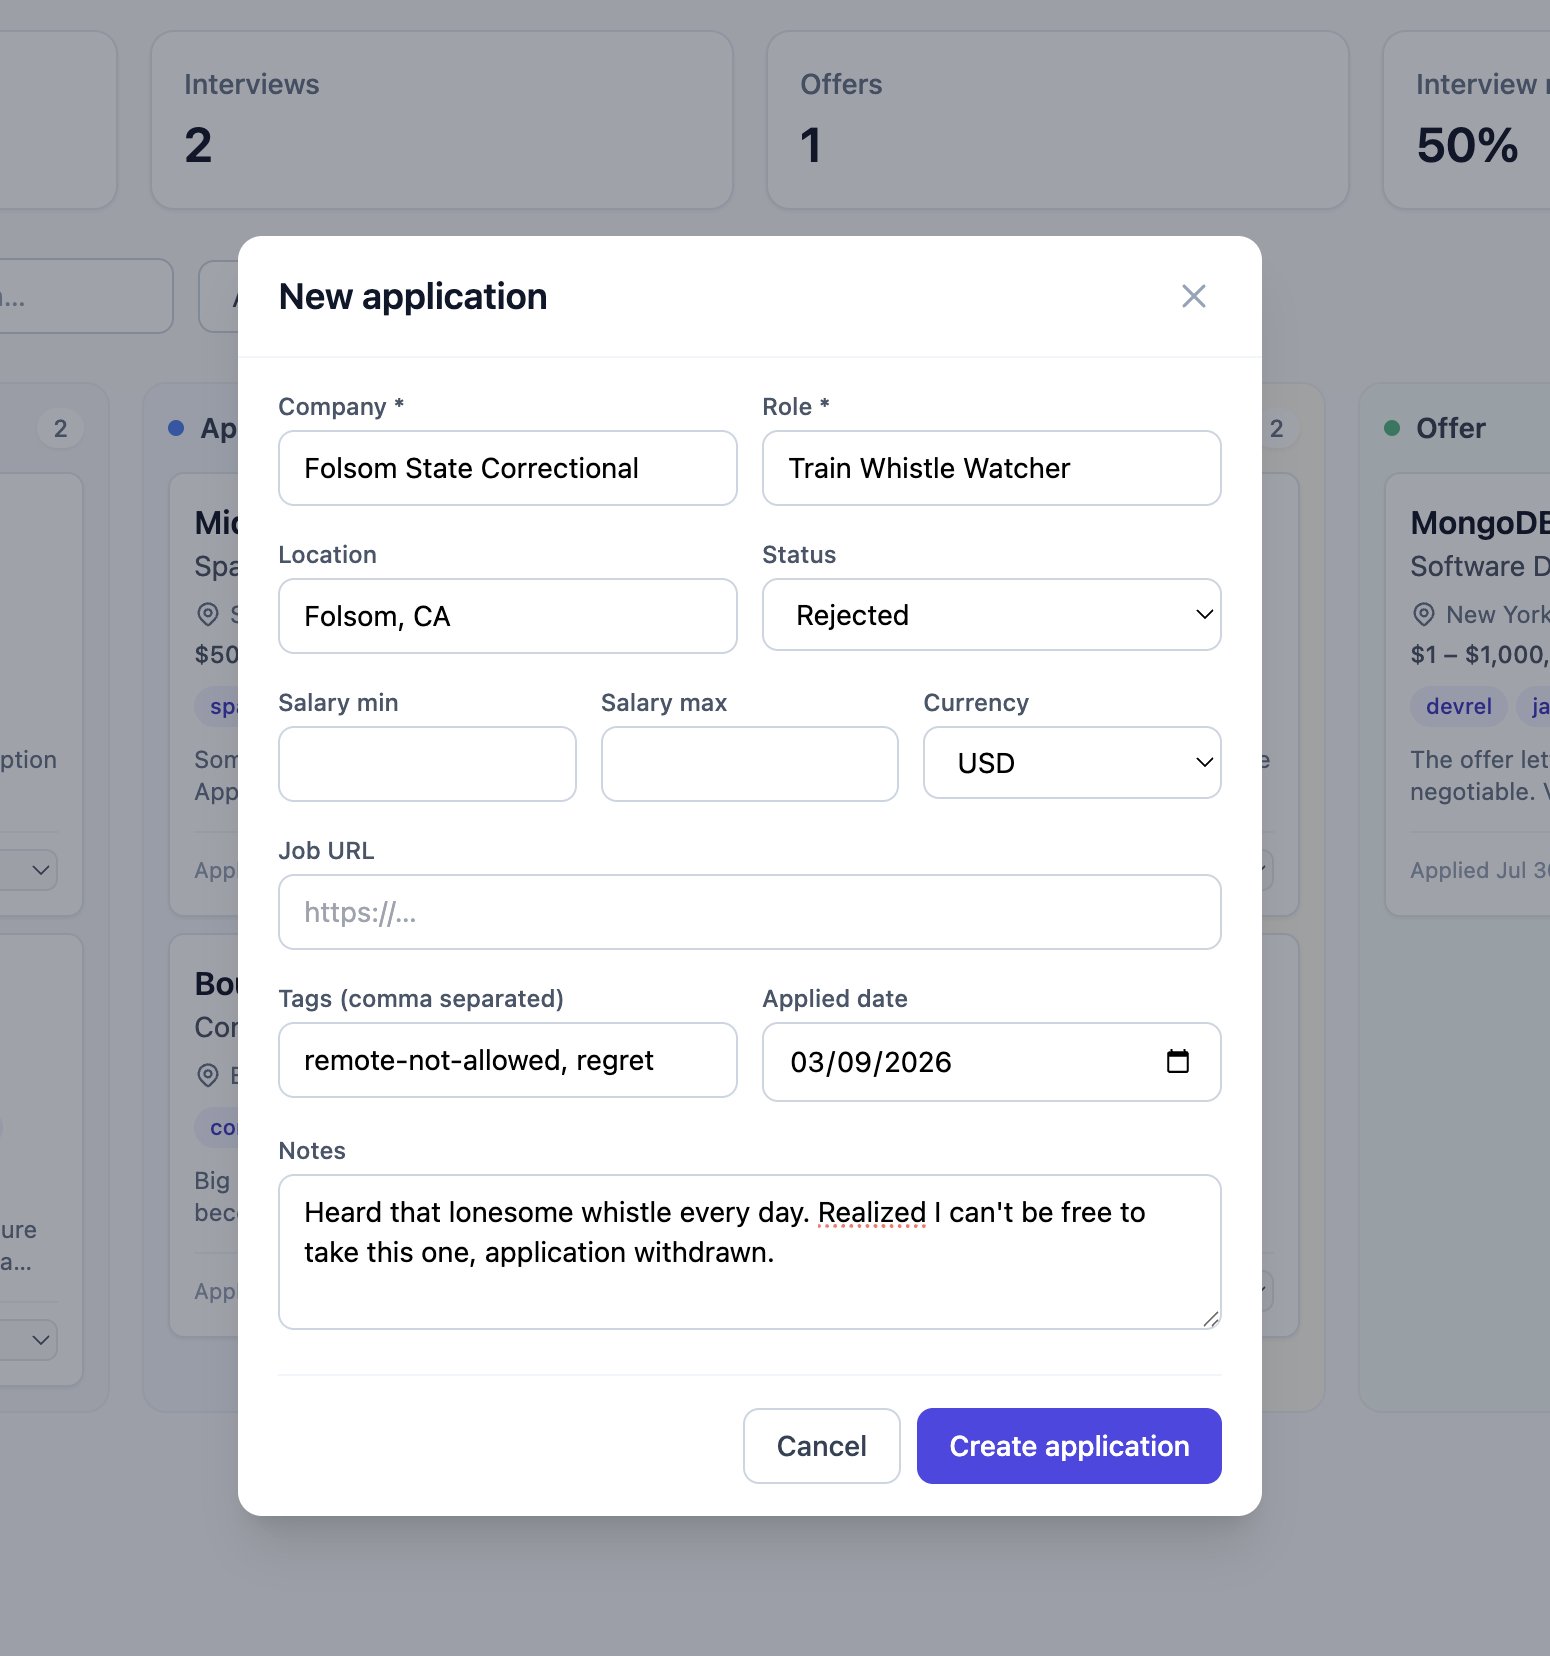
At this stage, the ephemeral cluster has done its job: it has enabled a real, persistent prototype without front-loading infrastructure work. Iterate on the build prompt, data model, REST endpoints, and UI while the learning loop is still fast.
5. Claim the cluster when the idea earns it
When the prototype is worth preserving, open the claim URL returned by the provisioning response. Complete the Atlas flow to attach the cluster to your Atlas organization. Claiming is the handoff from an experimental resource to a database you can manage as part of your Atlas estate. You can ask the agent to provide it if it was saved earlier:
show claim URL in previous API response
It is provided in the original response used to create the ephemeral cluster in the field claimUrl:
{
  "claimUrl": "https://account-dev.mongodb.com/account/register?claimId=claimId",
  "clusterId": "clusterId",
  "connectionString": "mongodb+srv://POexample:[email protected]/",
  "expiresAt": "2026-09-05T13:21:35Z",
  "status": "ACTIVE",
  "termsOfService": "By using this API and any resources provisioned through it, you agree to be bound by MongoDB's Cloud Terms of Service at https://www.mongodb.com/legal/terms-and-conditions/cloud; and Privacy Policy at https://www.mongodb.com/legal/privacy/privacy-policy."
}
By following that link, you will be asked to either sign in or create an account with MongoDB Atlas. Once signed in, you will be taken to a page to decide what organization you want to add the cluster to, and configure an allow list for network connections.
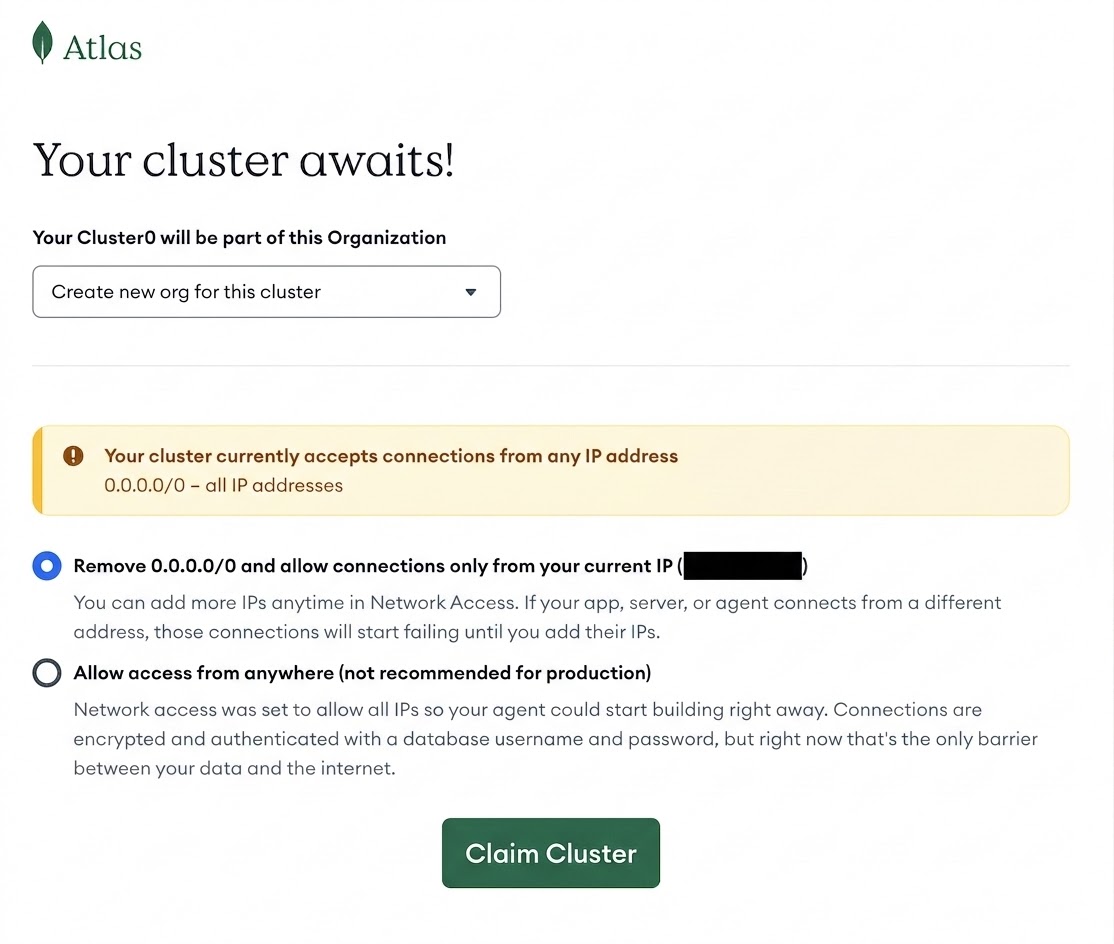
After that, it is time to claim the cluster!
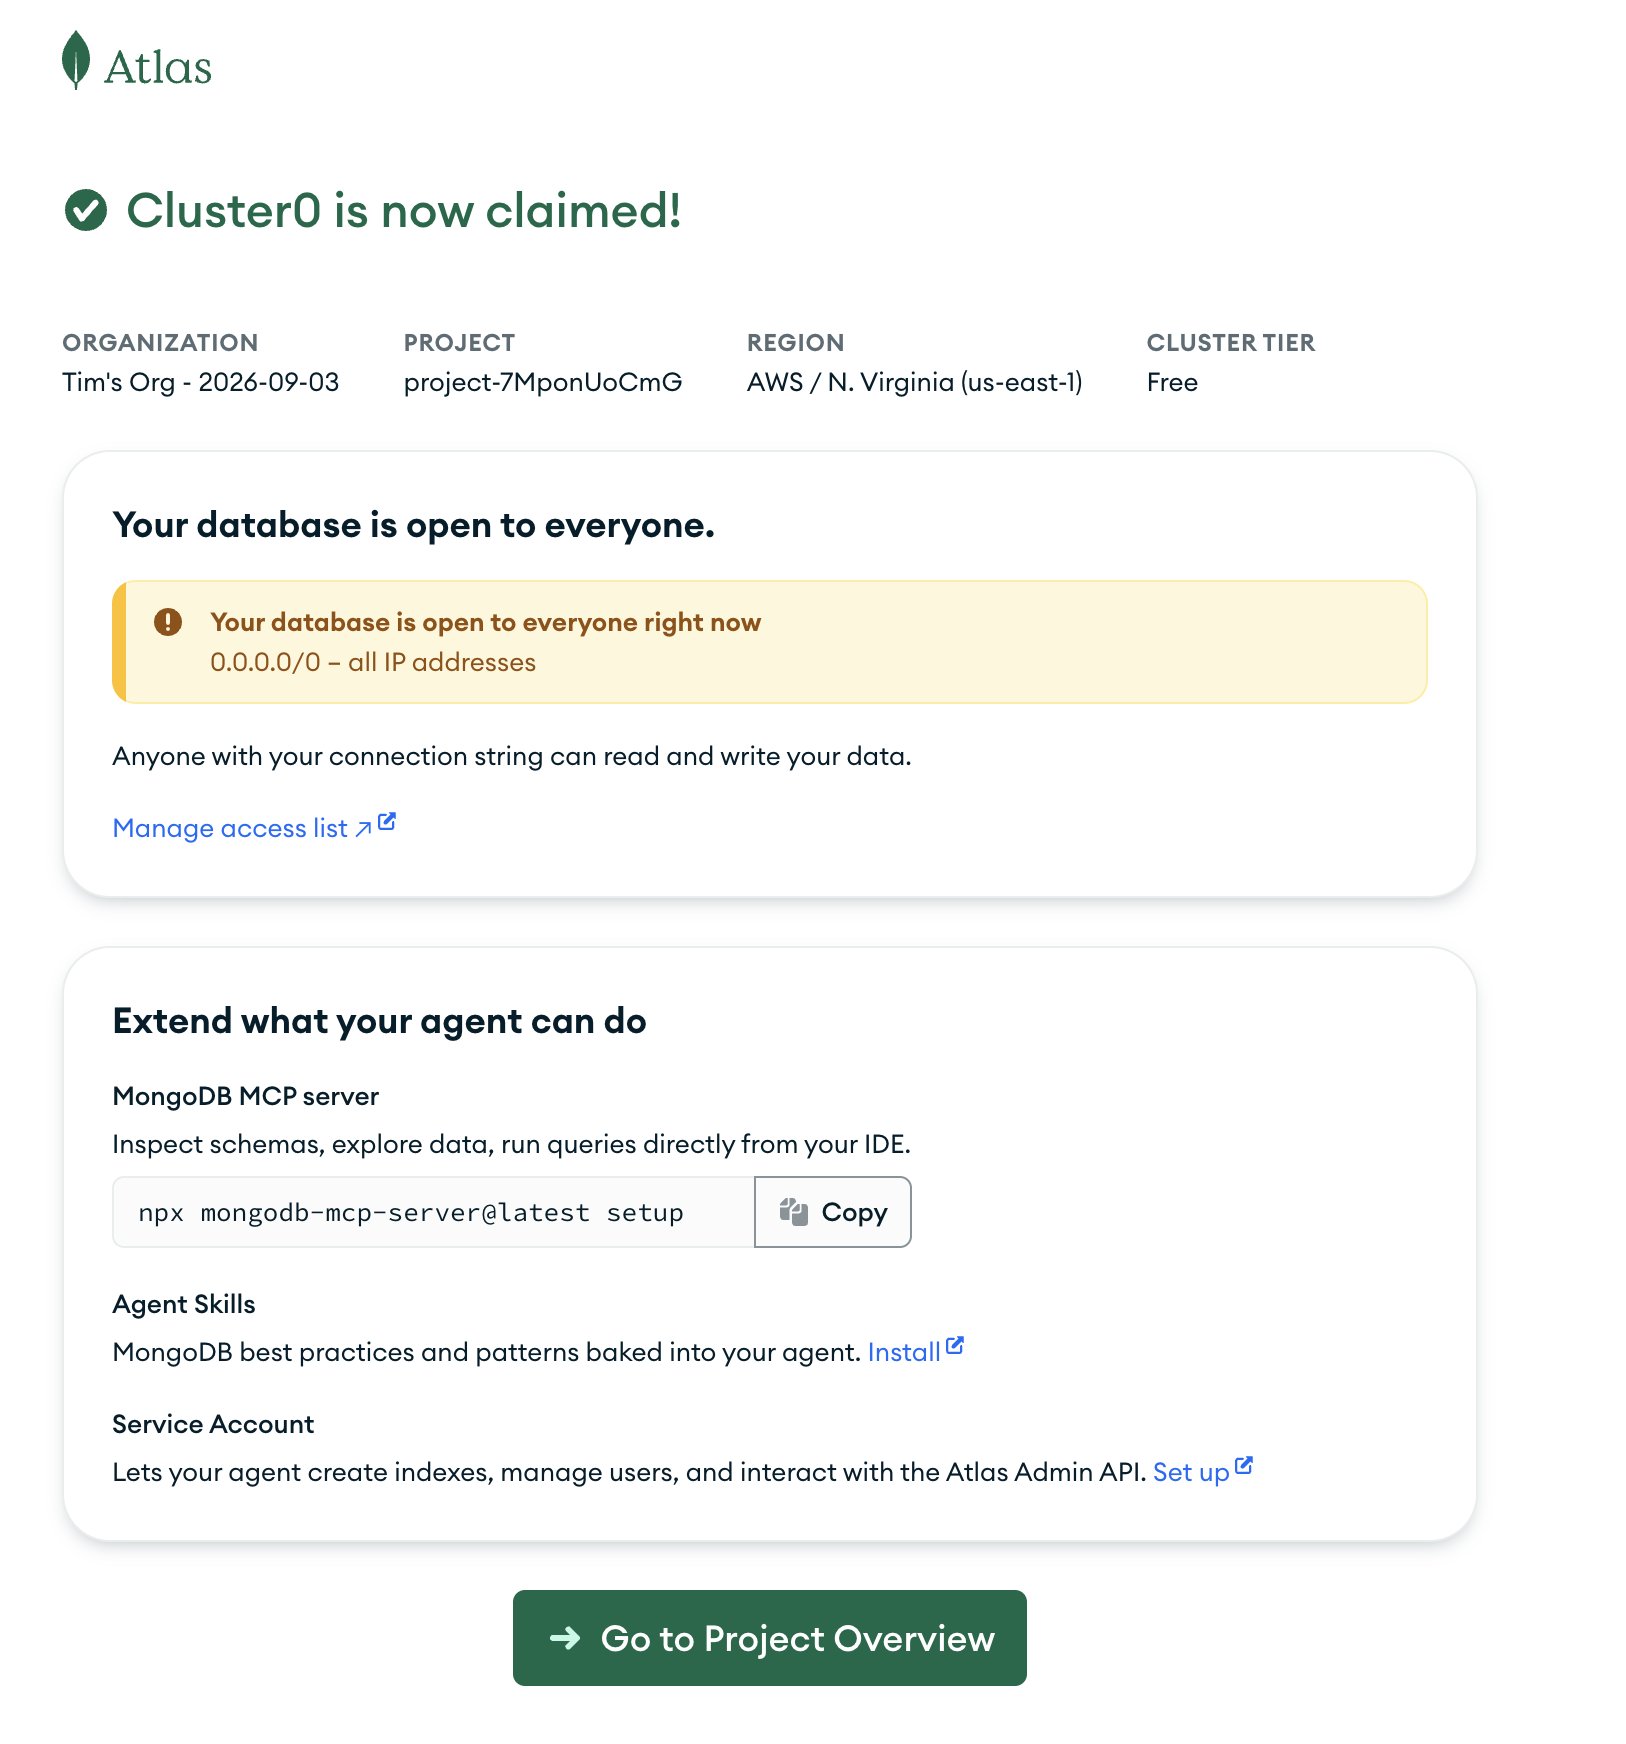
With all that said and done, the ephemeral cluster is now a standard cluster and is ready to be interacted with, upgraded, and configured, like any other MongoDB Cluster.
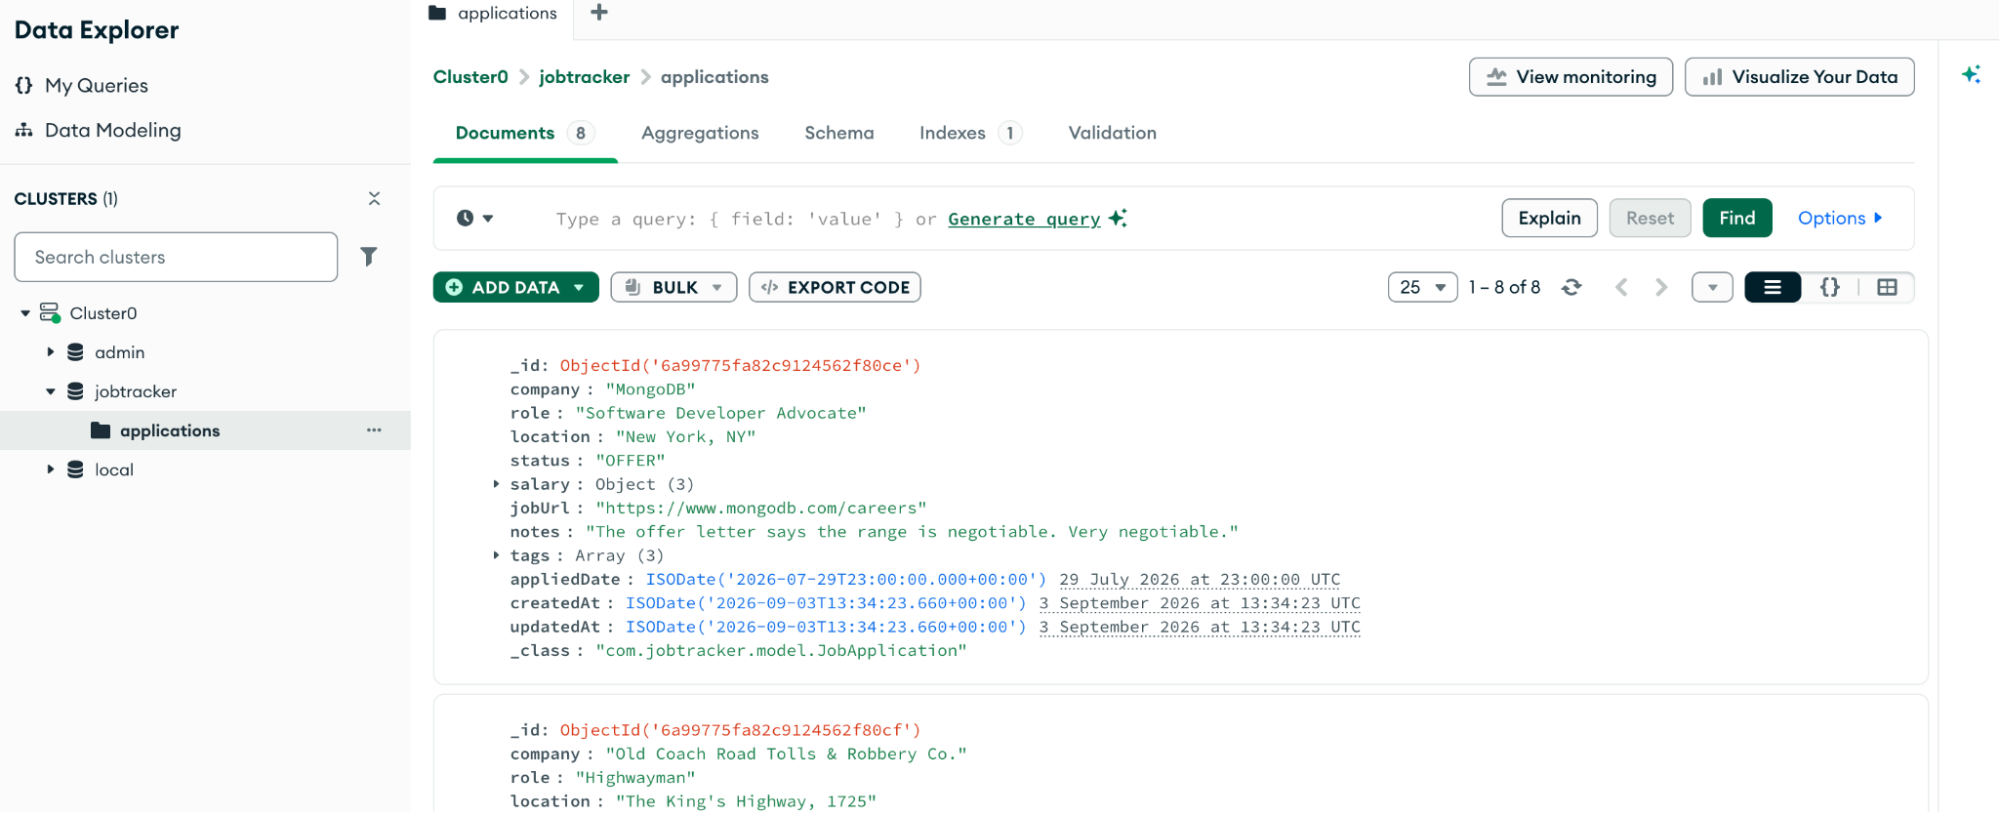
Before claiming, make sure you know where the connection string is used and remove accidental copies from logs, screenshots, chat transcripts, or source control. After claiming, update the application’s configuration to use the connection details and access controls appropriate for the environment you are creating.
Where ephemeral clusters fit
Use an ephemeral cluster when you need to:
- Give an AI agent a real MongoDB database immediately
- Prototype a new SaaS workflow, demo, hackathon project, or proof of concept
- Test a document model and query pattern before committing to a longer-lived environment
- Keep the developer in the IDE instead of sending them through setup screens
Use a regular Atlas deployment when you need a durable environment, production-grade operational controls, a chosen configuration, or a workload that outlives the ephemeral lifecycle.
The takeaway
Ephemeral Clusters move database provisioning out of the critical path of early product work. Instead of interrupting an idea to create an account, select infrastructure, configure a deployment, and copy credentials between tools, you can give an agent one instruction: create a database, retain the connection details securely, and build against it now.
That changes the first-build experience. Your agent can generate the Spring Boot API, connect it through MONGODB_URI, create the MongoDB document model, seed realistic data, and deliver a React interface that persists changes to a live Atlas cluster. You stay focused on the useful questions: does the workflow make sense, does the data model hold up, and is the product worth pursuing?
The cluster is intentionally temporary, which makes experimentation low-friction. Prototype freely, discard what does not work, and avoid treating an unproven idea like a production system. When the application earns another iteration, open the saved claimUrl and bring the cluster into your Atlas organization. At that point, infrastructure decisions become a deliberate next step, not the price of getting started.
Start with one API call. Build with a real database from the first prompt. Claim the cluster when the idea proves it deserves to live on.
The full code for this application is available in this GitHub repository.
Found a mistake, or something to add? Edit this page on GitHub

Tim Kelly
Developer Advocate, MongoDB