

Beginning JavaFX Applications with IntelliJ IDE
- April 28, 2021
- 10 min read

This article is for the beginner who wants to get started developing JavaFX applications using Jetbrains' IntelliJ IDE. The article will create three flavors of a HelloWorld JavaFX application as follows:
- Plain - Create a new project from scratch using no build tools
- Maven - Create a new project using the Maven build tool
- Gradle - Create a new project using the Gradle build tool
While this article may seem elementary for some, I believe it can help newcomers to the JavaFX platform avoid some pitfalls and really hit the ground running.
Warning: This tutorial will touch the basics on how to create a JavaFX project using the new Java Platform Module System (JPMS) since Java 9. There are redundant naming of directories that may look peculiar to you. This is in regards to the naming of a module directory and Java package namespace in the initial creation of the project. To learn more about Java Platform Module System's naming convention check out Java SE 9 - JPMS module naming by Stephen Colebourne. For a deep dive into modules check out Understanding Java 9 Modules by Paul Deitel.
New comers to the JavaFX platform that want things even more basic (fundamental) such as using the command line or terminal should look at "A JavaFX App on ZuluFX in 60 Seconds".
Stable, Secure, and Affordable Java
Azul Platform Core is the #1 Oracle Java alternative, offering OpenJDK support for more versions (including Java 6 & 7) and more configurations for the greatest business value and lowest TCO.
Download Here!
Next, you'll need to download and install the required software.
Requirements
The following are requirements for this tutorial.
- IntelliJ IDE - https://www.jetbrains.com/idea/
- ZuluFX - https://www.azul.com/downloads/zulu-community/?package=jdk-fx
When downloading IntelliJ the free version is called the community edition.
To see how to install ZuluFX please refer to the section 'Installing ZuluFX' at "A JavaFX App on ZuluFX in 60 Seconds".
Plain JavaFX Project
The following steps will show you how to create a new JavaFX project from scratch (aka Plain old JavaFX Project). Usually this type of project is good for quick prototypes.
Step 1: Create a New Project
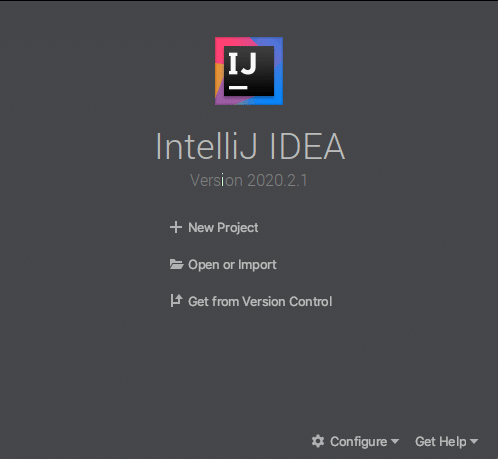
After installing and launching IntelliJ click on the 'New Project' option. In Figure 1 below are three options allowing you to create a Java project.
*Note: If you've already completed the tutorial "A JavaFX App on ZuluFX in 60 Seconds" then you could select the option 'Open or Import' and select the project directory and jump all the way down to step 15 executing the Hello World FX application.
Step 2: Select Java as a project type
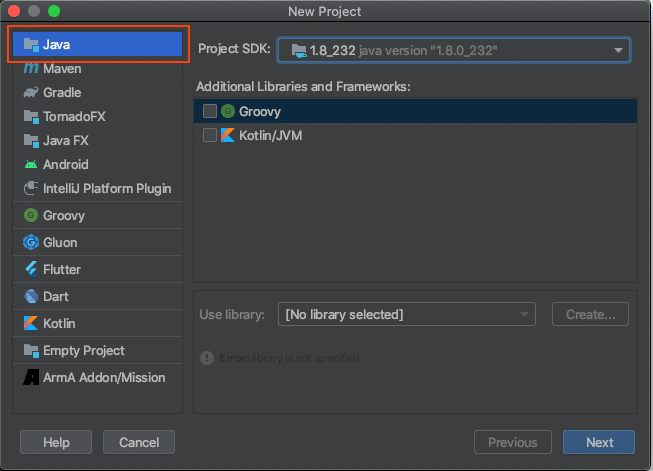
Select Java as the type of project to be created in the New Project as shown in figure 2.
*Warning: You should notice in figure 2 on the left is the option for JavaFX, where it is NOT selected. I am purposefully avoiding the non-modular JavaFX application project convention (in favor of the modular JPMS convention). Non-modular projects are Java Apps prior to Java 9 where JavaFX applications only use the Java class path as opposed to the new module path.
Step 3: Choose your JDK (ZuluFX)
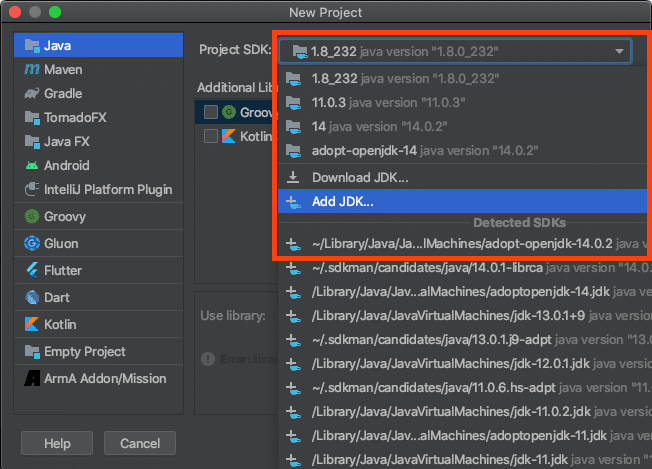
Click on the Add JDK option to locate the JDK's Home directory. In Figure 3 it shows three options to select a JDK for this project (Download, Add and Detected SDKs.
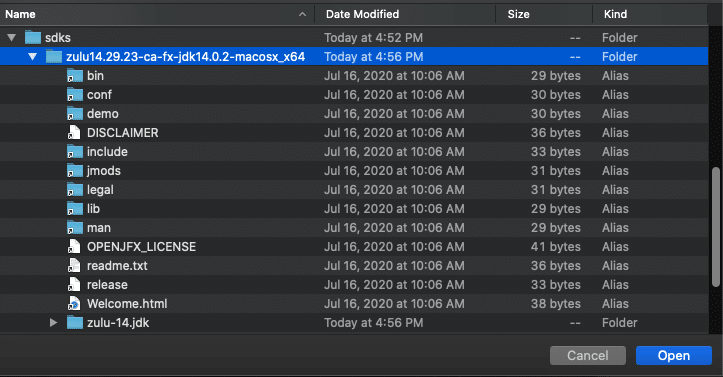
After selecting the 'Add JDK' option locate the previously installed (ZuluFX) JDK's Home directory as shown in figure 4 below. Assuming you've already installed ZuluFX locally, you will select the Home directory and click the Open button. In MacOS the parent directory will contain symlinks (Alias) to subdirectories under zulu-14.jdk. This makes it convenient for setting environment variables.
Step 4: Uncheck Create Project from template option, then Click Next
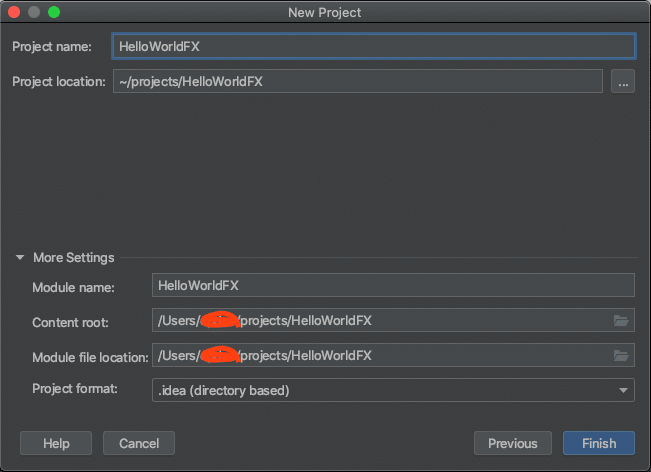
Step 5: Name your project HelloWorldFX and click Finish. As a convention of mine I will create a projects directory under my home directory. On Windows you would have the following: %HOMEDRIVE%%HOMEPATH%\projects
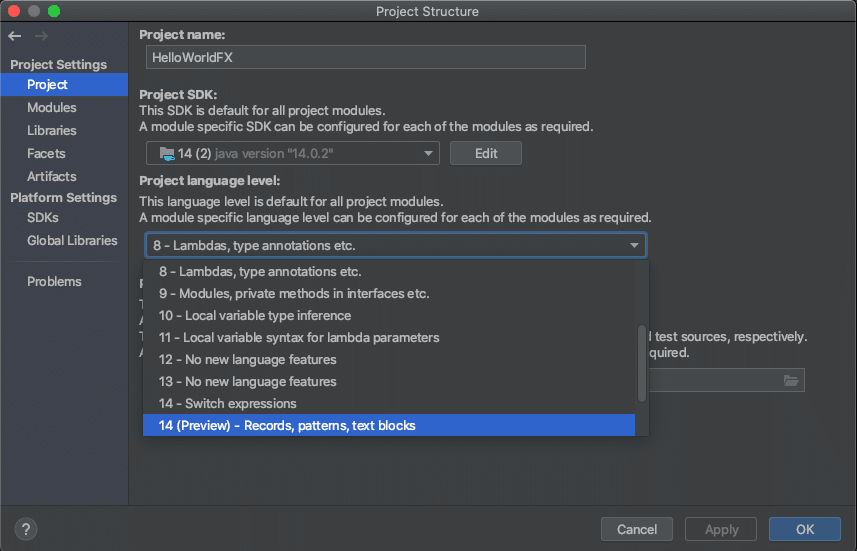
Step 6: Change Project Language Level. In IntelliJ's menu options select File -> Project Structure as shown below. Select 14 (Preview) and click OK.
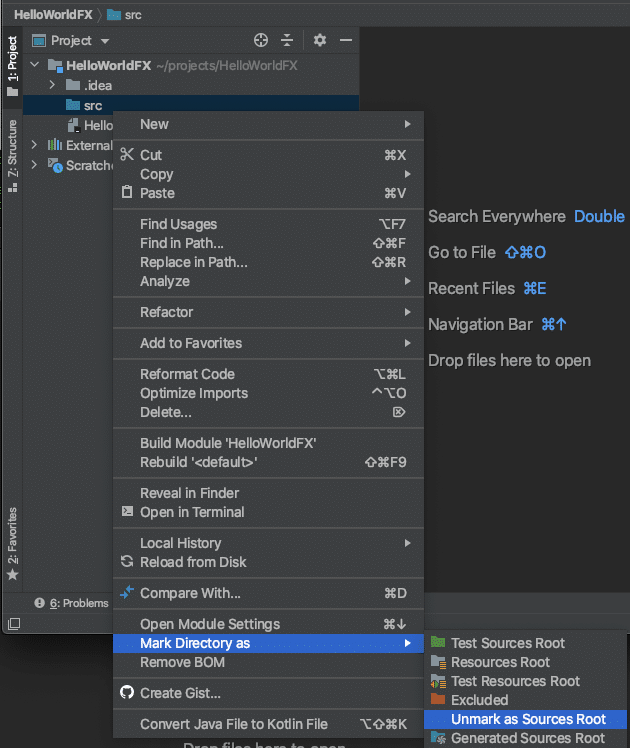
Step 7: Unmark the 'src' directory as the source root as shown below in figure 7.
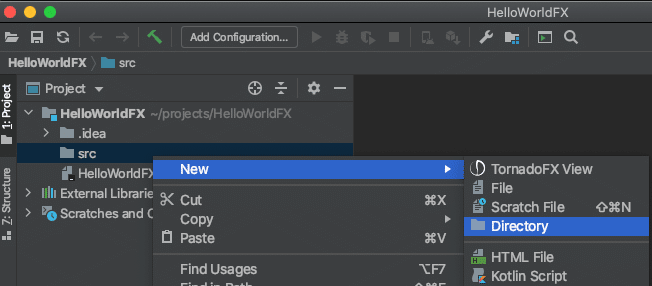
Step 8: Create a module directory as 'com.mycompany.helloworld'. Right mouse button click the 'src' directory in the project (tree) as shown in Figure 8. New -> Directory

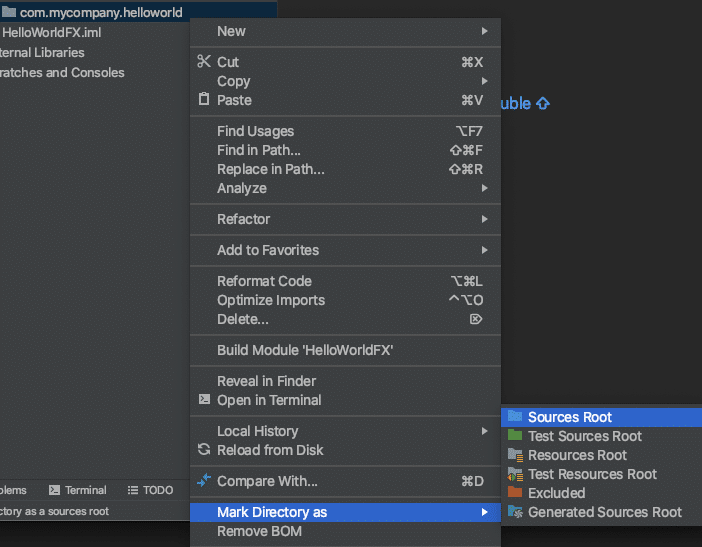
Step 9: Mark module directory as Root Source. Right mouse click 'com.mycompany.helloworld', Select Mark Directory as -> Sources Root
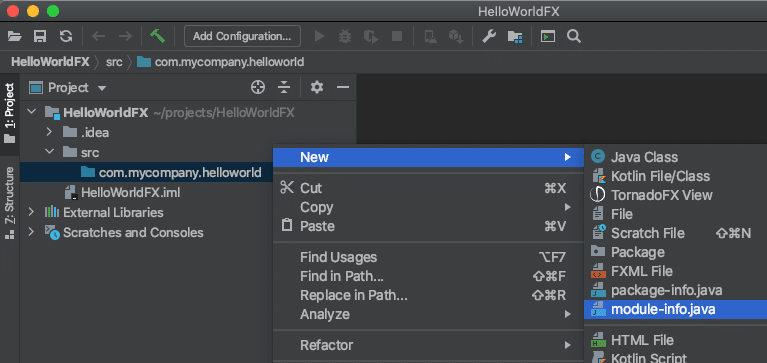
Step 10: Creating a module-info.java file definition. JPMS defines a module's dependencies and shared modules. Right mouse click the folder com.mycompany.helloworld, select New -> module-info.java
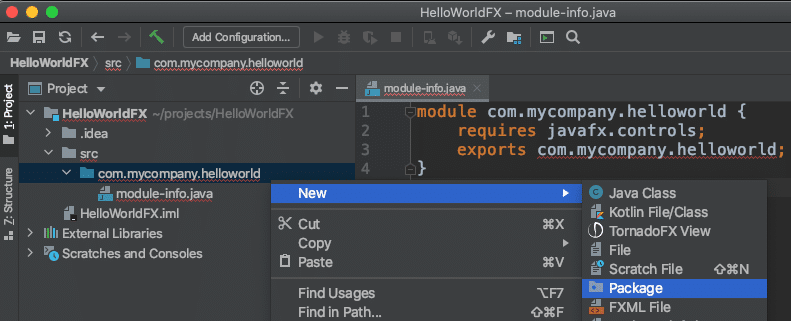
Step 11: Enter (copy & paste) the following module definition into the file.
module com.mycompany.helloworld {
   requires javafx.controls;
   exports com.mycompany.helloworld;
}
After hitting Ctrl + S to save the file you will encounter errors in the editor window where the module is referencing (exports) the com.mycompany.helloworld package which doesn't exist yet. So in the next step let's create the package namespace.
Step 12: Create the package name space of the Java application with the directory path of com/mycompany/helloworld. Right mouse click the folder com.mycompany.helloworld,
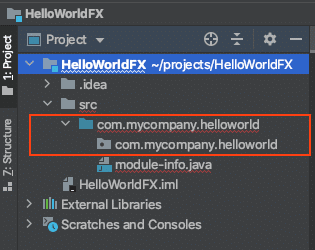
After selecting the menu options you will enter the package name com.mycompany.helloworld and hit Enter as shown below:

Once created you should see the following folder created under the module name as shown in figure 14 below:
Step 13: Creating the main JavaFX Application file HelloWorld.java in the package (folder) com.mycompany.helloworld (beneath the module directory).

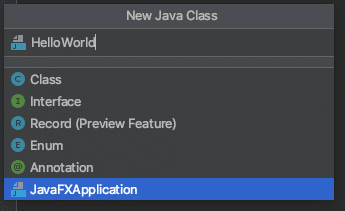
Next, the prompt will allow you to select the type of Java Class. Enter the name HelloWorld and select JavaFXApplication beneath denoting the Java Class type as shown below:
After hitting enter the file is created and displayed in the editor as shown in figure 17 below.
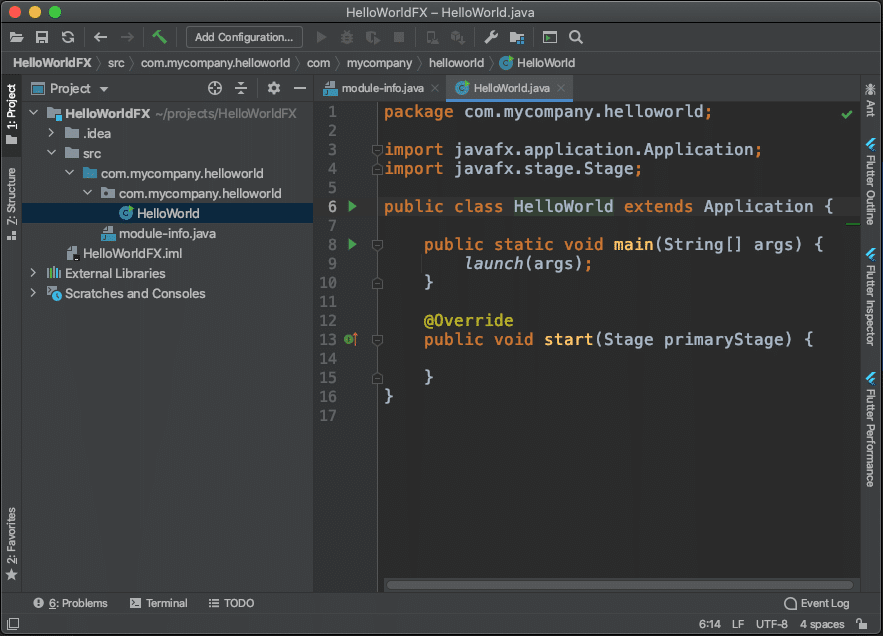
Here you'll notice two things, a generated JavaFX class and no errors from missing a package and class (dependent in the module-info.java file). Also, the generated JavaFX code's start() method body is empty. In the next step you'll just cut & paste the JavaFX application code into body of the method.
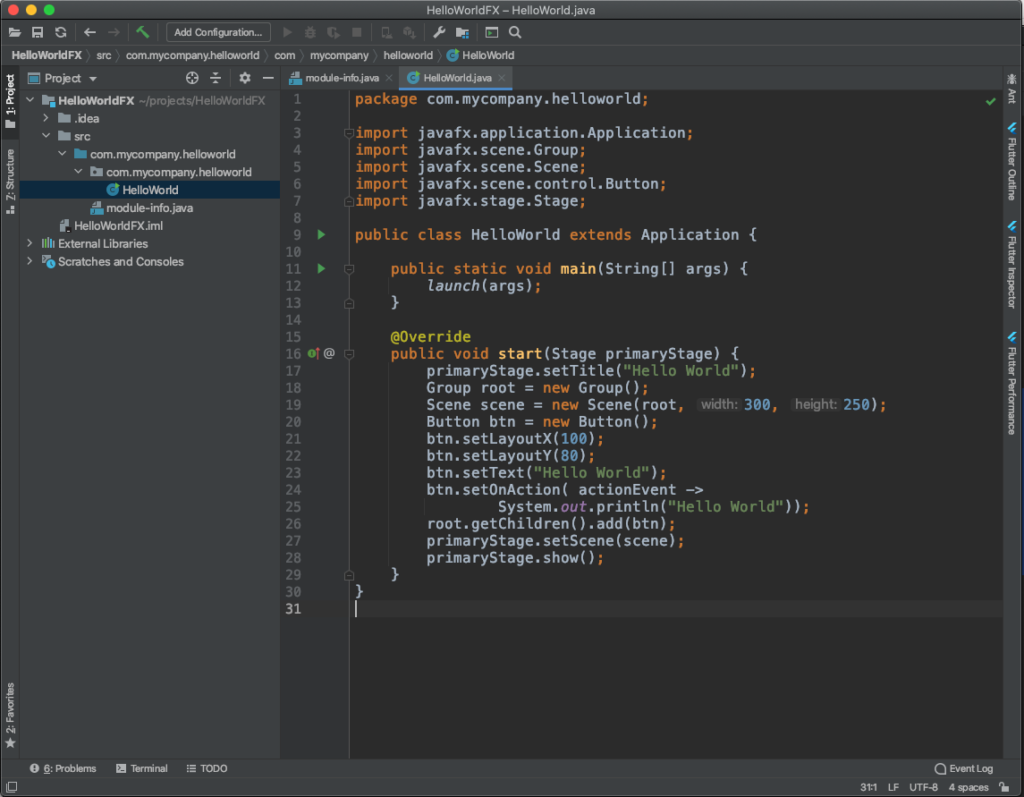
Step 14: Enter or cut & paste the following JavaFX code into the body of the start() method.
        primaryStage.setTitle("Hello World");
        Group root = new Group();
        Scene scene = new Scene(root, 300, 250);
        Button btn = new Button();
        btn.setLayoutX(100);
        btn.setLayoutY(80);
        btn.setText("Hello World");
        btn.setOnAction( actionEvent ->
                System.out.println("Hello World"));
        root.getChildren().add(btn);
        primaryStage.setScene(scene);
        primaryStage.show();
The final project in IntelliJ should look like the following:
Step 15: Executing the HelloWorldFX application project.
Right mouse click the HelloWorld file in the Project tree view select Run as shown in figure 19
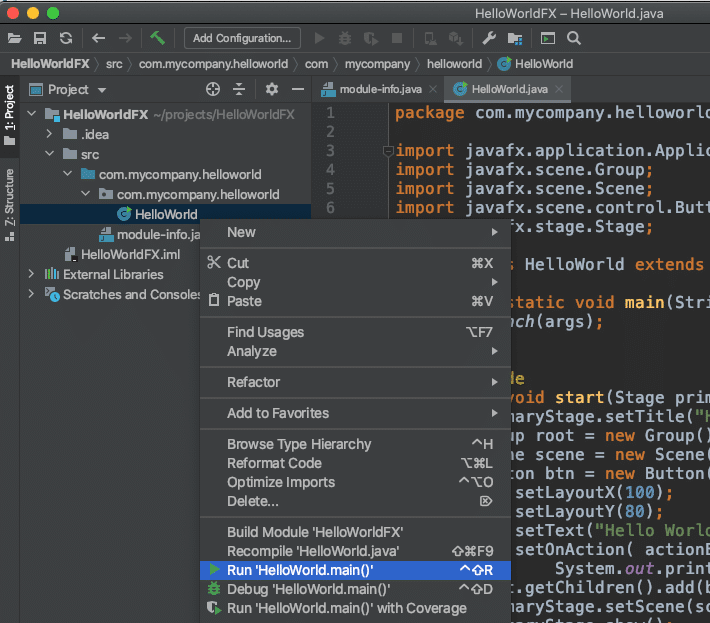
Figure 19. Run the HelloWorld application.
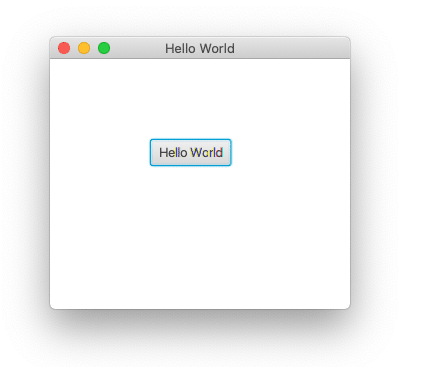
The following is the output of running the HelloWorld application.
Maven JavaFX Project
The following are steps to create a modular JavaFX application through IntelliJ as a Maven project.
Step 1: Create a New Project
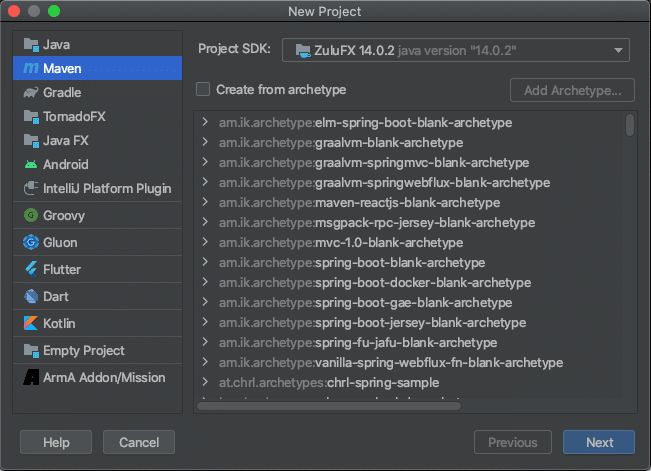
Step 2: Select Maven as the project type and Choose Project SDK
*Note: It's preferred to use ZuluFX due to JavaFX modules are already bundled together with Java JDK. If you choose a JDK that doesn't include JavaFX you will need to add libraries through File -> Project Structure -> Libraries add to locate JavaFX lib directory.
After hitting Next, you'll set up your project and Maven settings.
Step 3: Name the project and create Maven coordinates
Name the project MavenHelloWorldFX and a project directory destination.
Next, you'll be specifying Maven coordinates GroupId, ArtifactId and Version as follows.
GroupId: com.mycompany.helloworld
ArtifactId: helloworldfx
Version: 1.0-SNAPSHOT
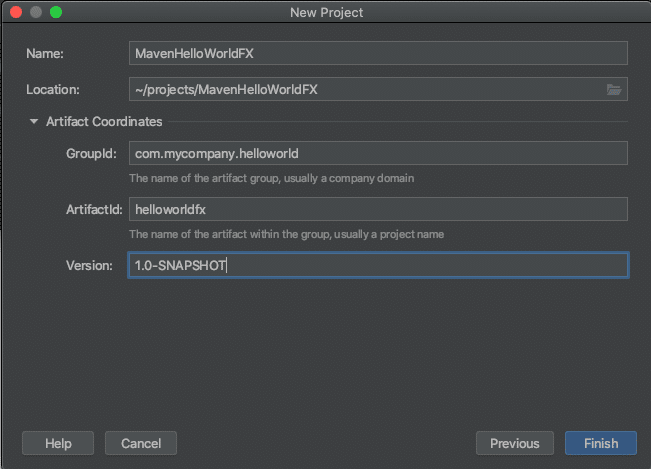
Click on Finish.
The project will output as shown below in Figure 24.
Step 4: Add Plugins and dependencies into pom.xml file
Copy & Paste to replace the following pom.xml into the editor and Save.
<project xmlns="http://maven.apache.org/POM/4.0.0" xmlns:xsi="http://www.w3.org/2001/XMLSchema-instance"
  xsi:schemaLocation="http://maven.apache.org/POM/4.0.0 http://maven.apache.org/maven-v4_0_0.xsd">
    <modelVersion>4.0.0</modelVersion>
    <groupId>com.mycompany.helloworld</groupId>
    <artifactId>helloworldfx</artifactId>
    <version>1.0-SNAPSHOT</version>

    <properties>
        <project.build.sourceEncoding>UTF-8</project.build.sourceEncoding>
        <maven.compiler.release>14</maven.compiler.release>
        <javafx.version>14</javafx.version>
    </properties>
    <dependencies>
        <dependency>
            <groupId>org.openjfx</groupId>
            <artifactId>javafx-controls</artifactId>
            <version>${javafx.version}</version>
        </dependency>
    </dependencies>
    <build>
        <plugins>
            <plugin>
                <groupId>org.apache.maven.plugins</groupId>
                <artifactId>maven-compiler-plugin</artifactId>
                <version>3.8.1</version>
                <executions>
                    <execution>
                        <id>default-compile</id>
                        <configuration>
                            <release>${maven.compiler.release}</release>
                        </configuration>
                    </execution>
                </executions>
            </plugin>
            <plugin>
                <groupId>org.openjfx</groupId>
                <artifactId>javafx-maven-plugin</artifactId>
                <version>0.0.5</version>
                <configuration>
                   <release>${maven.compiler.release}</release>
                   <mainClass>com.mycompany.helloworld.HelloWorld</mainClass>
                </configuration>
            </plugin>
        </plugins>
    </build>
</project>
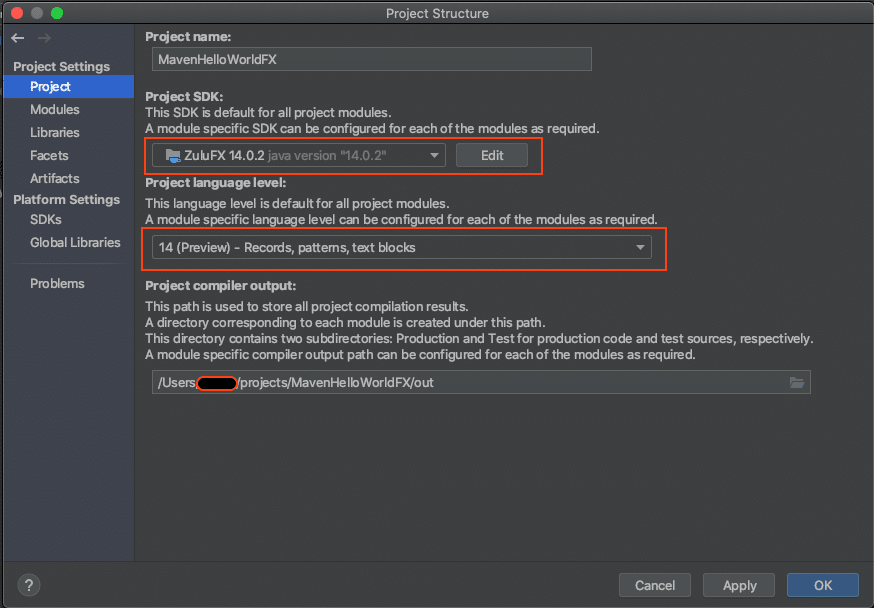
Step 5: Project Settings -> Project - Set Language Level
Below you will want to ensure the Project SDK and Project language level is at least 11 or better. In figure 25 the language level was set to Java 14 (Preview).
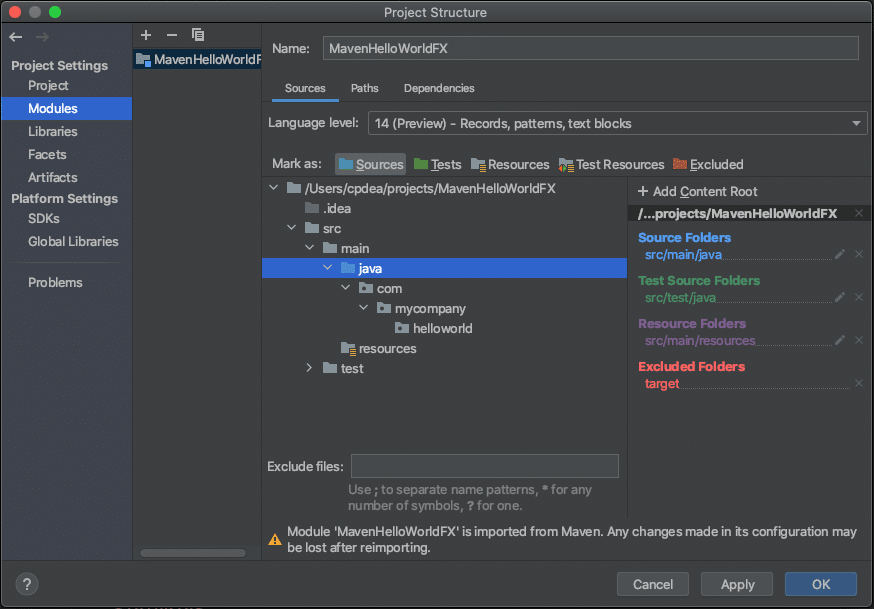
Step 6: Project Settings -> Modules - Set Language Level to 14 (Preview)
Select Modules under Project Settings. Make sure the helloworld project language level is in sync as shown below (fig 26). Then click OK.
Step 7: Create a module-info.java file
Right mouse click the java folder (Project pane), then
select menu New -> module-info.java
After the file is created you will want to use the definition in step 6.
Step 6: Copy and paste the following module definition to replace the generated one. Then hit Save.
module com.mycompany.helloworld {
    requires javafx.controls;
    exports com.mycompany.helloworld;
}
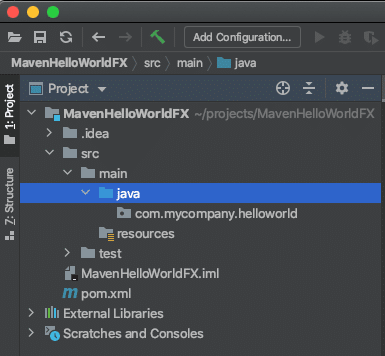
Step 6: Create a Java package name space com.mycompany.helloworld.
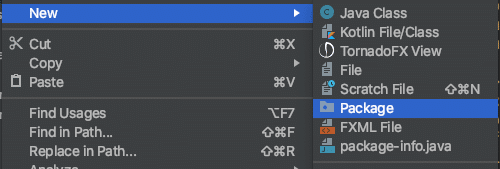

After entering the package name the following is a created folder under the java directory as shown in figure 29 below.
Step 7: Create the Main JavaFX app file
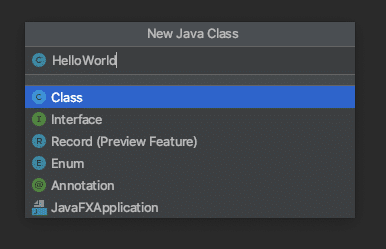
Right Mouse click the folder com.mycompany.helloworld (Project pane) to select the popup menu New -> Class, then type in HelloWorld as the name of the class as shown in figure 30 below. This will create an empty class.
Next, copy & paste or type the following code to replace the code in the recently created HelloWorld.java file and Save.
package com.mycompany.helloworld;

import javafx.application.Application;
import javafx.scene.Group;
import javafx.scene.Scene;
import javafx.scene.control.Button;
import javafx.stage.Stage;

public class HelloWorld extends Application {

    public static void main(String[] args) {
        launch(args);
    }

    @Override
    public void start(Stage primaryStage) {
        primaryStage.setTitle("Hello World");
        Group root = new Group();
        Scene scene = new Scene(root, 300, 250);
        Button btn = new Button();
        btn.setLayoutX(100);
        btn.setLayoutY(80);
        btn.setText("Hello World");
        btn.setOnAction( actionEvent ->
                System.out.println("Hello World"));
        root.getChildren().add(btn);
        primaryStage.setScene(scene);
        primaryStage.show();
    }
}
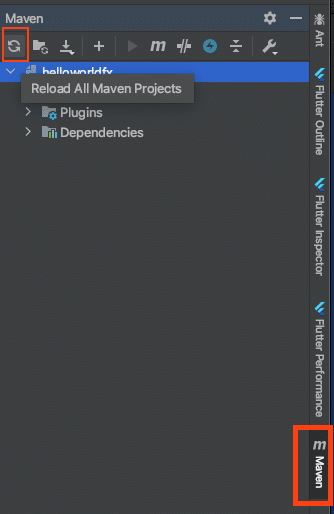
Step 8: Reload Maven Project
On the right pane there should be tabs to select Maven. Next, click on the reload tool bar button. This will pull down any plugins or dependencies specified in the pom.xml.
Step 9: Executing the HelloWorldFX application project.
Still on the Maven pane expand the Plugins folder, javafx, and double click on javafx:run
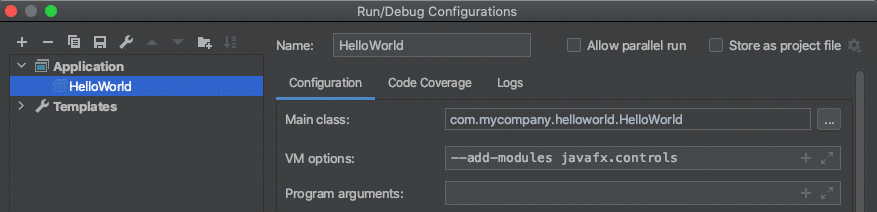
If you want to run the application using the IDE's Run configuration you'll need to specify VM Options such as the following:
When using ZuluFX:
--add-modules javafx.controls
When using JavaFX as separate libraries such as from GluonHQ ($PATH_TO_FX) and a mods directory (modules output directory):
--module-path $PATH_TO_FX:mods --add-modules javafx.controls
Gradle JavaFX Project
Because this article is getting way too long, I am only going to post the build.gradle file below. Because the file and directory structure of a gradle project is the same as a Maven project I trust you can simply go through creating the project in a similar manner and near the end click on the Gradle tab and the reload button to see the run task.
plugins {
  id 'application'
  id 'org.openjfx.javafxplugin' version '0.0.8'
}

repositories {
    mavenCentral()
}

javafx {
    version = "14"
    modules = [ 'javafx.controls' ]
}

mainClassName = "com.mycompany.helloworldfx/com.mycompany.helloworldfx.HelloWorld"
Conclusion
Well there you have it, a Hello World JavaFX Application that was JPMS based and created using the popular IntelliJ IDE in three project types Plain, Maven and Gradle.
As you get familiar with how to code and execute your application your next step would be how placing check points and incrementally debug your application.
As always feel free to comment if you have questions or need any help. Happy coding!
References:
Understanding Java 9 Modules by Paul Deitel - https://www.oracle.com/corporate/features/understanding-java-9-modules.html
Create a new JavaFX project -https://www.jetbrains.com/help/idea/javafx.html
OpenJFX.io - https://openjfx.io
- April 28, 2021
- 10 min read
Carl Dea is a Lead Developer and Software Engineer at Deloitte. He has authored Java books and has been developing software for 20+ years with many clients, from Fortune 500 companies to nonprofit organizations. He has written software ranging from mission-critical applications to e-commerce applications. Carl has been using Java since the very beginning (when Applets were cool) and is a JavaFX enthusiast (fanboy) dating back to when it used to be called F3/JavaFX script. He greatly loves sharing and advocating Java based technologies.


Comments (3)
Kiandra
6 years agoTried doing this as a plain JavaFX project but it didn't work. module-info.java can't find javafx.controls, and HelloWorld.java can't use any JavaFX elements. Using version 15 of ZuluFX and IntelliJ IDEA Community 2020.2.
Carl Dea
6 years agoKiandra, You maybe having the same issue with your module path or downloading an incorrect JDK for your operating system (contain jfx modules). Let’s take some baby steps and focus on the simpler plain project ("A JavaFX App on ZuluFX in 60 Seconds") without an IDE. Sometimes You’ll find it easier to specify command line commands to see what’s going on. Carl
Kiandra
6 years agoFound the problem. I downloaded Zulu JDK instead of Zulu JDK FX. Make sure you download the right one! Thank you Carl for all the help.