Kotlin on the RaspberryPi (Pi4J-Kotlin)
- November 17, 2022
- 7371 Unique Views
- 2 min read
Intro
Pi4J is considered the project that brought the JVM to the RaspberryPi.
It has been up for more than a decade allowing developers to write sophisticated, high-level, yet simple software on the RaspberryPi.
And we’re glad to make it even more simpler and powerful!
For quite some years now Kotlin has been a most welcome language in the JVM ecosystem and the modern development toolchain.
Many factors led to this great reality, most notable to me is Kotlin’s non-disruptive integration and seamless developer experience.
Enough reasons for us to bring it over to the RaspberryPi Community!
Pi4J-Kotlin
Our latest project, Pi4J-Kotlin, provides a Kotlin DSL for the already-mature & capable Pi4J V2 API. You can take full advantage of Kotlin on the RaspberryPi and write even more capable and concise code for your projects.
Blink if you can hear me
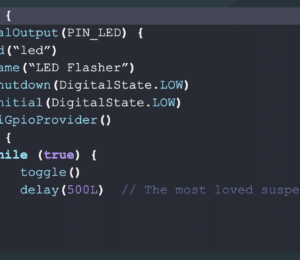
A blinking LED example is a benchmark for code simplicity (at least for me, just pretend). Here’s how to blink with Pi4J-Kotlin:
fun blink() = digitalOutput(22).run {
    while (true) {
        toggle()
        sleep(500)
    }
}
We also have a minimal example to get you started with more components.
Declarative API
All you have to do to access everything-RaspberryPi is to use the pi4j block:
pi4j {
    // beautiful code goes here
}
Here, you created a Pi4J Context that will take care of loading the right Platform and Providers. It will also automatically shutdown the Context after you finish the block. That’s right you no longer have to worry about opening or closing doors; you don’t have time for that!
Please never mind my bitter alter ego and let’s discover some other exciting APIs:
Using the digitalInput function you can easily create and customise your “pin” using this intuitive DSL:
digitalInput(address = 24) {
    name(“Button”)
    pull(PULL_DOWN)
    debounce(3000L)
}
In the same fashion, Analog and PWM get their fair share of sweetness:
analogOutput(24).run {
    whenInRange(0..5) {
        // fires when value is in the supplied range
    }
    whenOutOfRange(0..5) {
        // fires when value is not in the supplied range
    }
    onMin(0..5) {
        // fires when value changes to the minimum of the range
    }
    onMax(0..5) {
        // fires when value changes to the maximum of the range
    }
}
And of course we would take full advantage of the intuitive & inlined lambdas of Kotlin to create APIs like these:
listen { … }onLow { … }onHigh { … }
Be it Digital or Analog IO you’ll find a little API that makes life even more convenient for you (as if what you had wasn’t already enough).
Confused as you are, you might want to check the full documentation on these new APIs and lots more.
The story doesn’t end
There are still more DSLs on their way for communication protocols and standards like SPI, I²C and more!
Tell us what you think
Try it out! Tell us what you think and give us some ideas! Here is the GitHub Repository.
Don’t Forget to Share This Post!


Comments (0)
No comments yet. Be the first.