Java Testing with VS Code
- March 15, 2021
- 9076 Unique Views
- 2 min read
In our last post, we talked about starting a new Java project and running and debugging it with VS Code. In this post, we will cover testing.
To run Java tests on VS Code, we recommend using the Java Test Runner extension or the Java Extension Pack, which includes the extension. The extension supports the JUnit4, JUnit5, and TestNG frameworks.
Running Tests
When a project with test cases is imported into VS Code, VS Code can automatically detect the test cases and get them ready for you to run.
There are a couple of options to run them, as demonstrated below.
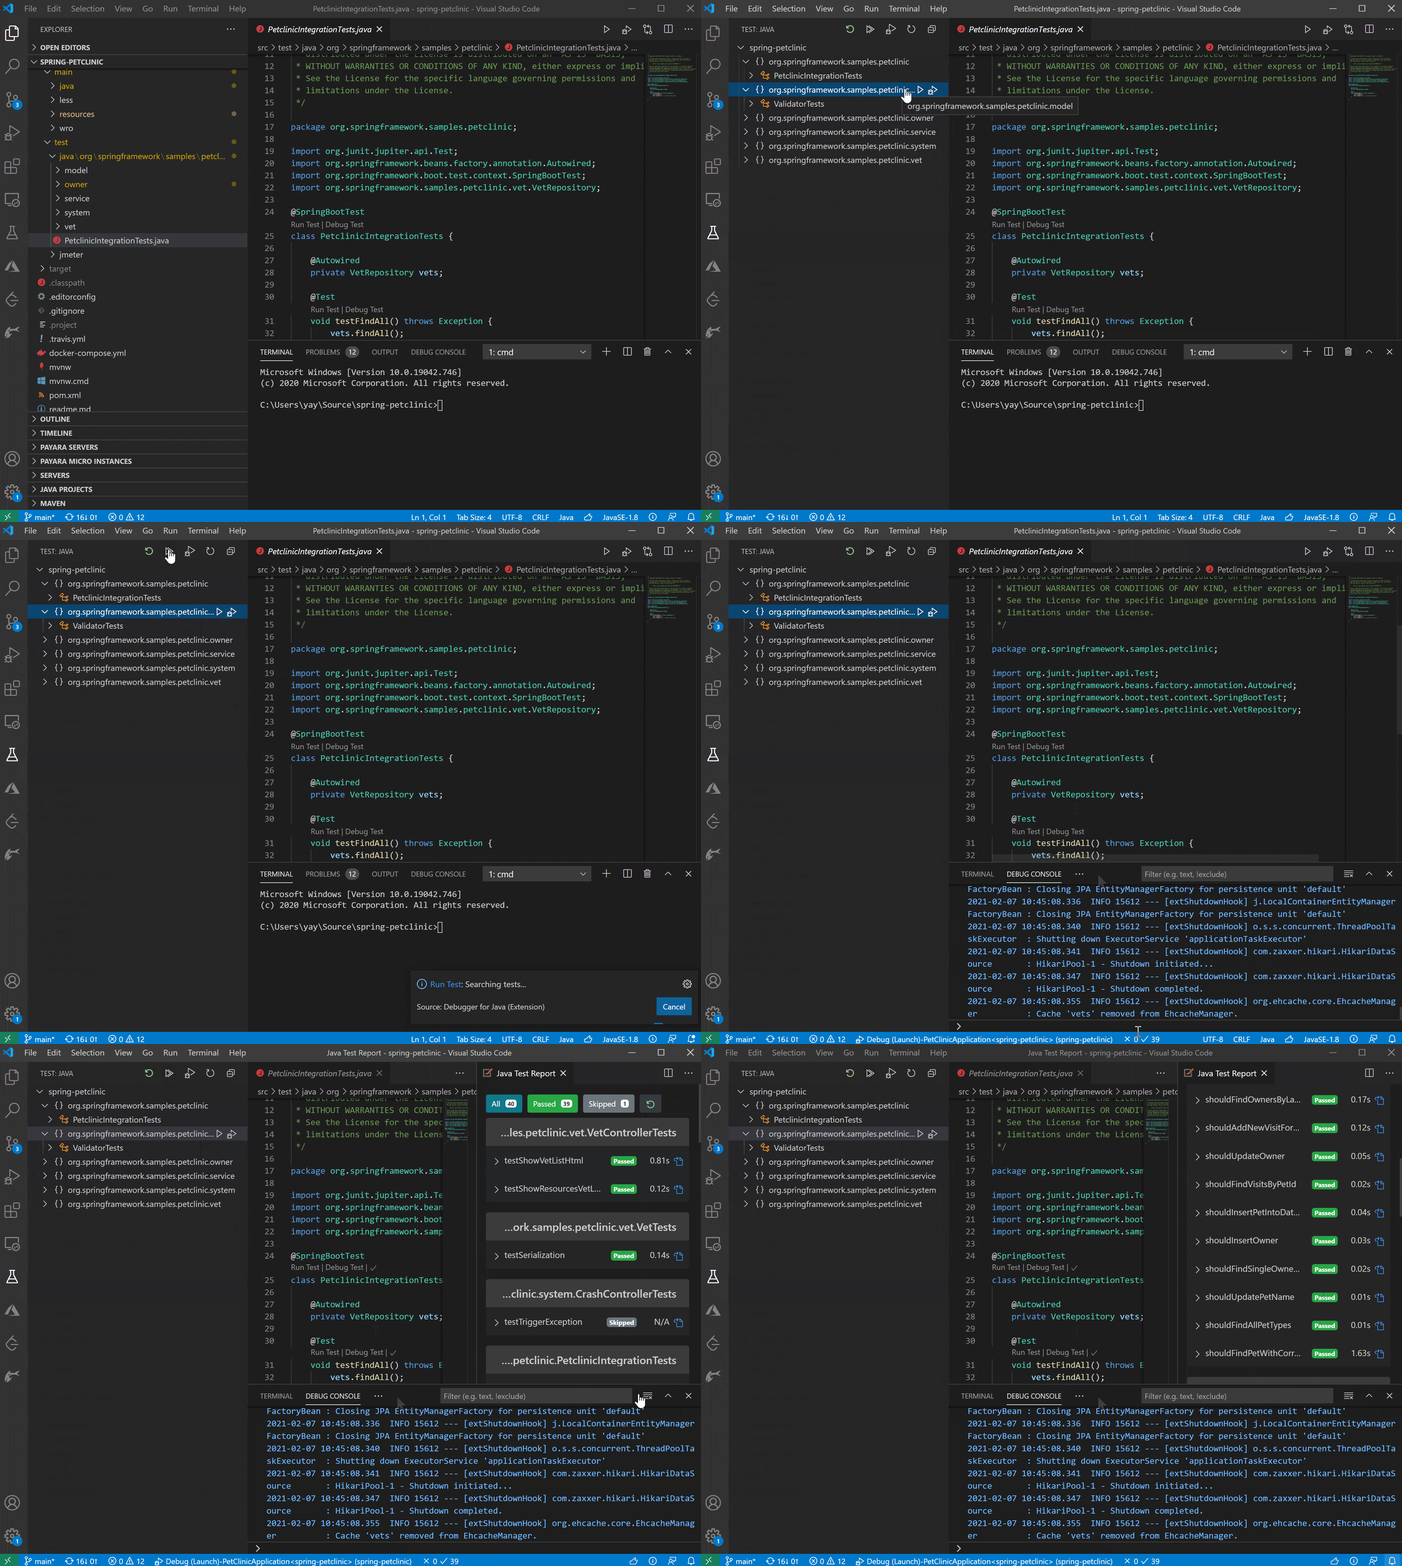
Running from Test Explorer
Test Explorer offers the most comprehensive support for testing. In addition to running cases individually, you can Run All Tests, as shown below.

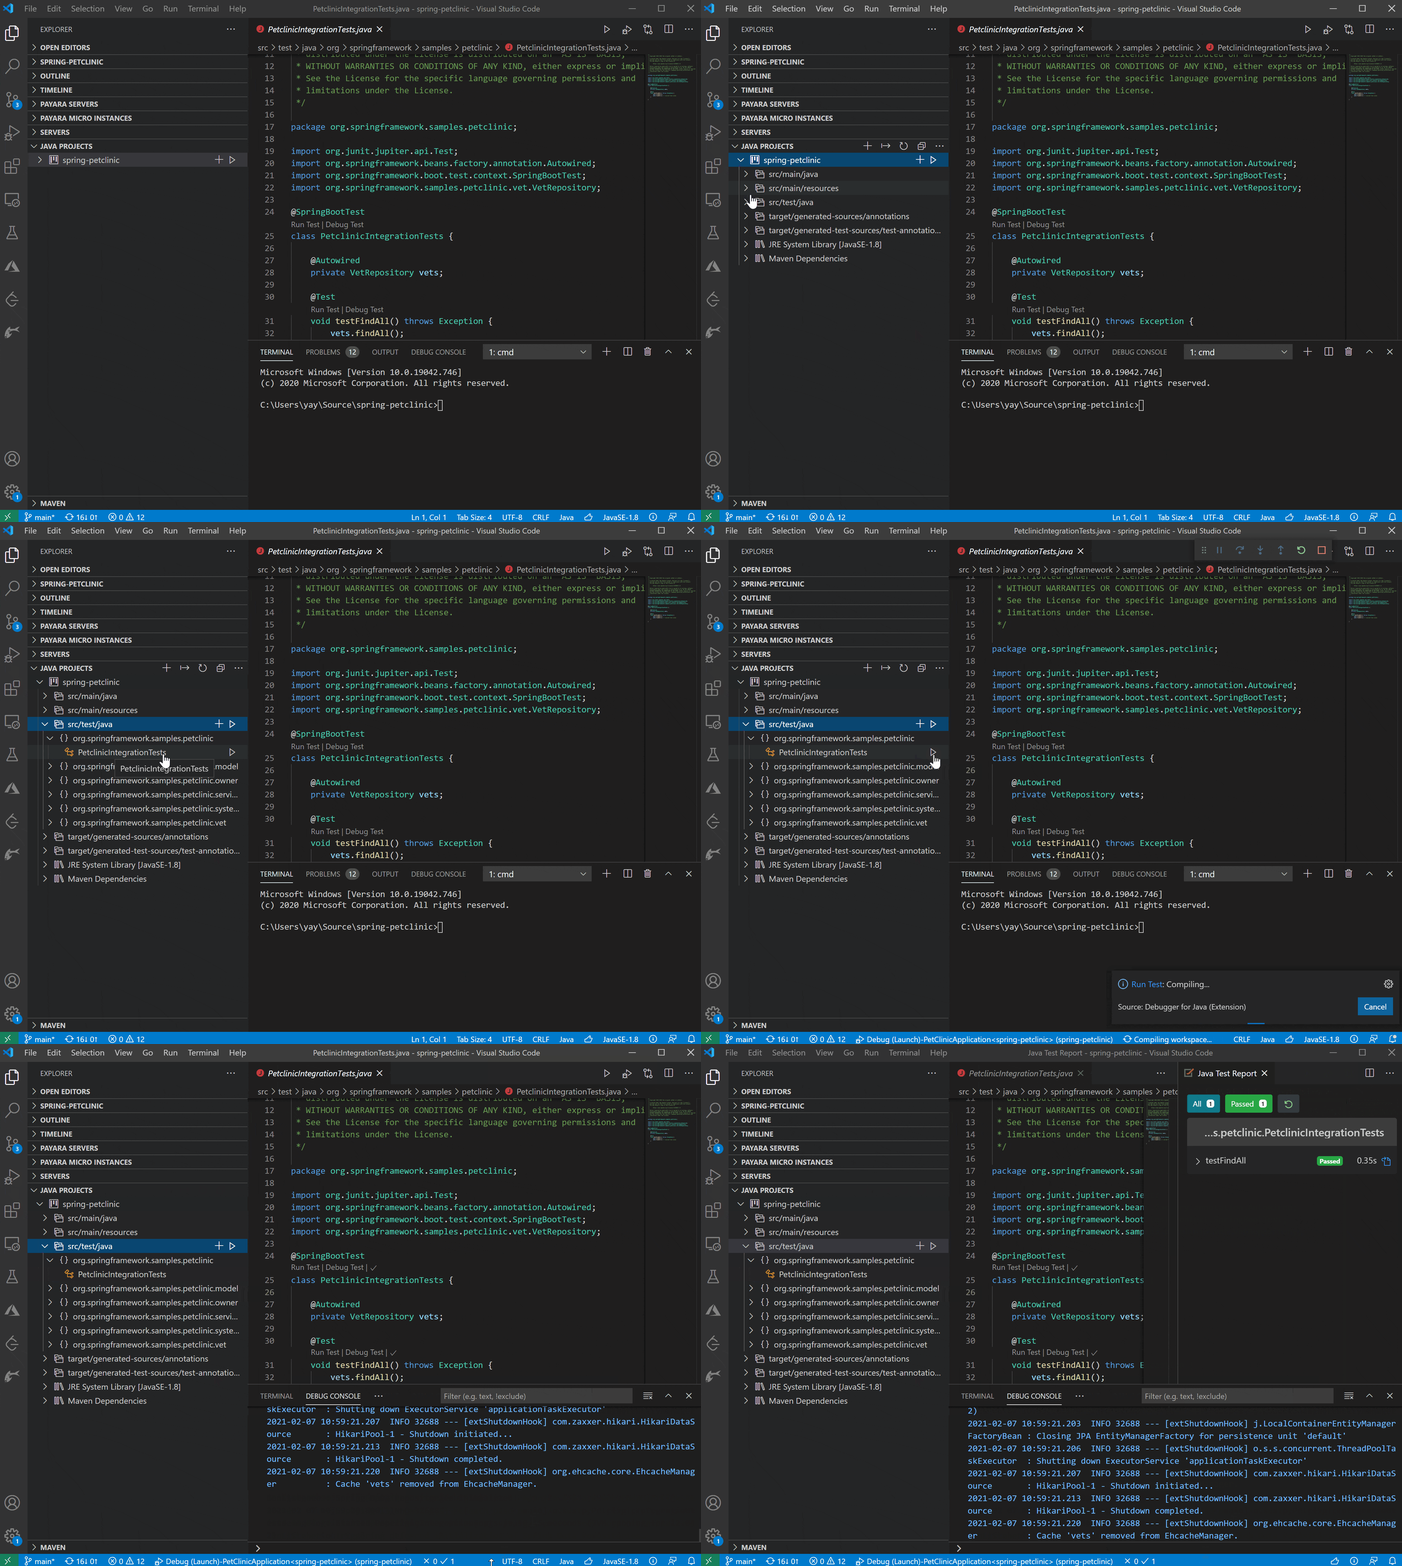
Running from Java Project Explorer
Java Project Explorer provides access to all project-related functionality, including testing. You can run tests at project level or at individual package or class level, as demonstrated below.

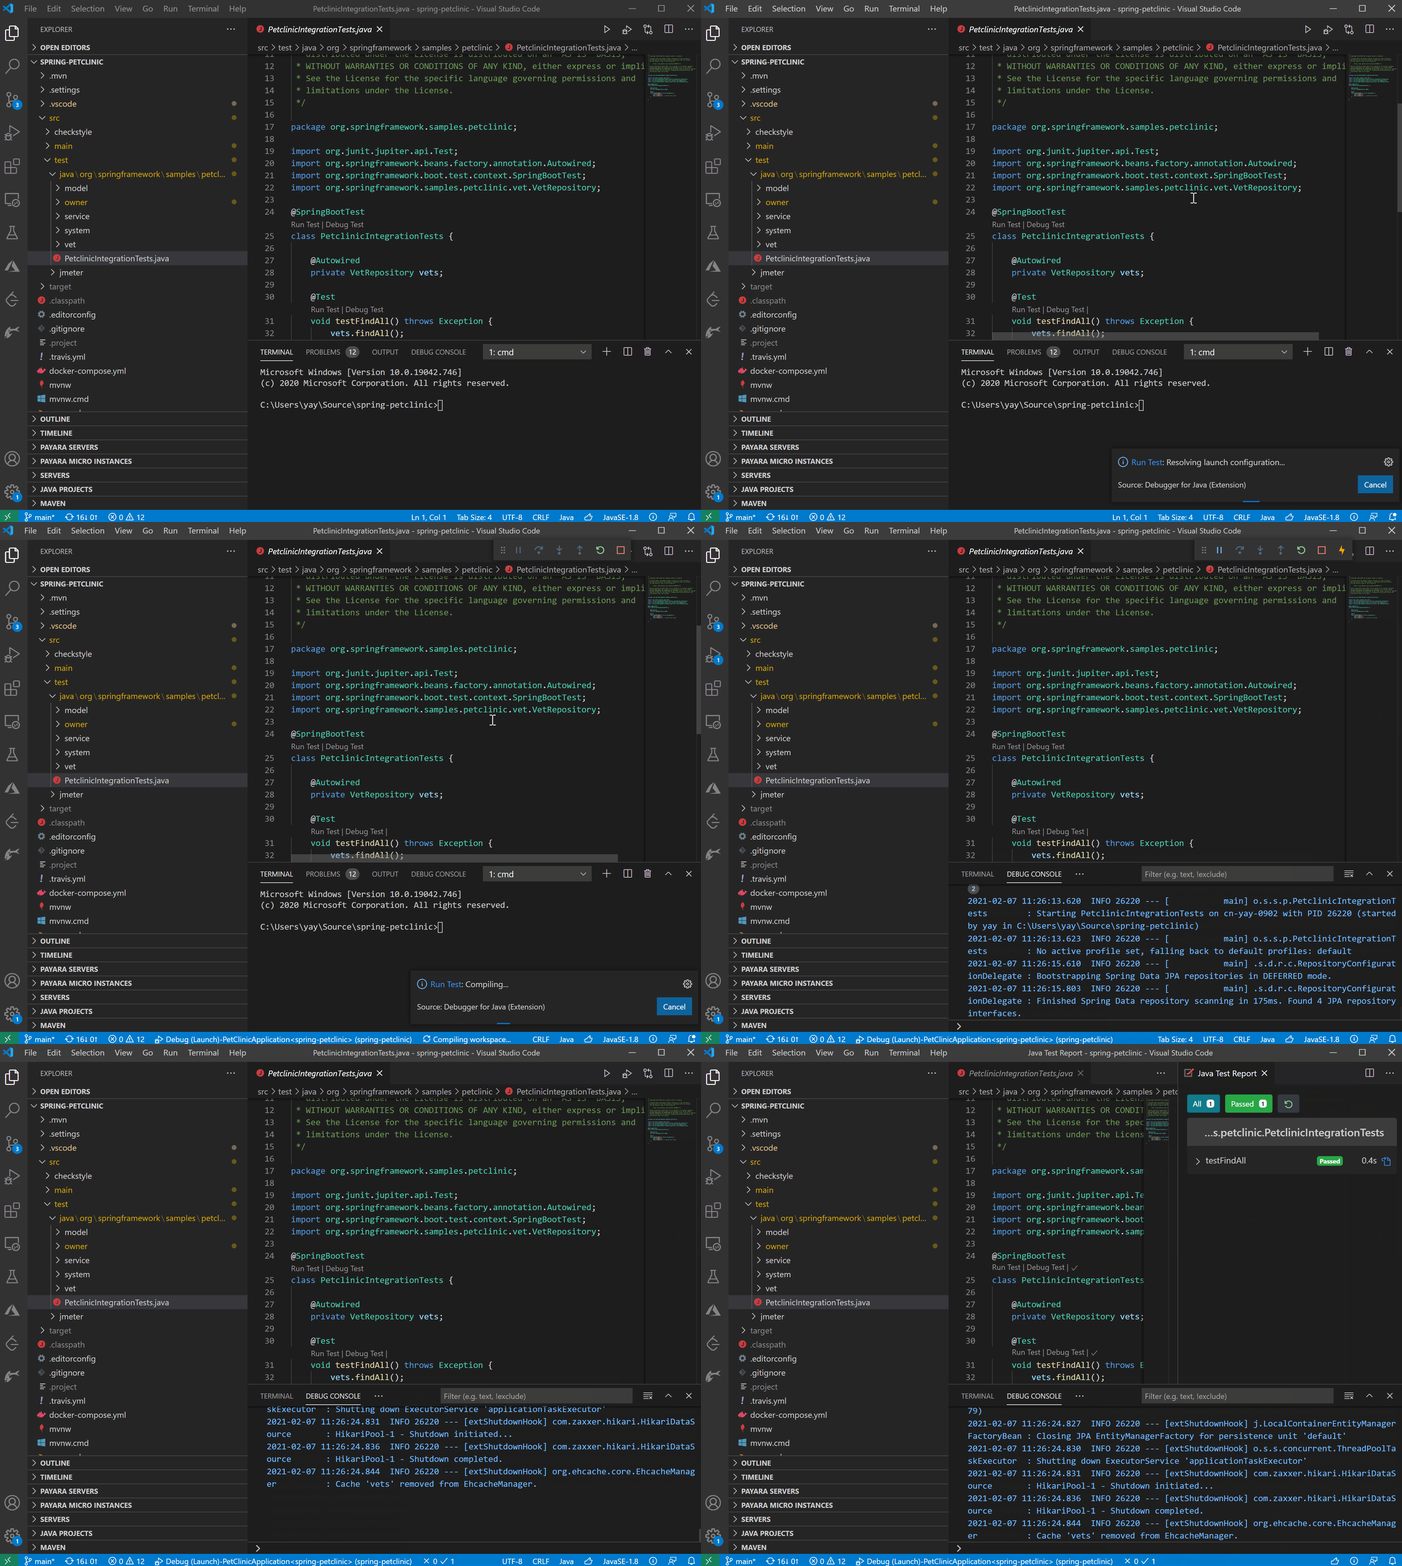
Running from CodeLens
CodeLens is a VS Code feature that provides context-aware actions through links next to your code.
When VS Code detects testing annotations in code, it will provide a link of “Run Test” and a link of “Debug Test” next to the annotation for you to quickly start an action without jumping out of your code.
It’s a handy feature that allows you to focus on coding by minimizing context switching.

Accessing Testing Reports
After running tests, VS Code generates a testing report for you.
You can access the report through status bar as shown in demos above or using Command Palette by Ctrl+Shift+P to launch the palette and then typing “java show test report” to open the report.
Until next time, happy coding!
Don’t Forget to Share This Post!


Comments (0)
No comments yet. Be the first.