


Building FormPilot: My Journey Creating an AI-Powered Form Filler with RAG, LangChain4j, and Ollama
- May 06, 2025
- 16 min read
- Part 1: Installing and Running Ollama Locally
- Part 2: Creating the Spring Boot Project via Spring Initializr
- Challenge 1: Robust Form Field Detection & Label Association
- Challenge 2: Handling Diverse Field Types Correctly
- Challenge 3: Triggering JavaScript Events for Framework Compatibility
- Challenge 4: Backend Communication & CORS
- Challenge 5: Prompt Engineering & Model Compliance
- 1. The Power of RAG for Contextual Personalization
- 2. LangChain4j Simplifies Java LLM Integration
- 3. Local LLMs (Ollama) Offer Privacy & Control
- 4. Chrome Extension Development
Disclaimer: This article details an experimental project built for learning and demonstration purposes. The implementation described is not intended as production-grade solution. Some parts of the code were generated using JetBrains’ AI Agent, Junie.
Have you ever found yourself filling out the same information on web forms over and over again? Name, email, address, phone number... it's tedious and time-consuming. As a developer who values efficiency, I decided to tackle this problem head-on by building FormPilot, an intelligent form filler that leverages the power of Large Language Models (LLMs) to fill out forms with contextually appropriate information automatically.
In this article, I'll take you through my journey of creating FormPilot, a Chrome extension backed by a Java Spring Boot application that uses Retrieval-Augmented Generation (RAG), LangChain4j, and Ollama to fill out web forms intelligently. I'll share the challenges I faced, the solutions I implemented, and the lessons I learned along the way.
The Inspiration
The idea for FormPilot came to me during a conference registration season. I found myself registering for multiple tech conferences, each with their own registration forms asking for the same information. As I filled out yet another form with my name, email, and bio for the fifth time, I thought, "There has to be a better way."
Sure, there are password managers and form fillers out there, but they typically just save and replay the exact information you've entered before. What if we could create something smarter? Something that could help us understand the context of each field and generate appropriate values based on that context?
That's when I decided to leverage my experience with Java and my interest in AI to build FormPilot.
The Architecture
I designed FormPilot with two main components:
- A Chrome extension that detects forms on web pages and communicates with a local server
- A Spring Boot application that uses RAG, LangChain4j, and Ollama to generate appropriate values for form fields
This architecture allows the extension to be lightweight while offloading the heavy lifting of AI processing to the local server. Here's how the data flows through the system:
- The Chrome extension detects a form on a web page
- It extracts metadata about each form field (id, name, type, label, placeholder, etc.)
- It sends this metadata to the local server
- The server uses RAG and LangChain4j with Ollama to generate appropriate values for each field
- The server returns these values to the extension
- The extension fills the form with the generated values
Getting Started: Setting Up Your Environment
Before we dive into the specific code implementation for FormPilot's backend, let's set up the necessary tools: Ollama for running the language model locally and the initial Spring Boot project structure.
Part 1: Installing and Running Ollama Locally
Ollama enables you to run open-source large language models (LLMs) directly on your own machine. This is great for privacy (data stays local) and avoids API costs.
- Download and Install Ollama:
-
- Visit the official Ollama website: https://ollama.com/
- Follow the instructions for your operating system:
-
- macOS: Download the .zip file, unzip it, move the app to your Applications folder, and run it once. It installs the command-line tool and runs as a background service (check your menu bar).
- Windows: Download and run the .exe installer. It typically sets up Ollama as a background service.
- Linux: Use the provided installation script in your terminal:
curl -fsSL https://ollama.com/install.sh | shThis usually sets up Ollama as asystemdservice.
- Verify Installation:
-
- Open your terminal (or Command Prompt/PowerShell) and type:
ollama --version - You should see the Ollama version number displayed.
- Open your terminal (or Command Prompt/PowerShell) and type:
- Ensure Ollama is Running:
-
- Ollama usually runs automatically in the background after installation on macOS and Windows.
- On Linux, you can check its status: sudo
systemctlstatus ollama. If needed, start it with sudosystemctlstart ollama and enable it on boot with sudosystemctlenable ollama. - The Ollama server typically listens for requests on
http://localhost:11434.
- Install an LLM (e.g., Llama 3):
-
- Use the Ollama command line to download the model mentioned in this article (llama3 or deepseek-llm:7b):
ollama run llama3
- Use the Ollama command line to download the model mentioned in this article (llama3 or deepseek-llm:7b):
-
- This command will first download the model files (this can take a while) and then load the model, giving you a chat prompt (>>>).
- You can exit the chat prompt by typing /bye. The model is now downloaded and available for use by applications like your Spring Boot backend.
- To see all locally downloaded models, use:
ollama list

Part 2: Creating the Spring Boot Project via Spring Initializr
Spring Initializr is a web tool that generates a basic Spring Boot project structure for you.
- Visit Spring Initializr:
-
- Go to https://start.spring.io/ in your browser and configure your project; for brevity, since this part is pretty much known by every spring developer, I am going to skip it. Download the structure and open it in your favourite IDE.
- Make sure you have the following dependencies in your
gradle.buildorpom.xml.
dependencies { implementation 'dev.langchain4j:langchain4j-spring-boot-starter:1.0.0-beta2' implementation 'dev.langchain4j:langchain4j-open-ai-spring-boot-starter:1.0.0-beta2' implementation 'dev.langchain4j:langchain4j-embeddings-all-minilm-l6-v2:1.0.0-beta2' implementation 'dev.langchain4j:langchain4j-ollama:1.0.0-beta2' implementation 'org.springframework.boot:spring-boot-starter-web' compileOnly 'org.projectlombok:lombok' developmentOnly 'org.springframework.boot:spring-boot-devtools' annotationProcessor 'org.projectlombok:lombok' testImplementation 'org.springframework.boot:spring-boot-starter-test' testRuntimeOnly 'org.junit.platform:junit-platform-launcher' }
With Ollama running and the basic Spring Boot project created, you're ready to start adding the FormPilot-specific code.
Implementing RAG with LangChain4j
One of the most exciting parts of building FormPilot was implementing Retrieval-Augmented Generation (RAG) using LangChain4j. RAG is a technique that enhances LLM outputs by retrieving relevant information from a knowledge base before generating a response.
For FormPilot, I wanted the system to be able to fill forms with personalized information. I started by creating a simple text file (content.txt placed in src/main/resources) containing information about conference speakers, including names, bios, contact information, and session details.
Here's how I implemented RAG in the RAGConfig class:
package ca.bazlur.formpilot.config;

import dev.langchain4j.data.segment.TextSegment;
import dev.langchain4j.memory.chat.ChatMemoryProvider;
import dev.langchain4j.memory.chat.TokenWindowChatMemory;
import dev.langchain4j.model.Tokenizer;
import dev.langchain4j.model.embedding.EmbeddingModel;
import dev.langchain4j.model.embedding.onnx.allminilml6v2.AllMiniLmL6V2EmbeddingModel;
import dev.langchain4j.store.embedding.EmbeddingStore;
import lombok.extern.slf4j.Slf4j;
import org.springframework.context.annotation.Bean;
import org.springframework.context.annotation.Configuration;

import dev.langchain4j.data.document.Document;
import dev.langchain4j.data.document.DocumentSplitter;
import dev.langchain4j.data.document.parser.TextDocumentParser;
import dev.langchain4j.data.document.splitter.DocumentSplitters;
import dev.langchain4j.rag.content.retriever.ContentRetriever;
import dev.langchain4j.rag.content.retriever.EmbeddingStoreContentRetriever;
import dev.langchain4j.store.embedding.EmbeddingStoreIngestor;
import dev.langchain4j.store.embedding.inmemory.InMemoryEmbeddingStore;
import org.springframework.core.io.Resource;
import org.springframework.core.io.ResourceLoader;

import java.io.IOException;

import static dev.langchain4j.data.document.loader.FileSystemDocumentLoader.loadDocument;

@Slf4j
@Configuration
public class RAGConfig {

    @Bean(name = "ollamaChatMemoryProvider")
    ChatMemoryProvider chatMemoryProvider(Tokenizer tokenizer) {
        return memoryId -> TokenWindowChatMemory.builder()
                .id(memoryId)
                .maxTokens(10_000, tokenizer)
                .build();
    }

    @Bean
    EmbeddingStore<TextSegment> embeddingStore(EmbeddingModel embeddingModel, ResourceLoader resourceLoader) throws IOException {

        // Normally, you would already have your embedding store filled with your data.
        // However, for the purpose of this demonstration, we will:

        // 1. Create an in-memory embedding store
        EmbeddingStore<TextSegment> embeddingStore = new InMemoryEmbeddingStore<>();

        // 2. Load an example document
        Resource resource = resourceLoader.getResource("classpath:content.txt");
        Document document = loadDocument(resource.getFile().toPath(), new TextDocumentParser());

        log.info("Document loaded: {}", document.metadata());

        // 3. Split the document into segments 2000 tokens each
        // 4. Convert segments into embeddings
        // 5. Store embeddings into embedding store
        // All this can be done manually, but we will use EmbeddingStoreIngestor to automate this:
        DocumentSplitter documentSplitter = DocumentSplitters.recursive(2000, 500);
        EmbeddingStoreIngestor ingestor = EmbeddingStoreIngestor.builder()
                .documentSplitter(documentSplitter)
                .embeddingModel(embeddingModel)
                .embeddingStore(embeddingStore)
                .build();
        ingestor.ingest(document);

        return embeddingStore;
    }


    @Bean
    EmbeddingModel embeddingModel(){
        // not good but works for this demo
        return new AllMiniLmL6V2EmbeddingModel();
    }

    @Bean(name = "ollamaContentRetriever")
    ContentRetriever contentRetriever(EmbeddingStore<TextSegment> embeddingStore, EmbeddingModel embeddingModel) {
        log.info("Creating ContentRetriever");
        // You will need to adjust these parameters to find the optimal setting,
        // which will depend on multiple factors, for example:
        // - The nature of your data
        // - The embedding model you are using
        int maxResults = 2;
        double minScore = 0.4;

        return EmbeddingStoreContentRetriever.builder()
                .embeddingStore(embeddingStore)
                .embeddingModel(embeddingModel)
                .maxResults(maxResults)
                .minScore(minScore)
                .build();
    }
}
This configuration:
- Creates an in-memory embedding store.
- Loads the
content.txtdocument from the project's resources. - Split the document into segments of 2000 characters with a 500-character overlap (adjust these values based on your content and model).
- Converts these segments into vector embeddings using the configured EmbeddingModel and stores them.
- Creates a ContentRetriever that will query this embedding store to find the most relevant text segments based on semantic similarity to the input query (e.g., a form field label).
The Magic of LangChain4j's @AiService
One of the most elegant aspects of FormPilot is how it uses LangChain4j's @AiService annotation to create a declarative interface for interacting with the LLM. This approach dramatically simplifies the code required to prompt the model and parse its response.
Here's the FormAssistant interface:
package ca.bazlur.formpilot.service;

import ca.bazlur.formpilot.model.FormField;
import dev.langchain4j.service.MemoryId;
import dev.langchain4j.service.SystemMessage;
import dev.langchain4j.service.UserMessage;
import dev.langchain4j.service.spring.AiService;
import dev.langchain4j.service.spring.AiServiceWiringMode;

import java.util.List;
import java.util.Map;
import java.util.Objects;

@AiService
public interface FormAssistant {

    @SystemMessage("""
          You are an AI assistant acting *exclusively* as a JSON Form Filler.
          Your *only* task is to process a list of form fields and accompanying context (if provided) and output a *single, valid JSON object* representing the filled form.

          **CRITICAL OUTPUT REQUIREMENT:**
          Your entire response MUST be *only* the final JSON object.
          - Start immediately with `{`.
          - End immediately with `}`.
          - Do NOT include any introductory text, explanations, apologies, conversational filler, or markdown formatting *outside* the JSON structure itself.

          **Input You Will Receive:**
          1.  A list/description of form fields, each with metadata like: `id`, `name`, `type`, `label`, `placeholder`, `required`.
          2.  Optional: Text context or user-supplied data relevant to the form.

          **Processing Rules:**
          * **JSON Key:** Use the field's `id` as the key in the output JSON. If `id` is empty or missing, use `name`.
          * **Skipping Fields:** Ignore any field where both `id` and `name` are empty strings.
          * **Value Determination (Priority Order):**
              1.  **Context First:** Use any provided text context or user-supplied data to fill the fields. Match data to relevant field types/labels (e.g., use provided phone number for `tel` field, biography text for `textarea` bio field).
              2.  **Generation:** If context is insufficient for a field, generate a realistic and contextually appropriate value based on its `type`, `label`, and `placeholder`.
          * **Type-Specific Generation Rules:**
              * `email`: Generate a plausible email (e.g., `[email protected]`) if not in context.
              * `password`: Use a placeholder strong password (e.g., `P@ssw0rd123!`).
              * `date`: Generate a valid date (e.g., `1995-06-15`).
              * `number`: Generate a sensible number based on context (e.g., `85000` for annual income).
              * `tel`: Generate a plausible phone number (e.g., `+1-416-555-0199`) if not in context.
              * `textarea` (bios, comments, descriptions): Generate detailed, multi-sentence text relevant to the field's purpose, using context if available.
              * `select-one` (often paired):
                  * Fill the associated text input (`field-id-selectized`) with the *text label* (e.g., "Intermediate").
                  * Leave the `select-one` field (`field-id`) value as `""` (empty string) unless the specific *internal value* is known from context.
          * **Required Fields:** If `required: true` and no value can be determined from context, generate a placeholder value (e.g., `"N/A - Required"`, `"[email protected]"`, `"https://example.com/placeholder"`) instead of leaving it empty.
          * **Duplicate Sections:** Fill apparently duplicated sections (e.g., `User` vs. `ImpersonatedUser`) consistently with the same data unless context specifies otherwise.

          Now, process the following form fields and context, providing only the JSON output.

          Return Map<String, ?> where the key is the field's `id` or `name` and the value is the filled value.

          """)
    Map<String, ?> generateForm(@MemoryId String memoryId, @UserMessage List<FormField> fields);
}
Define the FormField record/class (e.g., in the model package):
package ca.bazlur.formpilot.model;

import lombok.AllArgsConstructor;
import lombok.Data;
import lombok.NoArgsConstructor;

import java.util.ArrayList;
import java.util.List;

/**
 * Represents a form field from a webpage.
 * This data is sent from the Chrome extension to the server.
 */
@Data
@NoArgsConstructor
@AllArgsConstructor
public class FormField {
    private String id;
    private String name;
    private String type;
    private String label;
    private String placeholder;
    private boolean required;
    private String value;
    private List<Option> options = new ArrayList<>();
}

@Data
class Option {
    private String text;
    private String value;
}
With just this interface and the @AiService annotation (from dev.langchain4j.service.spring.AiService), the LangChain4j Spring Boot starter automatically creates a bean implementing this interface. When you call the generateForm method:
- It constructs a prompt using the @SystemMessage and the provided fields list (formatted as the
@UserMessage). - The process automatically incorporates the ContentRetriever bean (our RAG setup). LangChain4j handles querying the retriever and adding relevant context to the prompt sent to the LLM.
- It sends the combined prompt to the configured LLM (Ollama in this case).
- It parses the LLM's JSON response back into a
Map<String, String>.
This declarative approach keeps the service layer clean and focuses on what needs to be done rather than the low-level details of LLM interaction and RAG integration.
Integrating with Ollama
I chose to use Ollama for the LLM backend, which allows for the local running of LLMs. This provides several advantages:
- Privacy: Form data never leaves the user's computer.
- No API Costs: Users don't need to pay for LLM API usage.
- Offline Capability: The system can potentially work without an active internet connection (once models are downloaded).
Configuring LangChain4j to use your local Ollama instance is straightforward using Spring Boot's application.properties (or application.yml) file located in src/main/resources.
Add the following properties:
# LangChain4j Configuration for Ollama

# Base URL for the Ollama API (default port is 11434)
langchain4j.chat-model.ollama.base-url=http://localhost:11434
# Specify the Ollama model to use for chat completions
langchain4j.chat-model.ollama.model-name=llama3
# Temperature: Controls randomness (0.0 = deterministic)
langchain4j.chat-model.ollama.temperature=0.0
# Timeout for API calls
langchain4j.chat-model.ollama.timeout=PT60S # 60 seconds

# Configure the embedding model (used for RAG)
# Use an Ollama model capable of generating embeddings
# Note: Not all models are fine-tuned for embeddings. Check Ollama docs.

langchain4j.embedding-model.ollama.base-url=http://localhost:11434/v1
langchain4j.embedding-model.ollama.model-name=deepseek-llm:7b

langchain4j.embedding-model.ollama.timeout=PT60S
Make sure you have downloaded the specified models using Ollama (e.g., ollama run llama3 or ollama run deepseek-llm:7b).
These properties tell the LangChain4j Spring Boot starter to configure both the chat model (for generating the form values) and the embedding model (for RAG) to use your local Ollama server.
Building the Chrome Extension
The Chrome extension acts as the user-facing part of FormPilot. It needs to:
- Detect forms on the current web page.
- Extract relevant information about each input field.
- Send this information to the local Spring Boot backend.
- Receive the generated values from the backend.
- Fill out the form fields with the values you received.
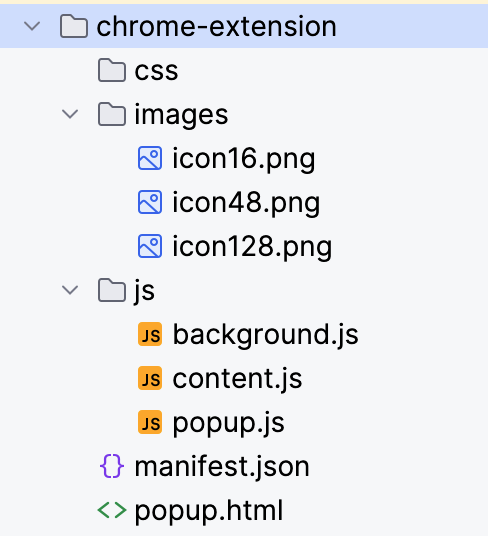
I structured the extension with three main parts:
- Content Script (content.js): Injected into web pages to interact with the DOM (find forms, fill fields).
- Background Script (background.js or Service Worker): Acts as a central hub, handling communication with the backend server and managing the extension state.
- Popup UI (popup.html and popup.js): Provides a simple interface for the user (e.g., a button to
trigger form filling).
The most challenging part was reliably detecting form fields and extracting useful metadata, especially labels, as HTML forms vary widely in structure. I implemented several strategies in content.js:
- Look for a <label> element with a for attribute matching the field's ID.
- Check if the field is nested inside a <label> element.
- Look for a sibling <label> element.
- Look at the aria-label or aria-labelledby attributes.
- As a fallback, check for preceding non-interactive element text content near the field.
Here's a simplified snippet illustrating field data extraction:
// content.js (Simplified Example)

function findFormsAndFields() {
  const forms = document.querySelectorAll('form');
  const allFieldsData = [];

  forms.forEach(form => {
    // Select common form input elements within the current form
    const elements = form.querySelectorAll('input:not([type="submit"]):not([type="button"]):not([type="reset"]):not([type="hidden"]):not([type="file"]), select, textarea');

    elements.forEach(element => {
      const fieldData = createFormFieldData(element);
      if (fieldData && !fieldData.value) { // Only include fields that are not already filled
        // Check if field is visible to the user
        if (element.offsetParent !== null) {
            allFieldsData.push(fieldData);
        }
      }
    });
  });
  return allFieldsData;
}

function getLabelForElement(element) {
    // 1. Check for <label for="...">
    if (element.id) {
        const label = document.querySelector(`label[for="${element.id}"]`);
        if (label) return label.textContent.trim();
    }
    // 2. Check for parent <label>
    const parentLabel = element.closest('label');
    if (parentLabel) return parentLabel.textContent.replace(element.value || '', '').trim(); // Attempt to remove element's own text if nested

    // 3. Check aria-label
    const ariaLabel = element.getAttribute('aria-label');
    if (ariaLabel) return ariaLabel.trim();

    // 4. Check aria-labelledby
    const ariaLabelledBy = element.getAttribute('aria-labelledby');
    if (ariaLabelledBy) {
        const labelElement = document.getElementById(ariaLabelledBy);
        if (labelElement) return labelElement.textContent.trim();
    }

    // 5. Fallback: Preceding sibling text (simplified)
    let previous = element.previousElementSibling;
    if (previous && !['input', 'select', 'textarea', 'button', 'label'].includes(previous.tagName.toLowerCase())) {
        return previous.textContent.trim();
    }

    return ''; // No label found
}


function createFormFieldData(element) {
  // Basic check to skip elements we don't want to fill
  const type = element.type ? element.type.toLowerCase() : element.tagName.toLowerCase();
  if (type === 'hidden' || type === 'submit' || type === 'button' || type === 'reset' || type === 'file') {
    return null;
  }

  // Skip if element is disabled or readonly
  if (element.disabled || element.readOnly) {
      return null;
  }

  // Get the current value (to potentially avoid filling already completed fields)
  let value = '';
  if (type === 'checkbox' || type === 'radio') {
      value = element.checked ? 'true' : 'false'; // Represent boolean state
  } else {
      value = element.value || '';
  }


  return {
    id: element.id || '',
    name: element.name || '',
    type: type,
    label: getLabelForElement(element), // Use dedicated function for label finding
    placeholder: element.placeholder || '',
    required: element.required || false,
    value: value // Include current value
  };
}

// --- Communication Logic (Example using Chrome messaging) ---
// This function would be called, e.g., when the user clicks the extension icon

function requestFormFill() {
    const fieldsToSend = findFormsAndFields();

    if (fieldsToSend.length > 0) {
        // Send fields to the background script
        chrome.runtime.sendMessage({ action: "fillForm", fields: fieldsToSend }, (response) => {
            if (chrome.runtime.lastError) {
                console.error("FormPilot Error:", chrome.runtime.lastError.message);
                // Handle error (e.g., show message to user)
                return;
            }
            if (response && response.filledFields) {
                // Fill the actual form elements on the page
                fillFormOnPage(response.filledFields);
            } else {
                console.error("FormPilot: No filled fields received from backend or backend error.");
                // Handle error or empty response
            }
        });
    } else {
        console.log("FormPilot: No suitable empty fields found on the page.");
        // Optionally notify user
    }
}

function fillFormOnPage(filledFieldsMap) {
    // filledFieldsMap is the Map<String, String> from the backend
    console.log("FormPilot: Received fields to fill:", filledFieldsMap);

    for (const [identifier, value] of Object.entries(filledFieldsMap)) {
        // Try finding element by ID first, then by name
        let element = document.getElementById(identifier) || document.querySelector(`[name="${identifier}"]`);

        if (element) {
            fillField(element, value);
        } else {
            console.warn(`FormPilot: Could not find element with id or name: ${identifier}`);
        }
    }
    console.log("FormPilot: Form filling attempt complete.");
}


function fillField(element, value) {
    const tagName = element.tagName.toLowerCase();
    const type = element.type ? element.type.toLowerCase() : tagName;

    console.log(`FormPilot: Filling field (id=${element.id}, name=${element.name}, type=${type}) with value: ${value}`);


    if (type === 'select' || type === 'select-one') {
        // Find the option with matching value or text (case-insensitive text match)
        const options = Array.from(element.options);
        let foundOption = options.find(opt => opt.value === value);
        if (!foundOption) {
            foundOption = options.find(opt => opt.text.toLowerCase() === value.toLowerCase());
        }

        if (foundOption) {
            element.value = foundOption.value;
        } else {
            console.warn(`FormPilot: Could not find option "${value}" for select field (id=${element.id}, name=${element.name})`);
            // Optionally try creating an option if allowed, or skip
        }
    } else if (type === 'checkbox') {
        // Check/uncheck based on truthiness (e.g., "true", "yes", "on", true)
        const shouldBeChecked = ['true', 'yes', 'on', '1'].includes(String(value).toLowerCase());
        element.checked = shouldBeChecked;
    } else if (type === 'radio') {
        // For radio buttons, find the one in the group with the matching value and check it
        const radioGroup = document.querySelectorAll(`input[type="radio"][name="${element.name}"]`);
        radioGroup.forEach(radio => {
            radio.checked = (radio.value === value);
        });
    } else {
        // For text inputs, textareas, email, password, number, date, etc.
        element.value = value;
    }

    // IMPORTANT: Trigger events to simulate user input, which many frameworks rely on
    triggerEvents(element);
}

function triggerEvents(element) {
    // Events commonly listened for by frameworks (React, Vue, Angular, etc.)
    const eventsToTrigger = [
        new Event('input', { bubbles: true, cancelable: true }),
        new Event('change', { bubbles: true, cancelable: true }),
        new FocusEvent('focus', { bubbles: true, cancelable: true }), // Simulate focus first
        new FocusEvent('blur', { bubbles: true, cancelable: true })   // Then blur
    ];

    // Dispatch focus first
    element.dispatchEvent(eventsToTrigger[2]);

    // Dispatch input and change
    element.dispatchEvent(eventsToTrigger[0]);
    element.dispatchEvent(eventsToTrigger[1]);

    // Dispatch blur last
    element.dispatchEvent(eventsToTrigger[3]);
}

// --- Listener for messages from background or popup ---
chrome.runtime.onMessage.addListener((request, sender, sendResponse) => {
    if (request.action === "triggerFormFill") {
        console.log("FormPilot: Received triggerFormFill command.");
        requestFormFill();
        // Indicate async response if needed, though maybe not for this simple trigger
        // sendResponse({ status: "Form fill initiated" });
        return true; // Keep message channel open for potential async response from requestFormFill if it used sendResponse
    }
});

console.log("FormPilot Content Script Loaded.");
The background script (background.js) would handle the chrome.runtime.onMessage listener for the "fillForm" action, make a fetch request to the local Spring Boot server (http://localhost:8080/api/fill-form or similar), and send the response back to the content script. Remember to configure CORS in your Spring Boot application to allow requests from the Chrome extension's origin.
Check out the chrome-extension: https://github.com/rokon12/form-pilot/tree/main/chrome-extension
Setting up the Spring Boot Server
Build the Spring Boot application:
./gradlew build
Run the Spring Boot application:
./gradlew bootRun
The server will start on port 8080. You can verify it's running by visiting:
http://localhost:8080/api/form/health
Setting up the Chrome Extension
- Open Google Chrome and navigate to:
chrome://extensions/ - Enable "Developer mode" by toggling the switch in the top right corner.
- Click "Load unpacked" and select the
chrome-extensiondirectory from this project. - The extension should now be installed and visible in your Chrome toolbar.
Using the Demo Form
A demo form is included in this project to help you test the Smart Form Filler extension:
- Create the demo form and open it in your browser: file:///path/to/FormPilot/demo/demo-form.html
- Alternatively, you can serve the demo form using a simple HTTP server:
# If you have Python installed

python -m http.server
Then visit http://localhost:8000/demo/demo-form.html in your browser.
- With the Smart Form Filler extension installed and the local server running, the extension should automatically detect the form fields on the demo page.
- You can manually trigger form filling in two ways:
- Click the extension icon in your Chrome toolbar
- Right-click on the page and select "Smart Form Filler" from the context menu, then choose "Fill Forms"

Testing with a Demo Form
To test FormPilot thoroughly, I created a comprehensive demo HTML form (demo.html) that included a wide variety of field types:
- Text inputs (First Name, Last Name, Address Line 1)
- Email input
- Password input
- Telephone input (tel)
- Date input
- Number input (Age)
- Select dropdown (Country)
- Radio buttons (T-Shirt Size)
- Checkboxes (Interests)
- Textarea (Comments/Bio)
Using this demo form locally allowed me to iterate quickly on both the backend logic (ensuring correct values were generated for each type) and the frontend JavaScript (ensuring fields were detected and filled correctly, including event triggering).
Challenges and Solutions
Building FormPilot wasn't without its hurdles. Here are some key challenges and how I addressed them:
Challenge 1: Robust Form Field Detection & Label Association
As mentioned, reliably finding input fields and their corresponding labels across diverse HTML structures is tricky.
- Solution: Implemented a multi-strategy approach in content.js (checking for attribute, parent labels, aria-label, siblings) as shown in the snippet. Added checks for visibility (offsetParent !== null) and avoided filling already completed fields. It's not perfect, but covers many common patterns.
Challenge 2: Handling Diverse Field Types Correctly
Simply setting element.value doesn't work for all types (selects, checkboxes, radio buttons).
- Solution: Created specific logic within the fillField function in content.js to handle different type
attributesortagName. For selects, it searches for matching option values or text. For checkboxes/radio buttons, it sets the checked property based on the received value.
Challenge 3: Triggering JavaScript Events for Framework Compatibility
Modern web apps heavily rely on JavaScript frameworks (React, Vue, Angular) that listen for input events (input, change, blur, focus) to update their internal state. Just setting the field's value programmatically often doesn't trigger these listeners.
- Solution: Implemented the triggerEvents function in content.js to manually create and dispatch input, change, focus, and blur events on the element after setting its value. This significantly improves compatibility with framework-based forms.
Challenge 4: Backend Communication & CORS
Chrome extensions have security restrictions. Content scripts cannot directly make cross-origin requests (like to http://localhost:8080).
- Solution:
-
- The content script sends a message to the background script.
- The background script (which has fewer restrictions) uses the fetch API to call the Spring Boot backend.
- Crucially, the Spring Boot application must be configured to handle Cross-Origin Resource Sharing (CORS) by sending the appropriate headers (e.g.,
Access-Control-Allow-Origin:chrome-extension://YOUR_EXTENSION_ID). This can be done globally using@ConfigurationandWebMvcConfigureror on specific@RestControllerendpoints using@CrossOrigin.
Challenge 5: Prompt Engineering & Model Compliance
Getting LLMs to follow detailed instructions exactly—especially when it comes to the output format and using logic like "try RAG first"—can be tricky.
Larger models like OpenAI’s GPT-4o usually follow detailed system instructions well, including sticking to strict JSON formats and trying RAG before generating answers. However, smaller models running locally with Ollama (like llama3 or deepseek-llm:7b) may not always do the same. They might add extra text outside the JSON, miss when they should use RAG, or create less accurate data for certain fields.
- Solution: You often need to fine-tune the prompt to get better results with smaller models. This means making the system instructions clearer and simpler, giving good examples of the exact format you want, and even adding warnings like, “Don’t write anything before or after the JSON.” Sometimes, it also helps to add a cleanup step in your Java backend—like extracting just the JSON from the output—even if the model includes extra text. It’s a balance between how powerful the model is, how complex your prompt is, and how much cleanup you’re willing to do afterward.
Lessons Learned
This project was a fantastic learning experience, reinforcing several key concepts:
1. The Power of RAG for Contextual Personalization
Implementing RAG was the most impactful part. Instead of generic placeholders, FormPilot could potentially pull my actual bio or project details from the content.txt file when filling out a relevant field. This moves beyond simple auto-fill to context-aware generation, making the tool significantly more useful. The quality depends heavily on the relevance of the data source and the effectiveness of the embedding model and retrieval parameters.
2. LangChain4j Simplifies Java LLM Integration
LangChain4j, especially with its Spring Boot starter, abstracts away much of the complexity of interacting with LLMs and integrating RAG. The @AiService annotation is incredibly powerful, allowing a declarative approach that keeps the business logic clean and focuses on the desired interaction rather than the plumbing.
3. Local LLMs (Ollama) Offer Privacy & Control
Using Ollama provided complete control over the model and ensured user data privacy, which is paramount when dealing with potentially sensitive form information. It also decouples the application from reliance on third-party API keys and costs, although it requires users to have sufficient hardware resources. The ease of switching models locally (just change application.properties and run ollama run <new_model>) is also a plus for experimentation.
4. Chrome Extension Development
Building the Chrome extension highlighted the importance of understanding the different script contexts (content, background, popup), their capabilities, and limitations (especially around DOM access and network requests). Proper event handling (triggerEvents) is essential for compatibility with modern web applications. Careful consideration of permissions and security (like CORS) is mandatory.
Conclusion
This a demonstration of how modern AI techniques like RAG can be combined with frameworks like LangChain4j and local LLMs via Ollama to create genuinely intelligent tools within the familiar Java ecosystem. It moves beyond simple automation to provide context-aware assistance for repetitive tasks like filling forms.
The journey highlighted the power of abstraction provided by libraries like LangChain4j and the increasing accessibility of running powerful LLMs locally. While challenges exist, particularly in reliably interacting with the diverse landscape of web forms, the potential for AI-driven productivity tools like FormPilot is immense.
The combination of a browser extension frontend and a local AI backend offers a compelling architecture for building privacy-preserving, intelligent applications.
If you're interested in exploring the code further or contributing, you can find the project on GitHub form-pilot.
Feel free to fork it, experiment, and adapt it. I'd love to hear your feedback and suggestions!
Happy (and smarter) form filling!
- May 06, 2025
- 16 min read
A N M Bazlur Rahman is a Software Engineer with over a decade of specialized experience in Java and related technologies. His expertise has been formally recognized through the prestigious title of Java Champion. Beyond his professional commitments, Mr. Rahman is deeply involved in community outreach and education. He is the founder and current moderator of the Java User Group in Bangladesh, where he has organized educational meetups and conferences since 2013. He was named Most Valuable Blogger (MVP) at DZone, one of the most recognized technology publishers in the world. Besides DZone, he is an editor for the Java Queue at InfoQ, another leading technology content publisher and conference organizer, and an editor at Foojay.io, a place for friends of OpenJDK. In addition, he has published five books about the Java programming language in Bengali; they were bestsellers in Bangladesh. He earned his bachelor's degree from the Institute of Information Technology, University of Dhaka, Bangladesh, in Information Technology, majoring in Software Engineering. He currently lives in Toronto, Canada.


Comments (0)
No comments yet. Be the first.