Presenting with IntelliJ IDEA
- October 11, 2022
- 12025 Unique Views
- 8 min read
In this article, we will take a look at ways to level up your presentation skills with IntelliJ IDEA.
Presentation Assistant plugin
Our first tip is to use the Presentation Assistant plugin. The Presentation Assistant plugin will show which shortcuts are being used.

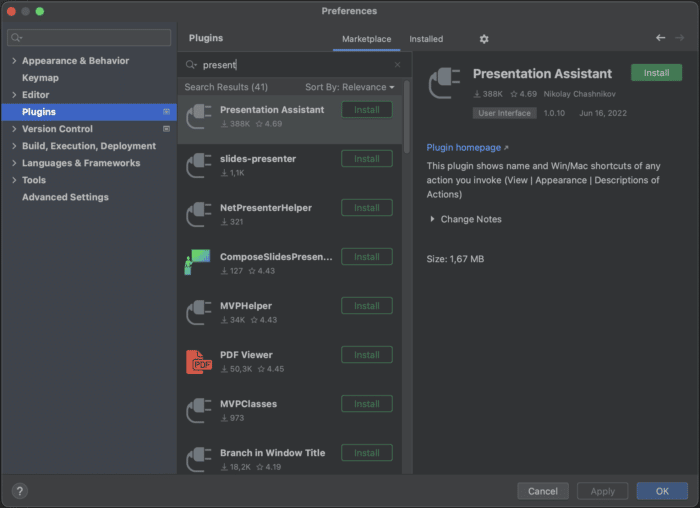
To install the plugin, open Preferences using ⌘, (on Mac) or Ctrl+Alt+S (on Windows/Linux). Go to Plugins and search for "Presentation assistant" on the Marketplace tab. Click Install and when it's done, click OK to apply the changes and close the dialog or click Apply to keep the dialog open.
To configure the Presentation Assistant plugin, go back to Preferences and go to Appearance & Behavior > Presentation Assistant.
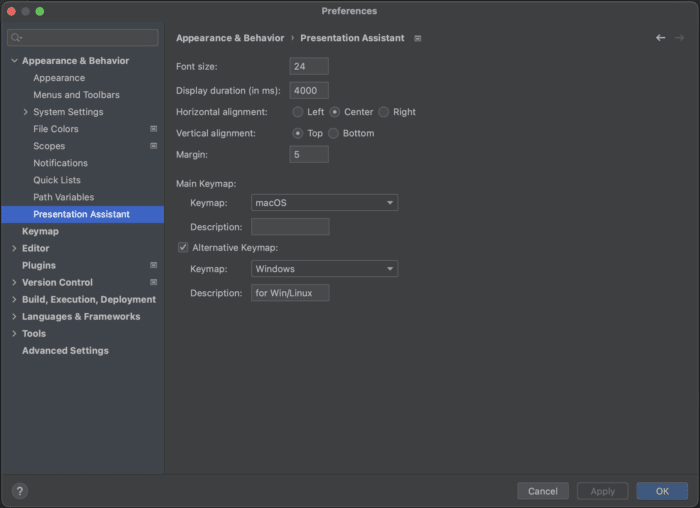
Here we can configure font size, duration, alignment, and which keymaps to show. We are using macOS, with Windows as the alternative keymap. We have also configured the Presentation Assistant plugin to show the shortcuts at the top of the screen.
Presentation Mode
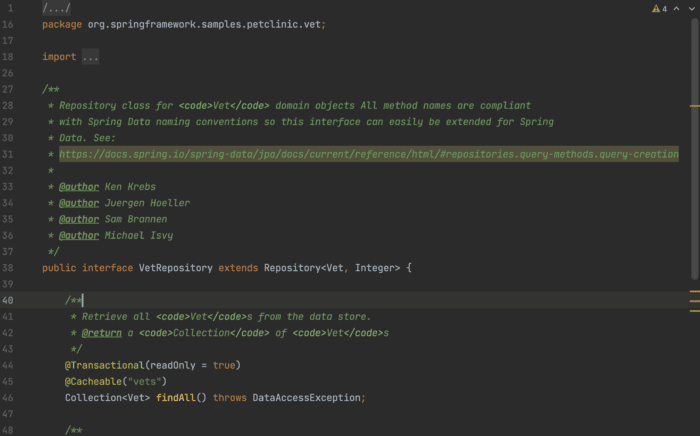
When presenting, you can use Presentation Mode. The IDE switches to full screen and everything is hidden except for the main editor window. The font size is increased, so it is easier to read from a distance.
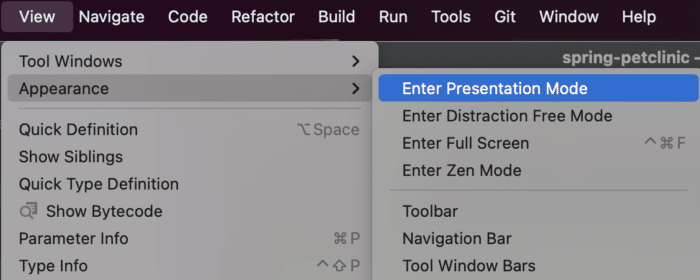
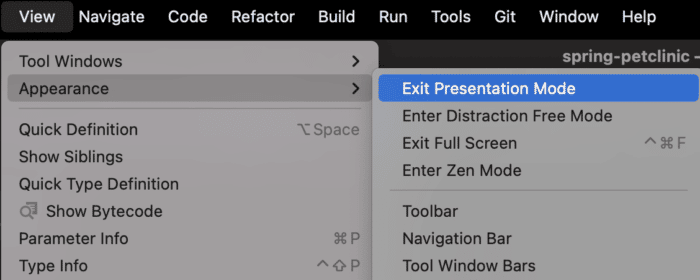
You can switch to Presentation Mode by clicking View > Appearance > Enter Presentation Mode.
Exit Presentation Mode by clicking View > Appearance > Exit Presentation Mode.
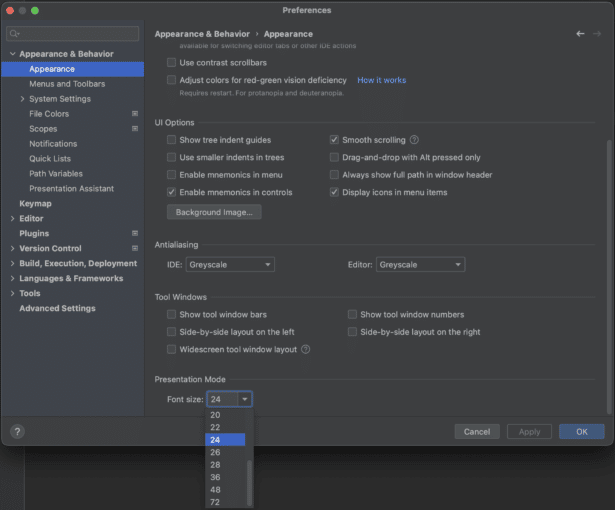
If needed, the font size in Presentation Mode can be configured in Preferences > Appearance & Behavior > Appearance. Scroll down to Presentation Mode, and font size and set the font size you want. Click OK to apply the changes and close the dialog or click Apply to keep the dialog open. Click Cancel to discard the changes and close the dialog.
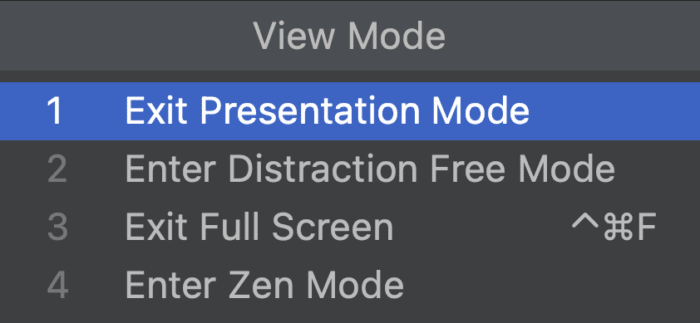
We can also open Presentation Mode using short-cuts. Open the Quick Switch Scheme using ⌃ BackTick (on Mac) or Ctrl+BackTick (on Windows/Linux). Use the arrows to select View Mode and then select Enter Presentation Mode.
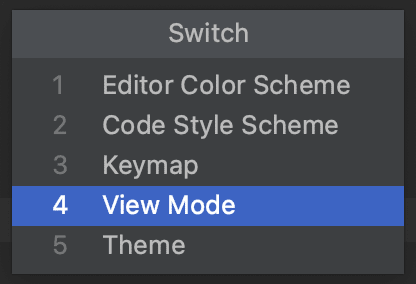
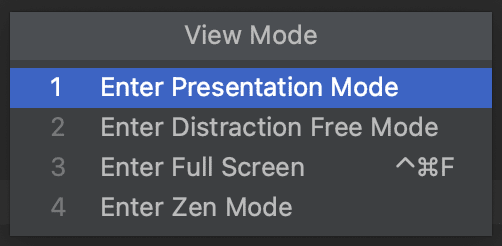
We can use Quick Switch Scheme again to Exit Presentation Mode.
Mouse Zoom
To enable mouse zoom, you need to turn it on explicitly. Go to Preferences > Editor > General and select Change font size with Command+Mouse Wheel (on Mac) or Change font size with Control+Mouse (on Windows/Linux). Click OK to apply the changes and close the dialog or click Apply to keep the dialog open.
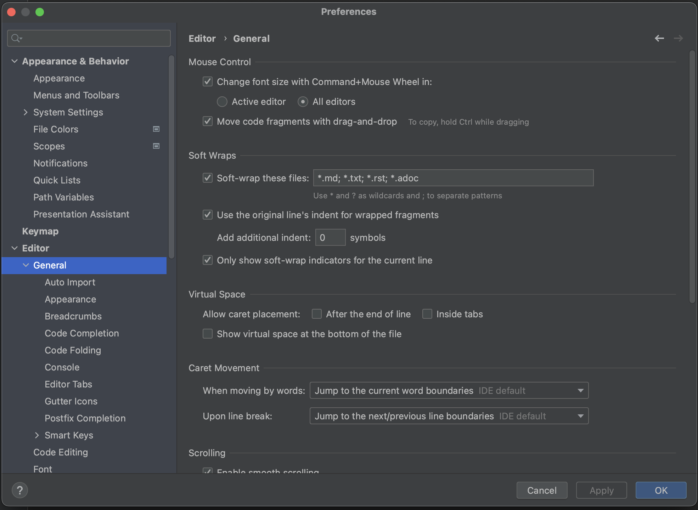
Now we can use Command+Mouse Wheel (on Mac) or Control+Mouse Wheel (on Windows/Linux) to zoom in or out. While we are using mouse zoom, a popup appears containing the current font size on the left and a link to reset to the original font size on the right. Click the link to reset the font size.

Font
To configure font and font size, go to Preferences > Editor > Font. We can select the font we want to use, and set the font size.
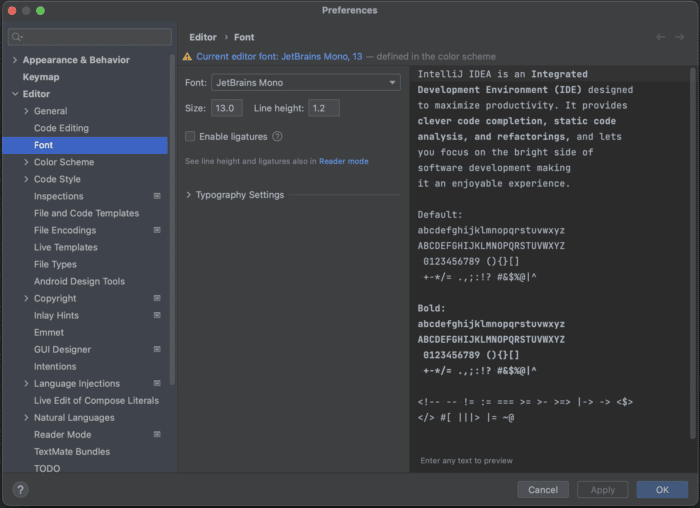
When presenting in person, make sure the font can be read from a distance. If possible, check out the room where you'll be speaking, do your setup before your talk, and walk to the back of the room to check if the code is readable.
Theme
By default, IntelliJ IDEA uses the Darcula theme. To change it, go to Preferences > Appearance & Behavior > Appearance.
Select the UI theme from the Theme list:
- IntelliJ Light is a traditional light theme for IntelliJ-based IDEs
- macOS Light or Windows 10 Light is an OS-specific light theme available as a bundled plugin
- Darcula is the default dark theme that we're using here
- High contrast is a theme designed for users with color vision deficiency
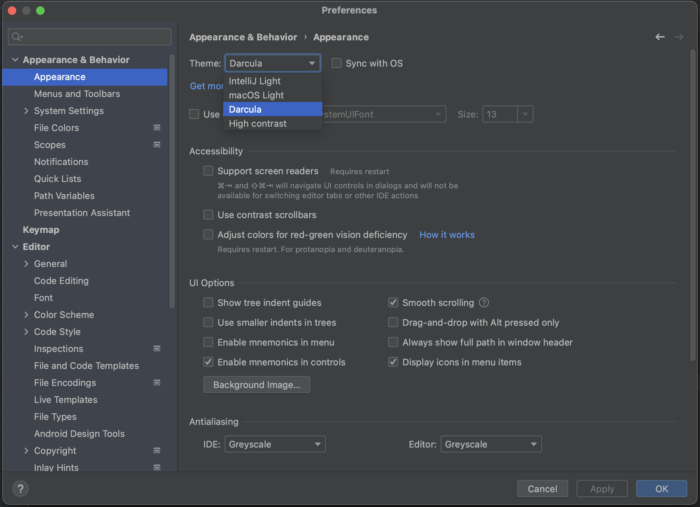
Which theme to use depends on your personal preference. When presenting in front of an audience, you may want to take into account how light or dark the room is. If possible, try different themes and walk to the back of the room to see which one works best before your presentation. When sharing your screen during an online meeting, you may also want to check with teammates which theme works best.
Tool windows
We recommend closing all unused windows so we can focus on the code we're looking at. Use Command + Shift + F12 (on Mac) or Control+Shift+F12 (on Windows/Linux) to hide all tool windows.
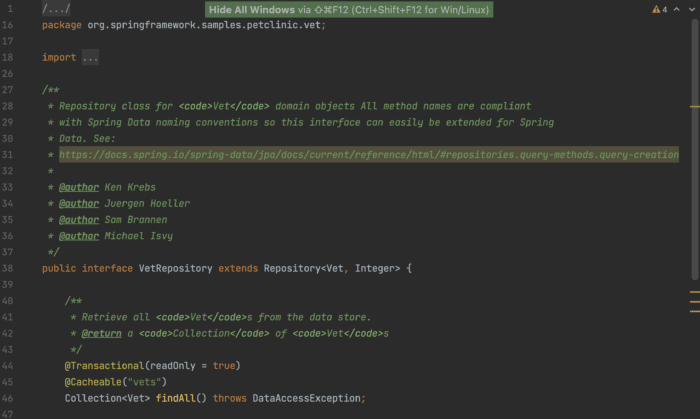
We can always reopen them using shortcuts. Here are the shortcuts to some of the most used windows:
- To open or close the Project Tool Window use ⌘1 (on Mac) or Alt+1 (on Windows/Linux)
- To open or close the Commit Tool Window use ⌘0 (on Mac) or Alt+0 (on Windows/Linux)
- To open or close the Terminal Tool Window use Alt+F12
- To open or close the Git Tool Window use ⌘9( on Mac) or Alt+4 (on Windows/Linux)
- To open or close the Run Tool Window use ⌘4( on Mac) or Alt+4 (on Windows/Linux)
- To open or close the Debug Tool Window use ⌘5( on Mac) or Alt+5 (on Windows/Linux)
You can also use keyboard shortcuts to stretch the active window. Go to the relevant window, and use ⌃ ⌥ ← or ⌃ ⌥ → (on Mac) or Control+Alt+Shift+Left or Control+Alt+Shift+Right (on Windows/Linux) to stretch the window left or right. This also works with the tool windows at the bottom, using the up or down arrows to stretch the window up or down.
Find action
If you want to do something, but don't remember the shortcut or menu option, use Find Action. Press ⇧⌘A (on Mac) or Control+Shift+A (on Windows/Linux) to open the Find Action dialog. Search for the action you want, and select the relevant action.

For example, let's use Find Action to apply soft-wrap.
Soft-wrap
When using a file that has long lines, we can prevent horizontal scrolling by using soft-wrap. Let's use Find Action to enable soft-wrap. Press ⇧⌘A (on Mac) or Control+Shift+A (on Windows/Linux) to open the Find Action dialog, and search for "soft-wrap".

We get the option to turn on soft-wrap, which will be for this file only. You can click this option to turn soft-wrap on or off.

Alternatively, we can configure soft-wrap. Let's select "Soft wrap these files", which will soft-wrap several types of text files. Click OK to apply the changes and close the Preferences dialog.
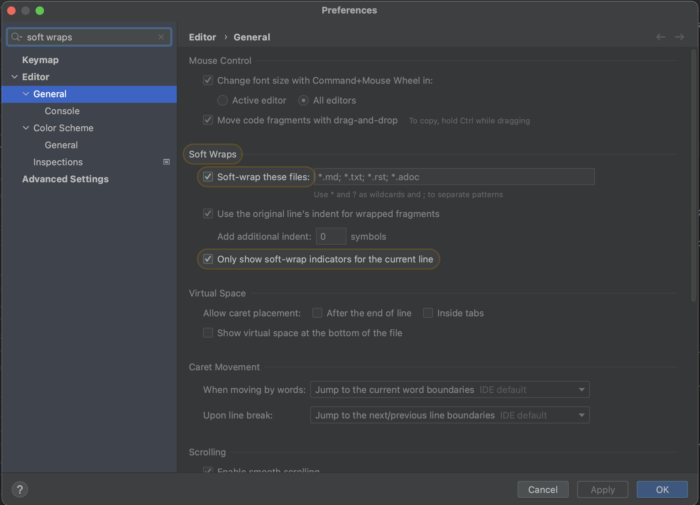
Shortcuts
We recommend using shortcuts as much as possible when presenting. This is easier to do during a presentation than using a mouse or trackpad, especially if you get nervous and your hands might get slippery. There are several ways to learn shortcuts.
- Find Action lets you search for commands and settings across all menus and tools.
- Key Promoter X is a plugin that shows a popup notification with the corresponding keyboard shortcut whenever a command is executed using the mouse. It also suggests creating a shortcut for commands that are executed frequently.
- If you are using one of the predefined keymaps, you can print the default keymap reference card and keep it on your desk to consult it if necessary. This cheat sheet is also available under Help > Keyboard Shortcuts PDF.
- To print a non-default or customized keymap, use the Keymap exporter plugin.
Let's take a look at some shortcuts for navigation.
Navigation
We can use several shortcuts to navigate around a project:
We can Find a class using ⌘ O (on Mac) or Ctrl+N (on Windows/Linux).
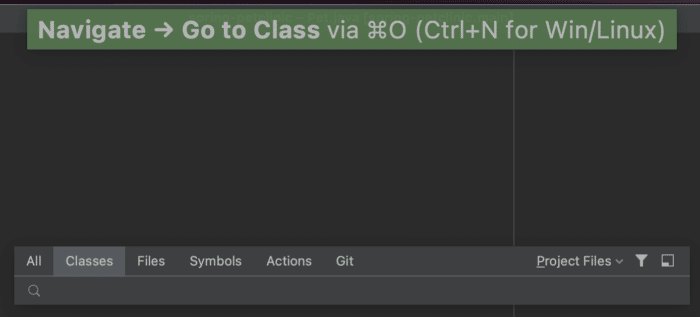
We can move the caret to a method and use ⌘ B (on Mac) or Ctrl+B (on Windows/Linux) to go to the declaration or usages.
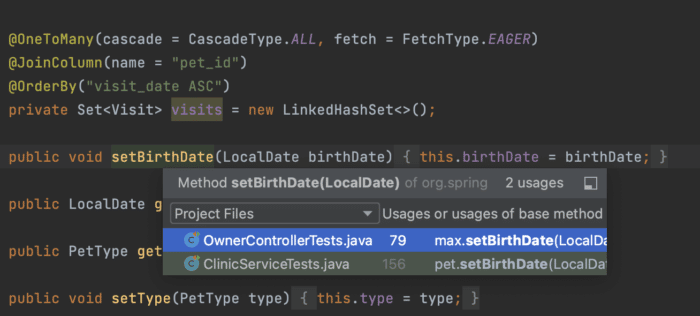
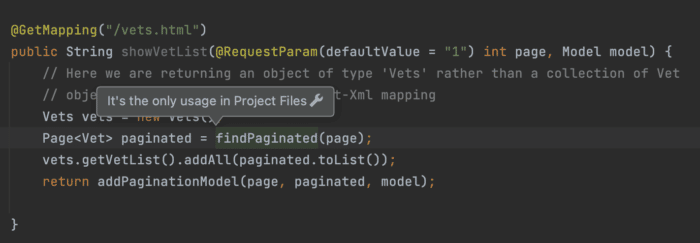
We can also navigate backwards by using ⌘ [ (on Mac) or Ctrl+Alt+Left (on Windows/Linux), or navigate forward: ⌘ ] (on Mac) or Ctrl+Alt+Right (on Windows/Linux).
Use ⇧ ⌘ E (on Mac) or Ctrl+Shift+E (on Windows/Linux) to find Recent Locations.
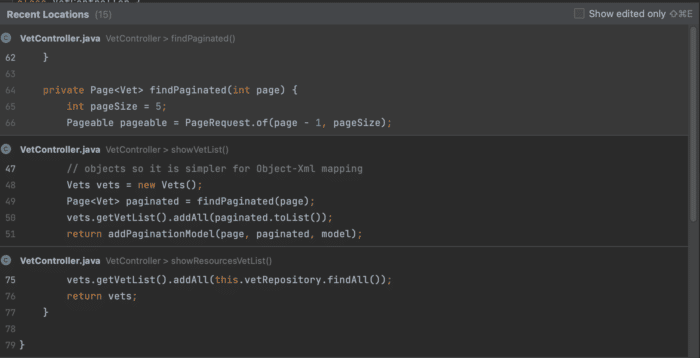
Or find Last edited location with ⇧ ⌘ ⌫ (on Mac) or Ctrl+Shift+Backspace (on Windows/Linux).
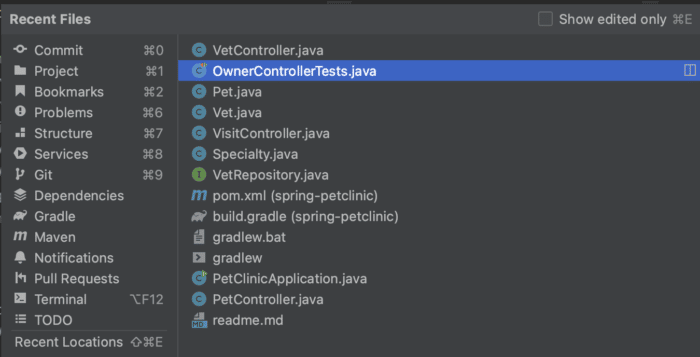
Finally, we can find Recent Files using ⌘ E (on Mac) or Ctrl+E (on Windows/Linux).
Bookmarks
Another way to navigate through code, is to use bookmarks. Press F3 (on Mac) or F11 (on Windows/Linux) to create an anonymous line bookmark.

To add a mnemonic line bookmark, press ⌥ F3 (on Mac) or Control+F11 (on Windows/Linux). In the popup that opens, select a number or a letter that you want to use as an identifier for this bookmark. Press ⏎ (on Mac) or Enter (on Windows/Linux) to save the bookmark. To bookmark files, packages, folders, and modules, right-click the item you want to bookmark in the Project Tool Window, and add an anonymous bookmark (F3 (on Mac) or F11 (on Windows/Linux)), or a mnemonic bookmark (⌥ F3 (on Mac) or Control+F11 (on Windows/Linux)).
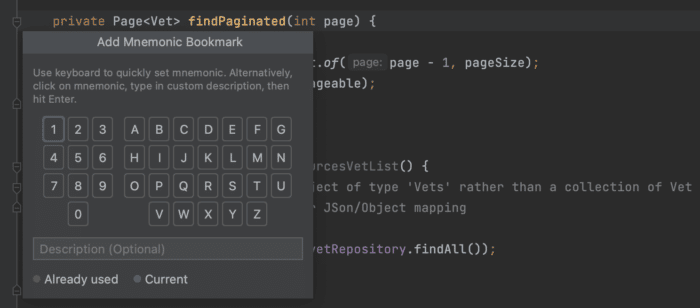

There are several ways to navigate between bookmarks. Press ⌘ F3 (on Mac) or Control+F11 (on Windows/Linux) to open a popup showing bookmarks and select the desired bookmark with the keyboard and press ⏎, or select the corresponding digit or letter for a mnemonic bookmark.
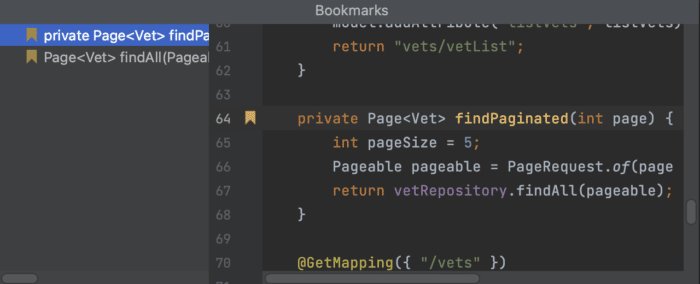
To jump straight to a mnemonic bookmark, hold ^ (on Mac) or Control (on Windows/Linux) and press the mnemonic digit or letter on the keyboard.
Summary and Shortcuts
Now we know several tricks that will level up our presentation skills with IntelliJ IDEA.
IntelliJ IDEA Shortcuts Used
Here are the IntelliJ IDEA shortcuts that we used.
| Name | macOS Shortcut | Windows / Linux Shortcut |
|---|---|---|
| Open Preferences | ⌘, | Ctrl+Alt+S |
| Open Quick Switch Scheme | ⌃** | **Ctrl+ |
|
| Hide all windows | ⇧⌘F12 | Control+Shift+F12 |
| Open / Close Project Tool Window | ⌘1 | Alt+1 |
| Open / Close [Commit Tool Window] | ⌘1 | Alt+1 |
| Open / Close [Terminal Tool Window] | ⌥F12 | Alt+F12 |
| Open / Close Git Log tool Window | ⌘9 | Alt+9 |
| Open / Close Run Tool Window | ⌘4 | Alt+4 |
| Open / Close [Debug Tool Window] | ⌘5 | Alt+5 |
| Stretch to Left | ⌃⌥← | Ctrl+Alt+Shift+Left |
| Stretch to Right | ⌃⌥→ | Ctrl+Alt+Shift+Right |
| Stretch to Top | ⌃⌥↑ | Ctrl+Alt+Shift+Up |
| Stretch to Bottom | ⌃⌥↓ | Ctrl+Alt+Shift+Down |
| Find Action | ⇧⌘A | Control+Shift+A |
| Find a class | ⌘O | Control+N |
| Go to declaration or usages | ⌘B | Control+B |
| Navigate backward | ⌘[ | Control+Alt+Left |
| Navigate forward | ⌘] | Control+Alt+Right |
| Recent Locations | ⇧⌘E | Control+Shift+E |
| Last Edited Location | ⇧⌘⌫ | Control+Shift+Backspace |
| Recent Files | ⌘E | Control+E |
| Anonymous Bookmark | F3 | F11 |
| Mnemonic Bookmark | ⌥F3 | Control+F11 |
| Save Mnemonic Bookmark | ⏎ | Enter |
Related Links
- (video) JetBrains - Presenting with IntelliJ IDEA
- (docs) JetBrains - Settings/Preferences
- (docs) JetBrains - Install plugins
- (marketplace) JetBrains - Presentation Assistant plugin
- (docs) JetBrains - IDE viewing modes
- (docs) JetBrains - IntelliJ IDEA keyboard shortcuts
- (pdf) IntelliJ IDEA reference card
- (docs) JetBrains - Configure keyboard shortcuts
- (docs) JetBrains - Creating custom shortcuts
- (marketplace) JetBrains - Key Promoter X plugin
- (marketplace) JetBrains - Keymap exporter plugin
- (docs) JetBrains - Navigation and search
- (docs) JetBrains - Source code navigation
- (docs) JetBrains - Bookmarks
Don’t Forget to Share This Post!


Comments (1)
Presenting with IntelliJ IDEA - Marit van Dijk
3 years ago[…] article was published on Foojay.io on October 11, […]