

Resolving Git Merge Conflicts in IntelliJ IDEA
- September 21, 2022
- 4 min read
At some point in your career, probably many points, you'll have to resolve merge conflicts.
A common cause of merge conflicts is when you're working on a feature branch while other changes have been applied to the main branch.
Merge feature branch into main
In this tutorial, we are currently on the main branch, and we want to merge the feature branch into main.
You can do this by selecting the feature branch in the Git tool window which you can open with ⌘9 (macOS), or Alt+9 (Windows/Linux).
Select the feature branch and then choose Merge feature into main.
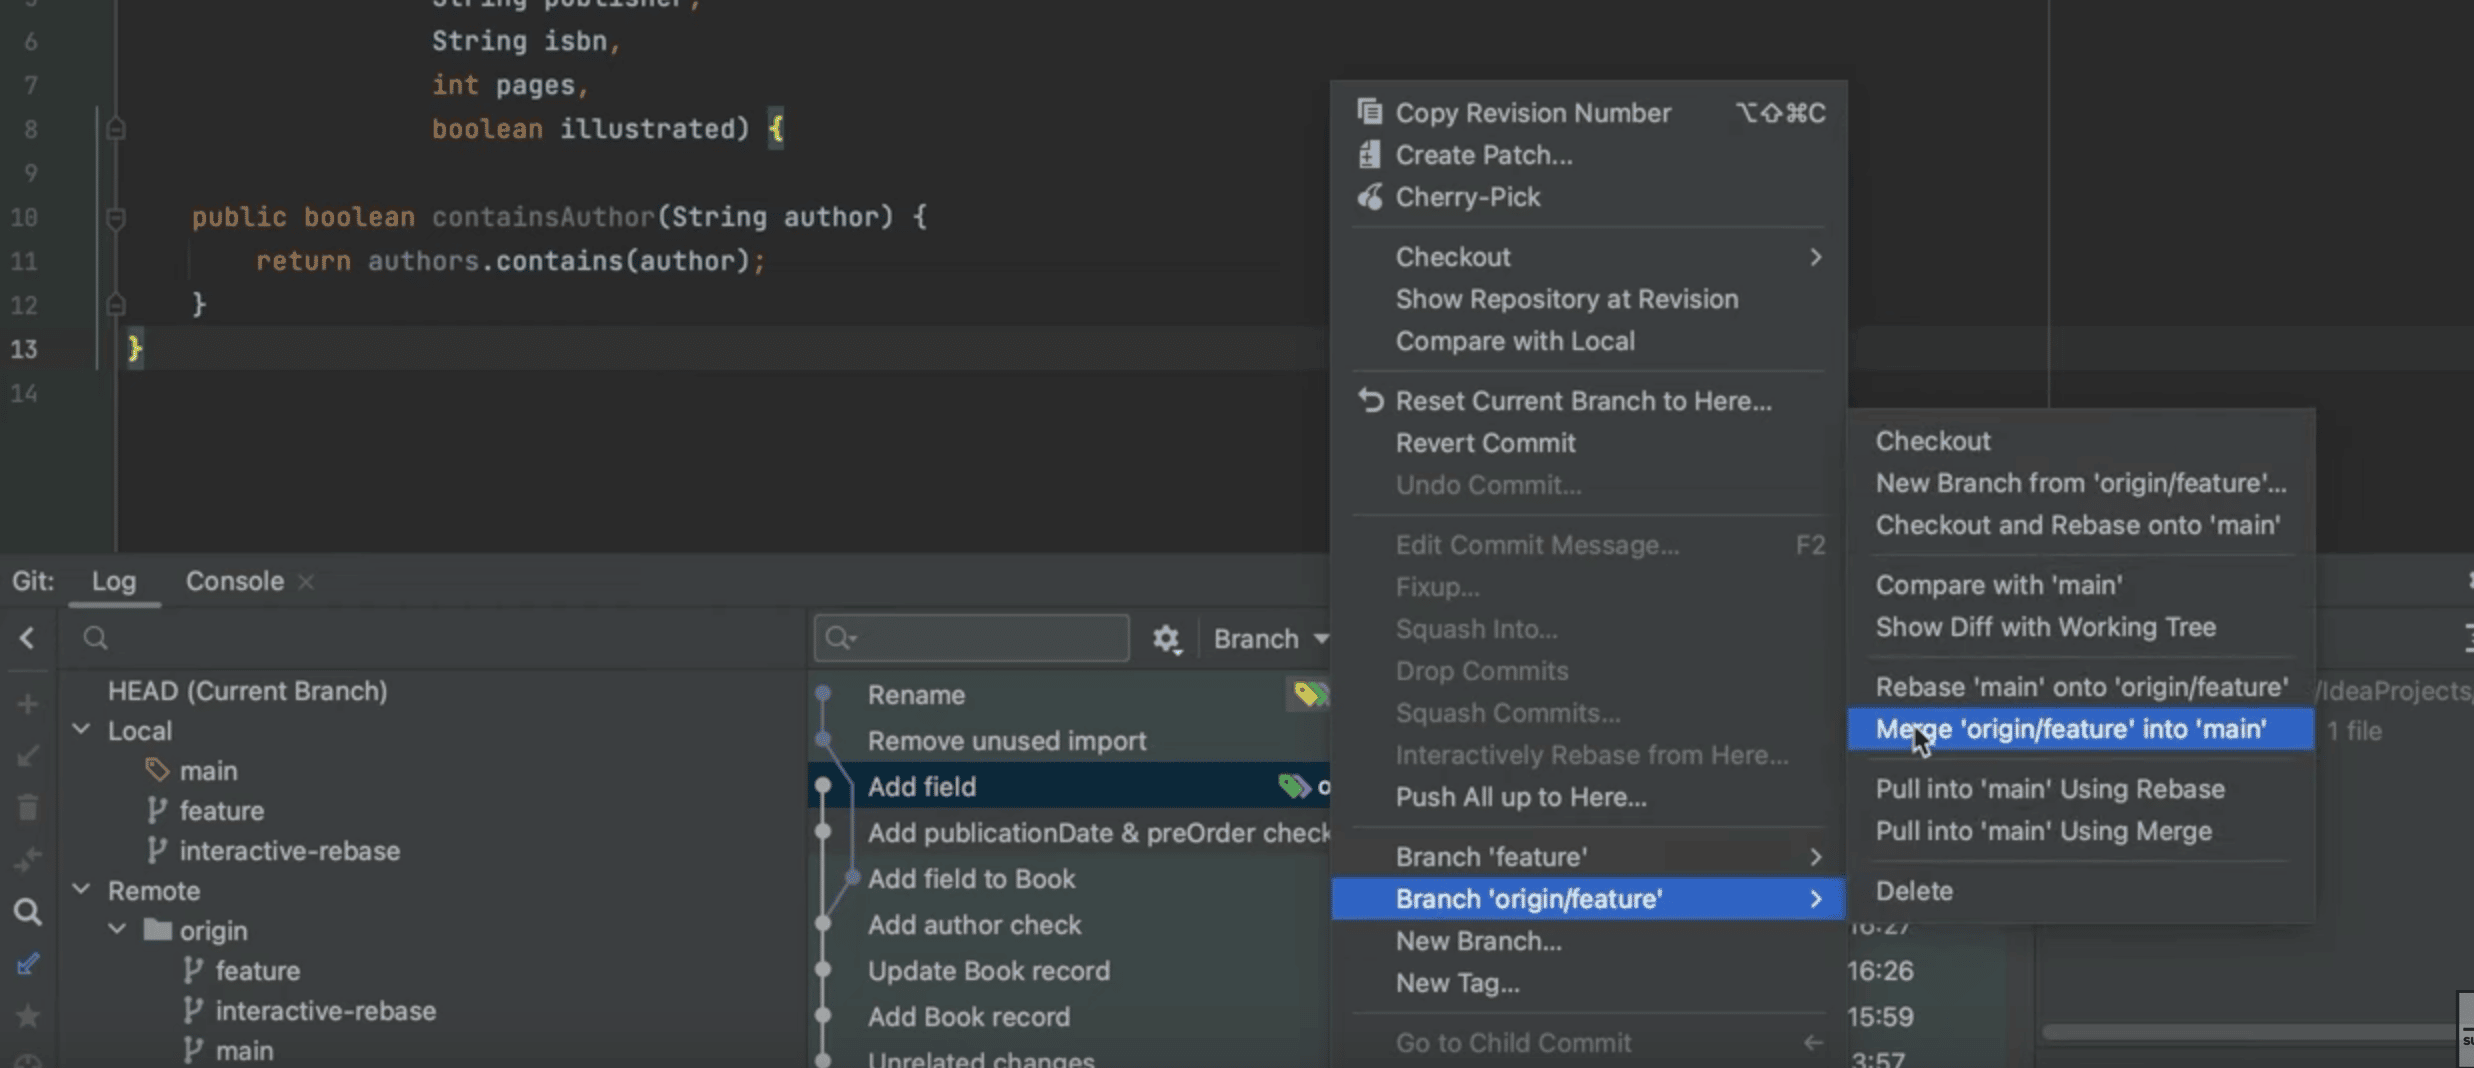
When you press ⏎ (macOS), or Enter (Windows/Linux), IntelliJ IDEA opens a popup telling us there are merge conflicts.
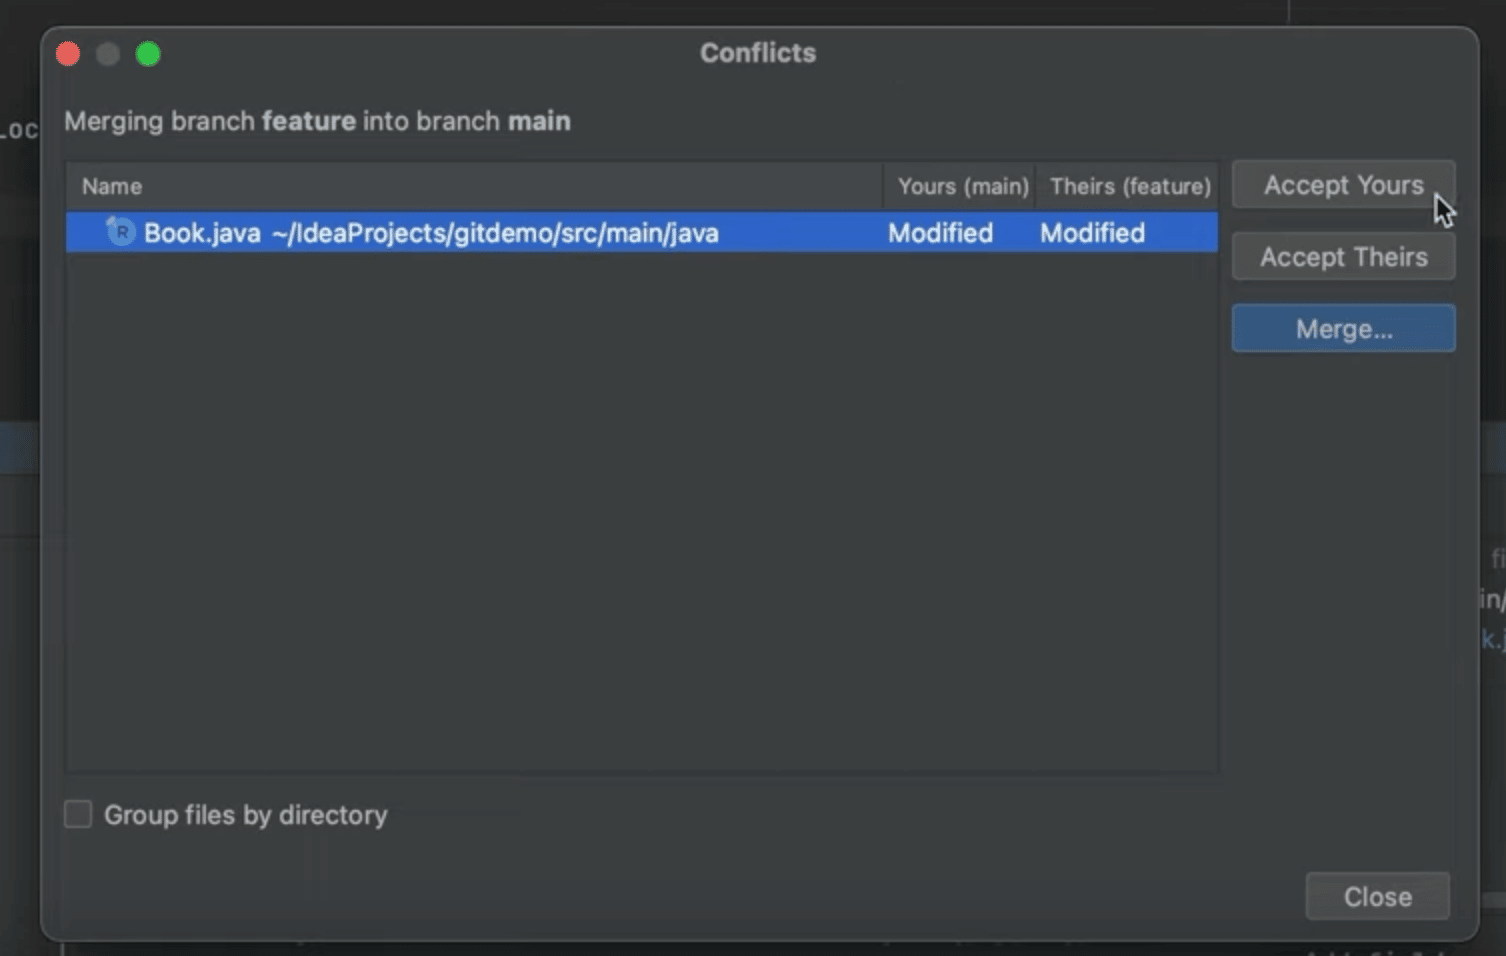
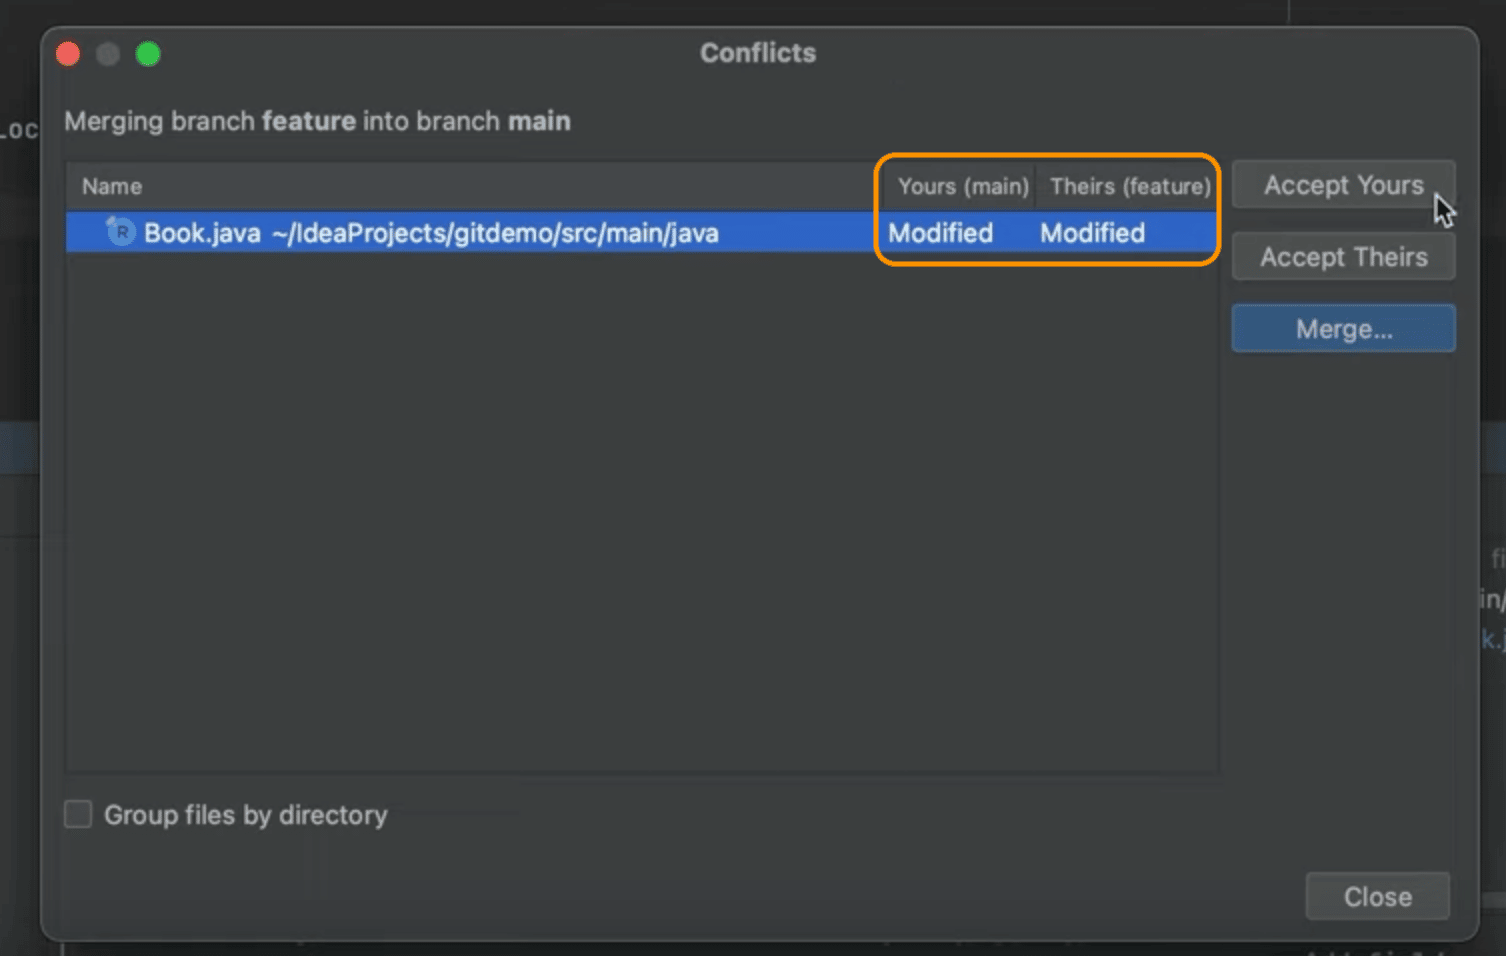
The Conflicts dialog offers several options:
- Accept yours will apply the changes on the current branch (main) and discard the changes from the other branch (feature).
- Accept theirs will apply the changes from the other branch (feature) and discard the changes from current branch (main).
- Merge will open up the Merge dialog. We will focus on this option in this tutorial.
If you are unsure about which is "yours" and which is "theirs", note that these are also visible in the table to the left of the buttons and the branch names are mentioned in brackets.
You see that both branches have been modified. Choosing either Accept yours or Accept theirs in this case would discard the changes made on the feature or main branch respectively.
Only choose those options if you want to discard those changes.
If you click Close in the Conflicts dialog, IntelliJ IDEA tells you that the feature was Merged with Conflict and you can click Resolve to reopen the Conflicts dialog.
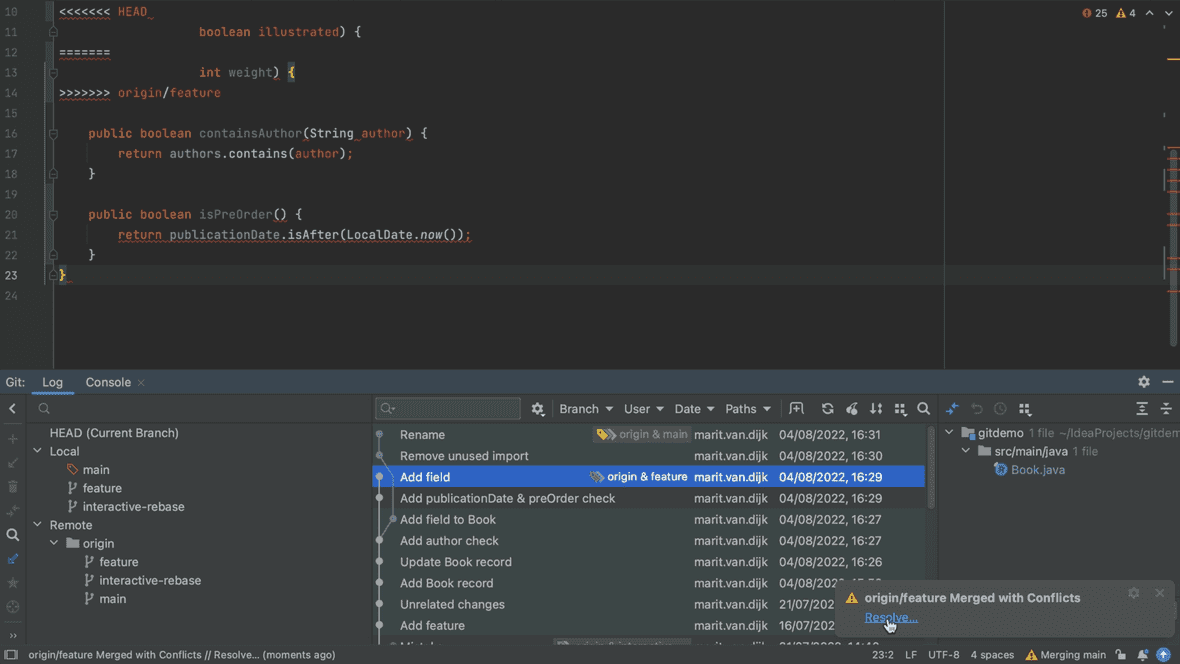
Alternatively, if you accidentally click Close, a Merge Conflicts node will appear in the Local Changes view too. You can open the Commit tool window using ⌘0 (macOS), or Alt+0 (Windows/Linux) and open the file.
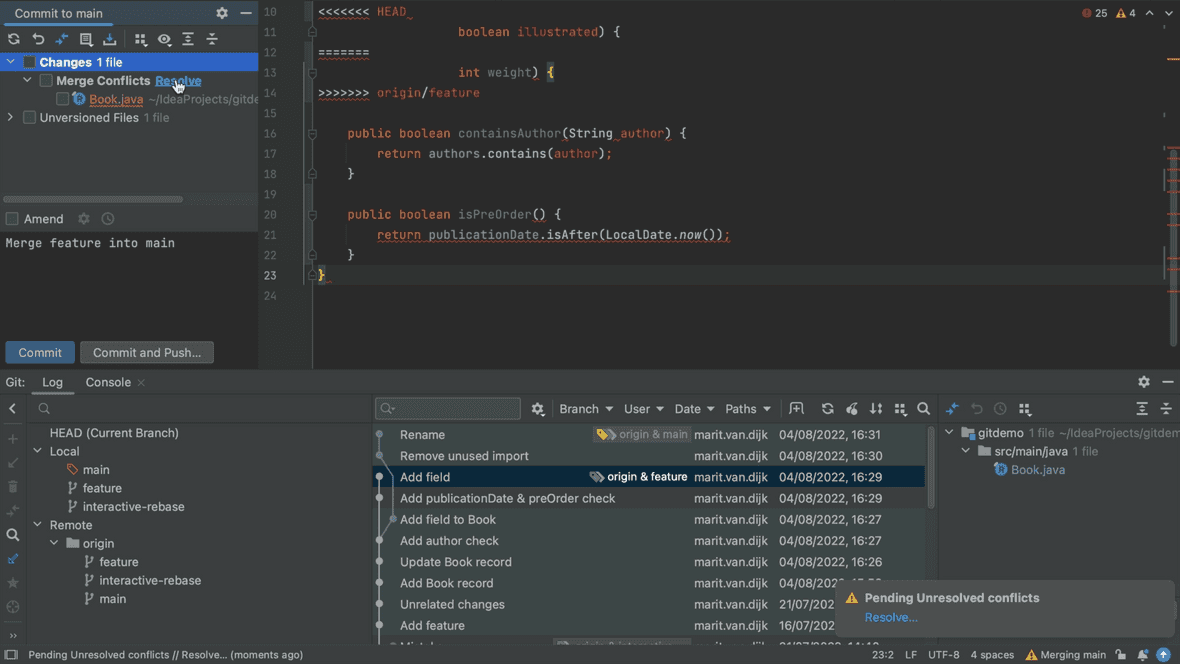
Click the arrow to see the Merge Conflicts node. You can click Resolve to reopen the Conflicts dialog.
Resolving Merges
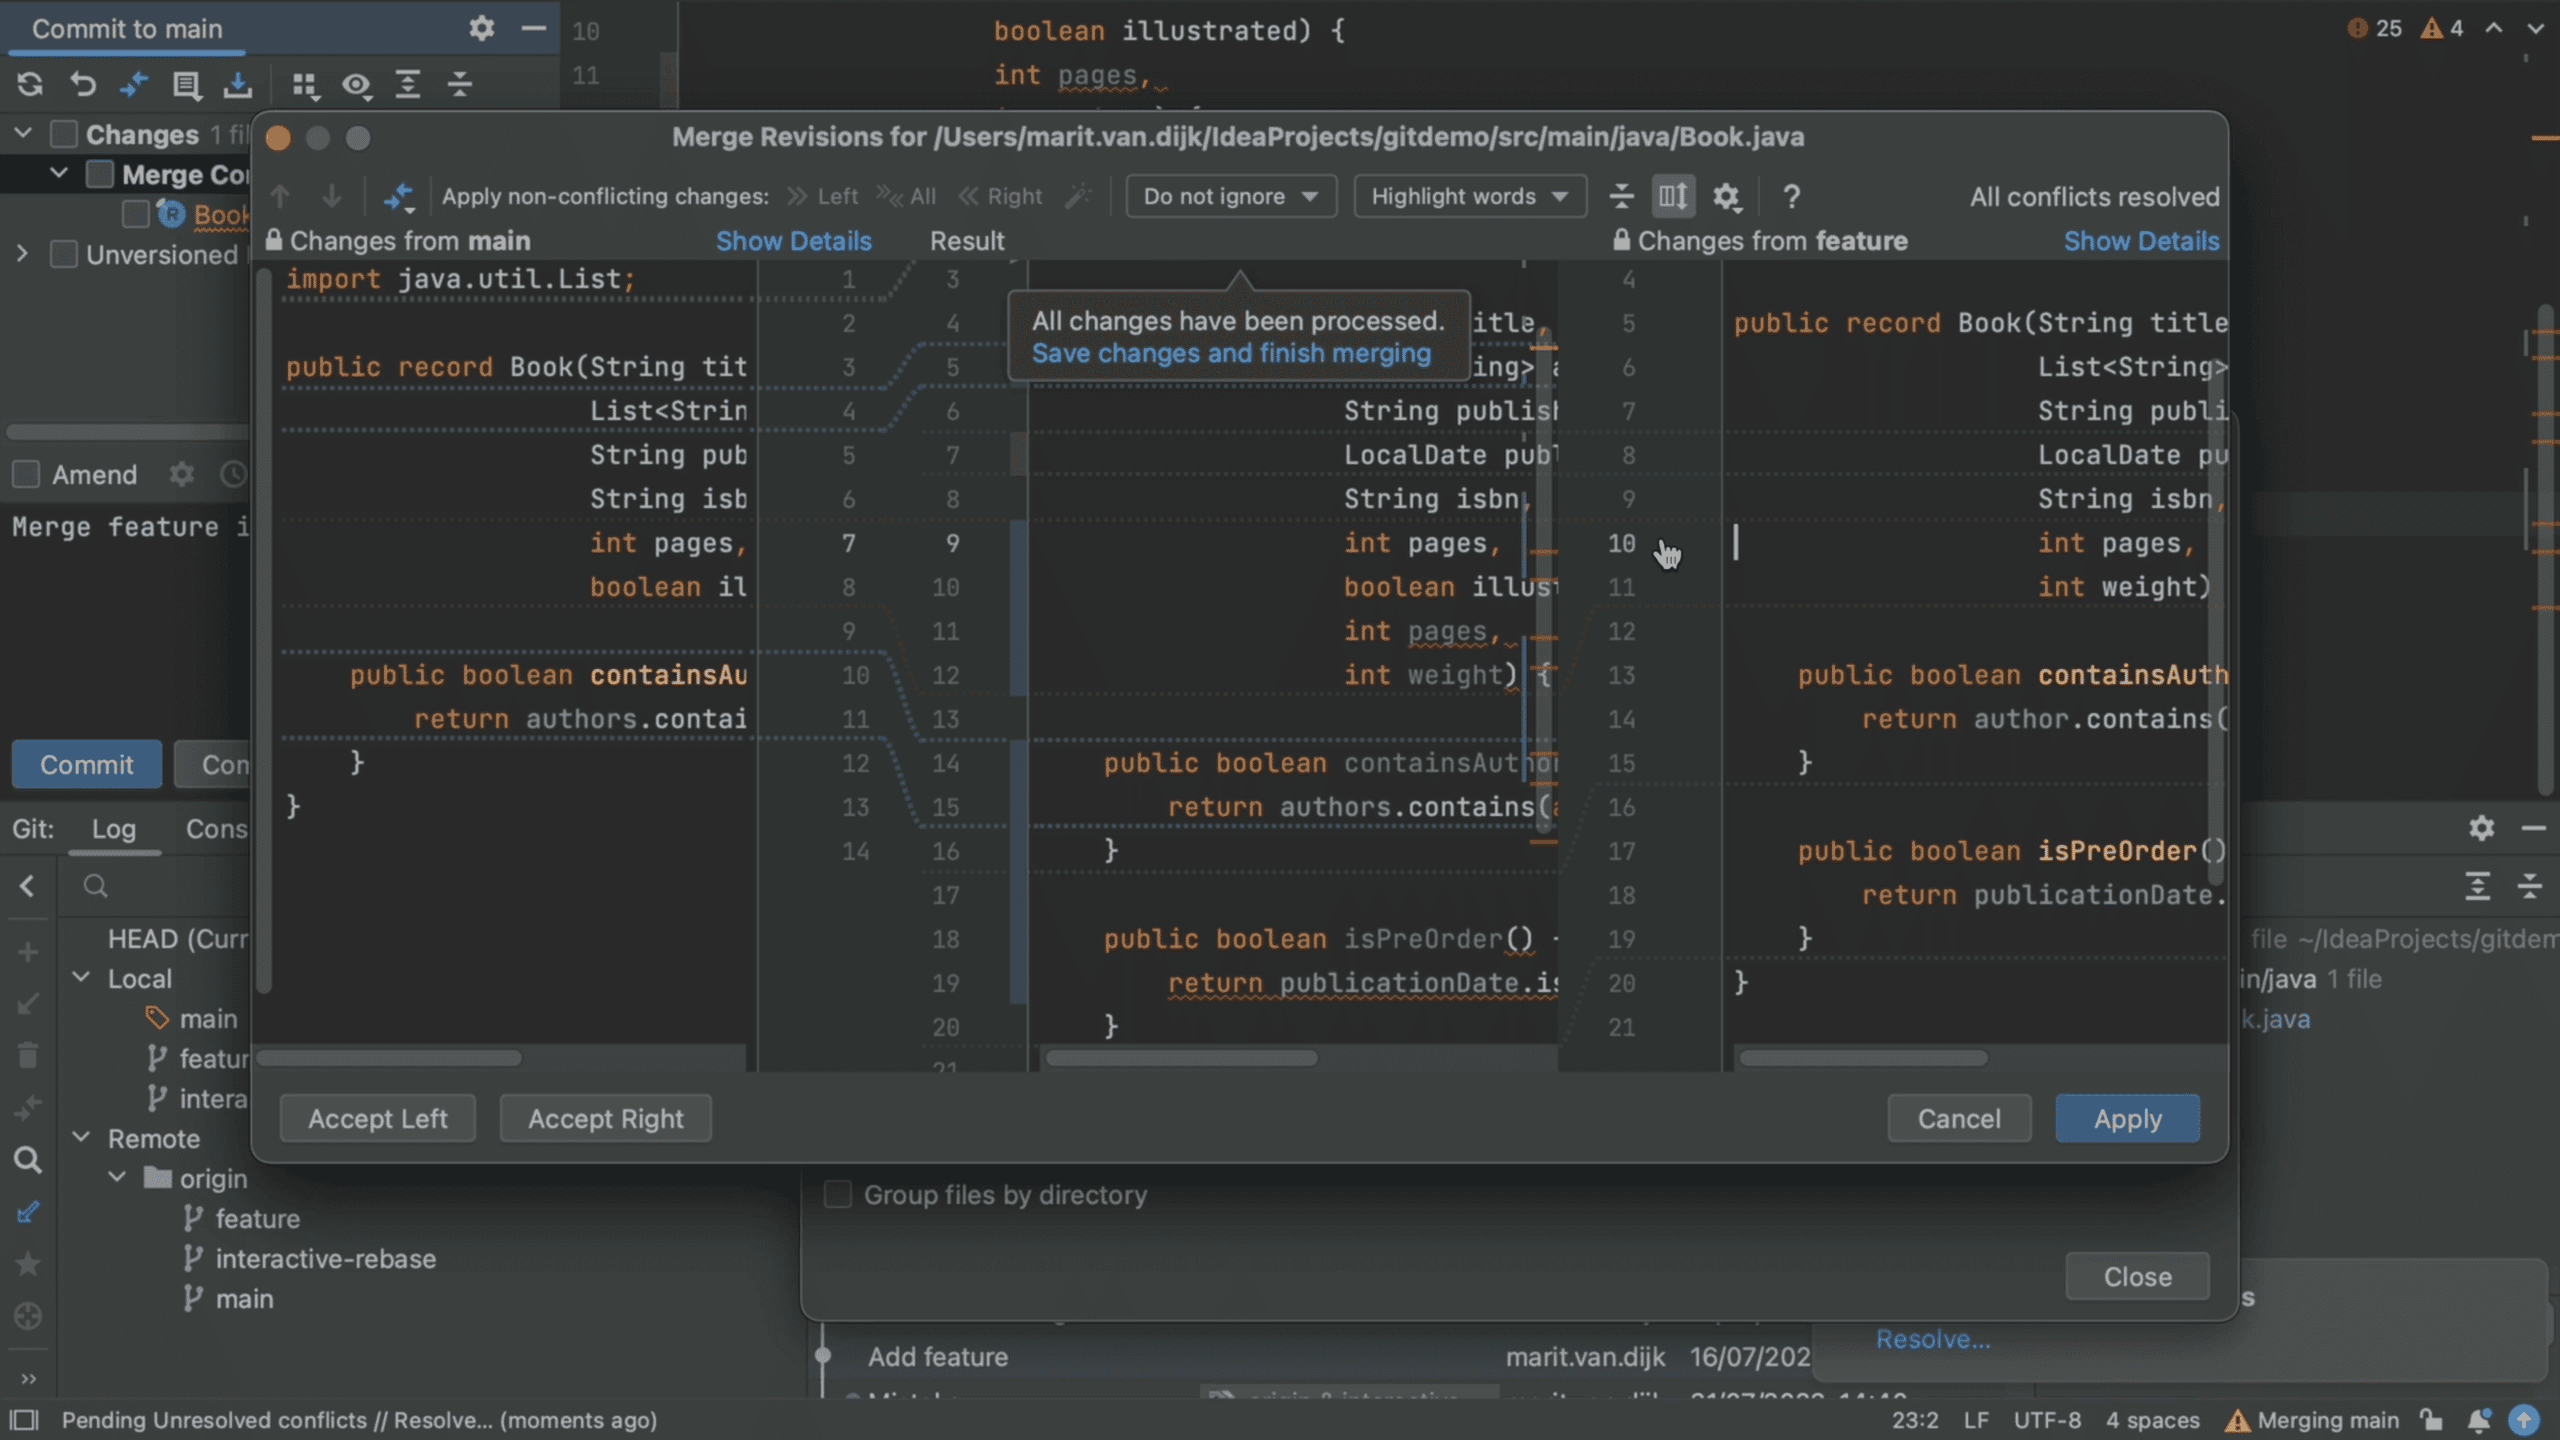
Back on the Conflicts dialog, there are changes on both branches that we want to keep so you can click Merge to open the Merge Revisions dialog.
Here you can see the changes to our current branch (main) on the left, and the changes that we want to merge from the feature branch on the right. There is a fully-functional editor in the middle.
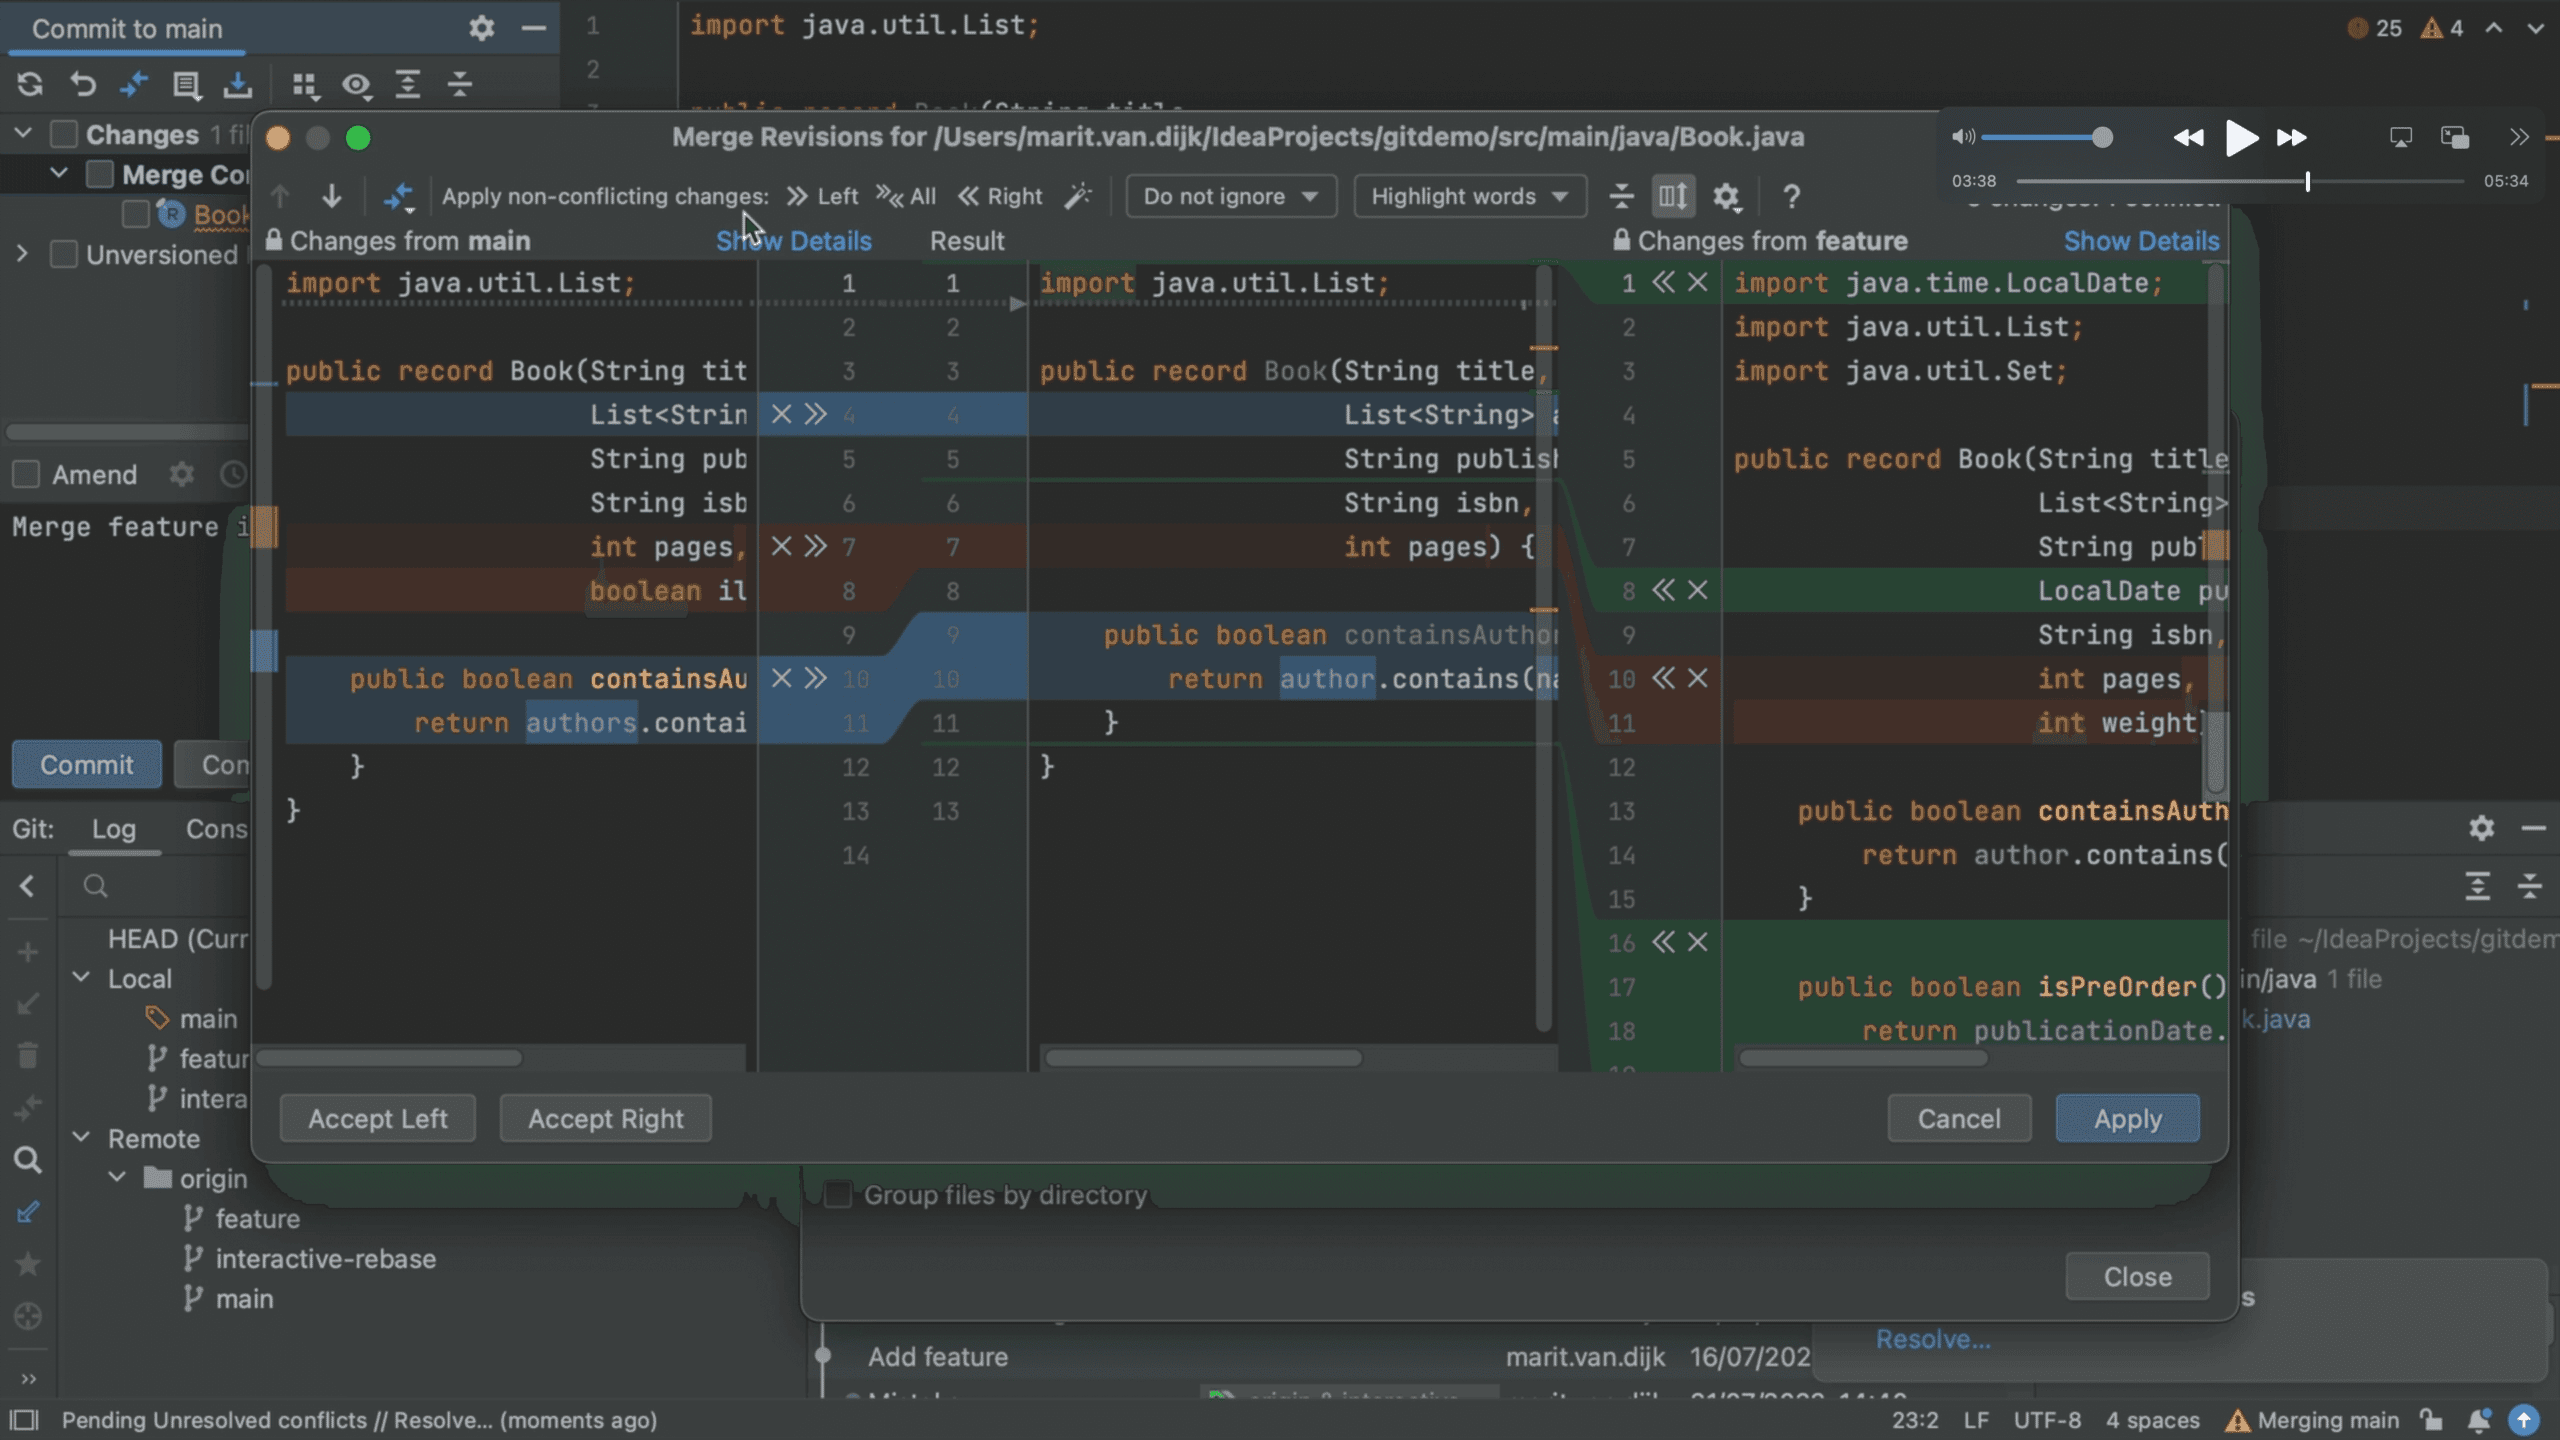
There are several changes:
- a removed line is shown in grey
- lines that were added are shown in green
- lines that were changed are shown in blue; the changes made are highlighted
- conflicts are shown in red
For each change you can decide to ignore it by clicking the x or to accept it by clicking the arrows.
You can use ⌘Z (macOS), or Ctrl+Z on (Windows/Linux) to undo an action here if required.
Depending on the number of changes, accepting or ignoring each change individual change might take some time.
You can merge all non-conflicting changes automatically with Apply All Non-Conflicting Changes.
Alternatively, you can use Apply Non-Conflicting Changes from the Left Side or Apply Non-Conflicting Changes from the Right Side to merge non-conflicting changes from the left/right parts of the dialog respectively.
When you have accepted all the changes, the Left/All/Right buttons are unavailable as there are no more non-conflicting changes to apply. There is just one remaining conflict.
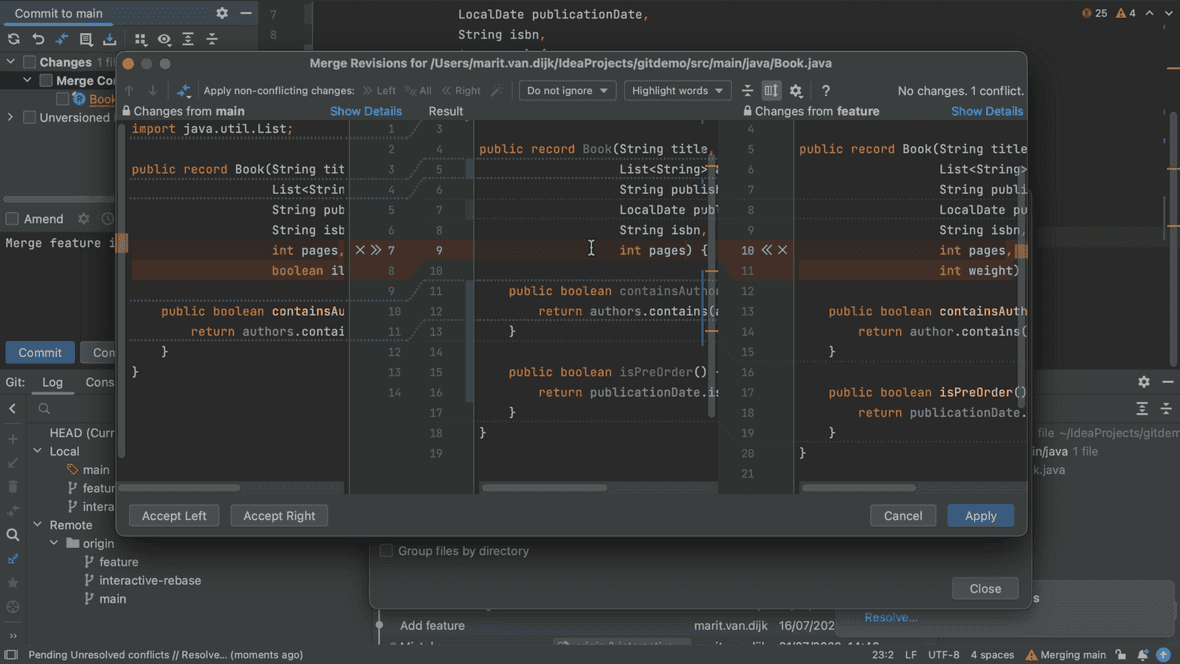
Another way of resolving conflicts is to right-click on the highlighted conflict in the central pane and use the commands from the context menu.
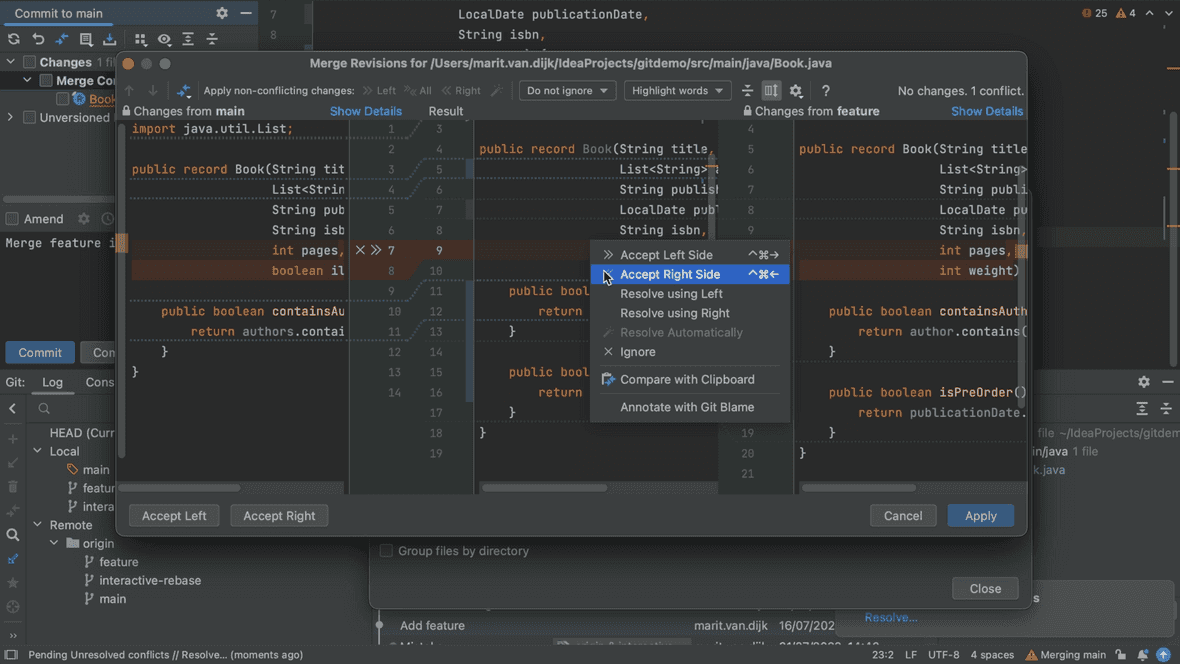
When you select Accept the left side or Accept the right side, the change from the selected side will be applied and the change on the other side will remain open.
When you choose Resolve using Left or Resolve using Right, the changes from either the left or right respectively will be applied and the changes from the other side will be ignored. In this example, lets combine the changes from both sides, so we will choose to accept them both.
At this point, IntelliJ IDEA has concluded that all changes have been processed, so we can click Apply to save the changes and finish merging which will close this dialog.
However, as we can see from the error highlighting this doesn't look quite right. The reason here is that both branches have added fields to this record, so we need to fix the brackets.
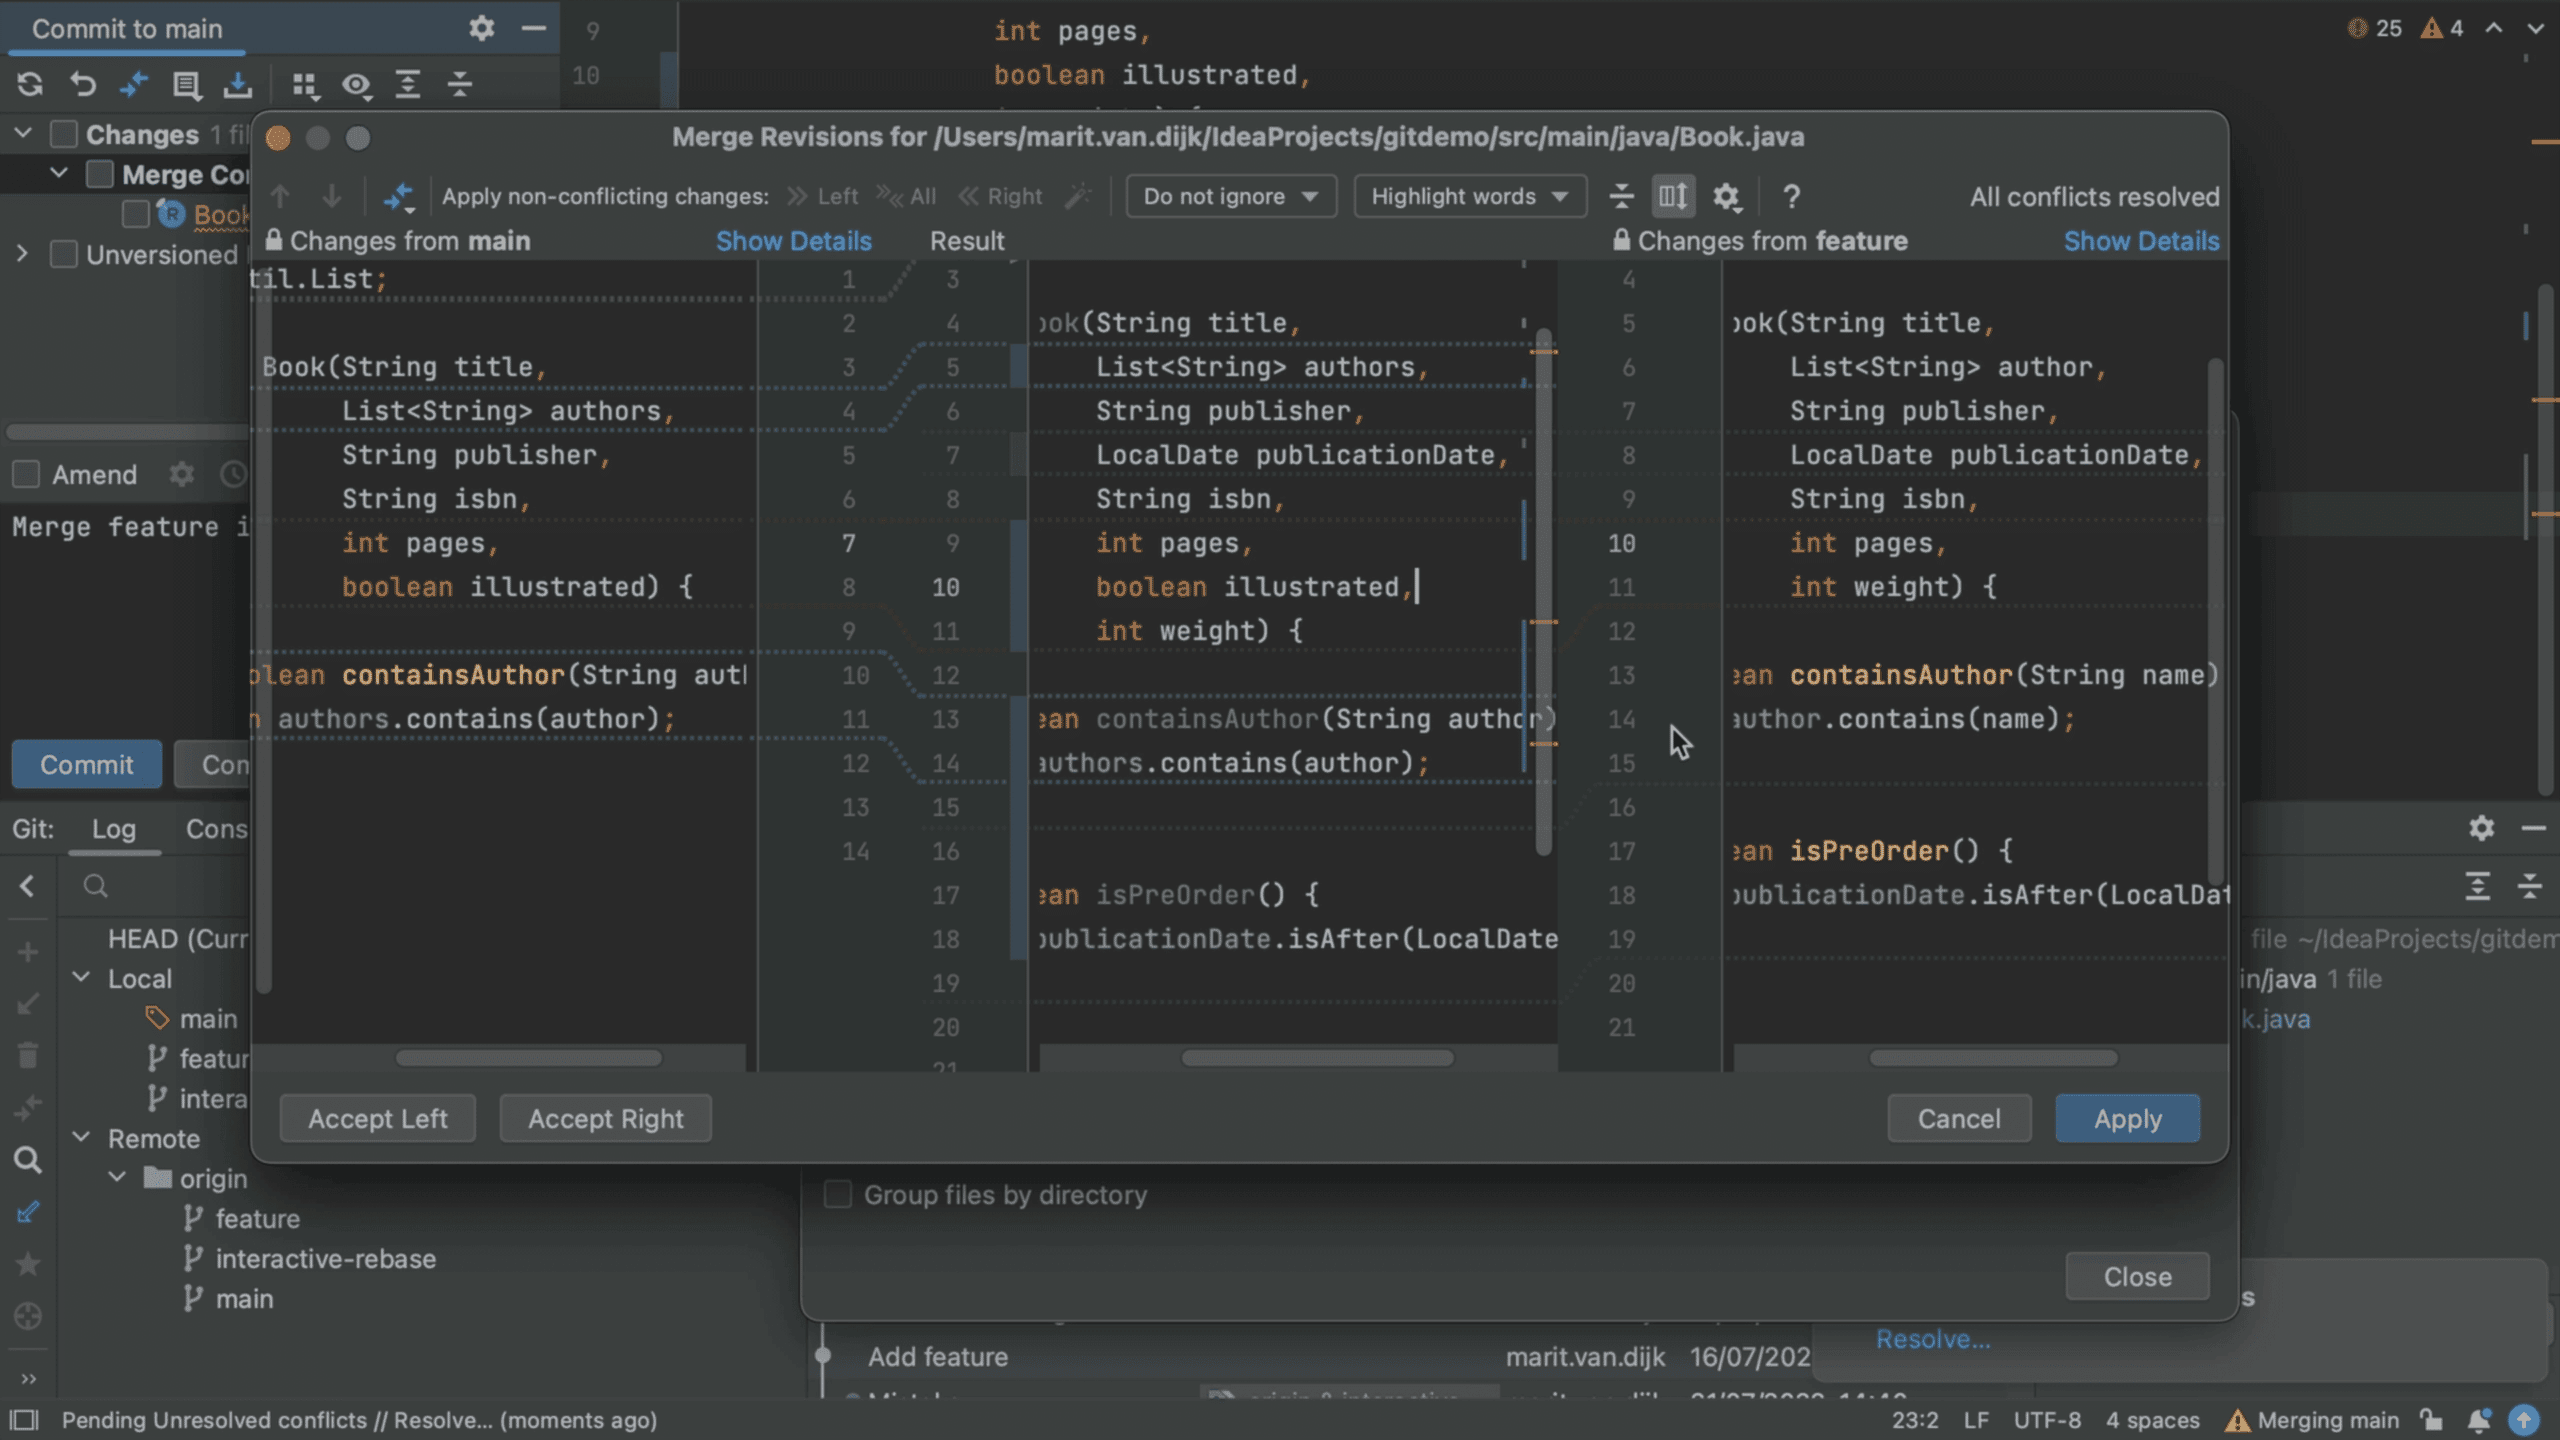
The middle pane is a fully-functional editor, so you can edit it here.
Once you've done that, you can click Apply to finish resolving your merge conflicts!
- In depth video: IntelliJ IDEA YouTube channel - Resolving Git Merge Conflicts
- In tutorial format: IntelliJ IDEA Guide - Resolving Git Merge Conflicts
- September 21, 2022
- 4 min read
Helen is a Java Developer Advocate at JetBrains. She has over 20 years’ experience in the software industry which has been gained in a variety of roles including developer, technical writer, product owner, and advocacy.


Comments (4)
Cherry-pick: Move a commit to a different branch - Marit van Dijk
3 years ago[…] (blog) Foojai.io: Resolving Git Merge Conflicts in IntelliJ IDEA […]
Cherry pick a commit to a different branch - Marit van Dijk
3 years ago[…] (blog) Foojai.io: Resolving Git Merge Conflicts in IntelliJ IDEA […]
The Art of Cherry Picking - Marit van Dijk
3 years ago[…] (blog) Foojai.io: Resolving Git Merge Conflicts in IntelliJ IDEA […]
Cherry Picking Git Commits To A Different Branch - Marit van Dijk
2 years ago[…] (blog) Foojai.io: Resolving Git Merge Conflicts in IntelliJ IDEA […]