


Using Bookmarks in IntelliJ IDEA
- March 07, 2023
- 6 min read
In this tutorial, we're going to take a look at using bookmarks in IntelliJ IDEA.
Bookmarks can come in handy while navigating a codebase, when you see something interesting that you want to come back to later.
You could use Recent Files (⌘E on macOS, or Control+E on Windows/Linux) to find it, but then you have to remember which file it was. This is where bookmarks come in handy.
Let's take a look!
Add anonymous bookmarks
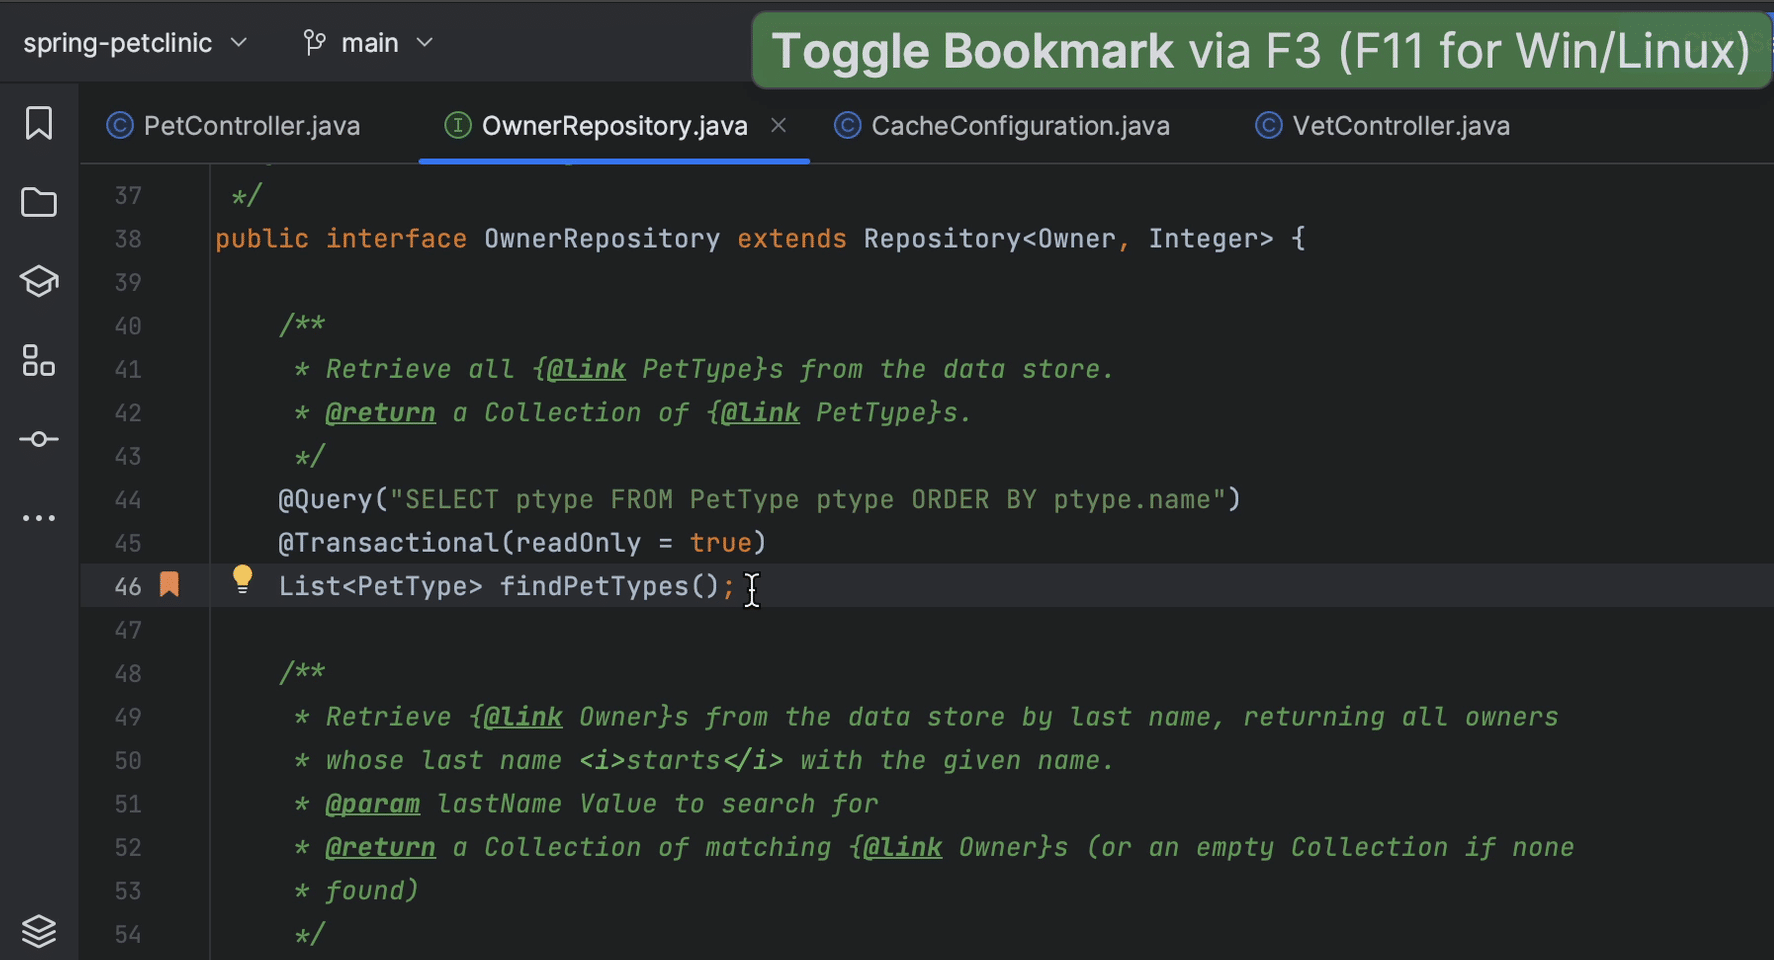
We can bookmark a line by pressing F3 (on macOS) or F11 (on Windows/Linux).
This shortcut creates an anonymous line bookmark, marked with a Bookmark icon.
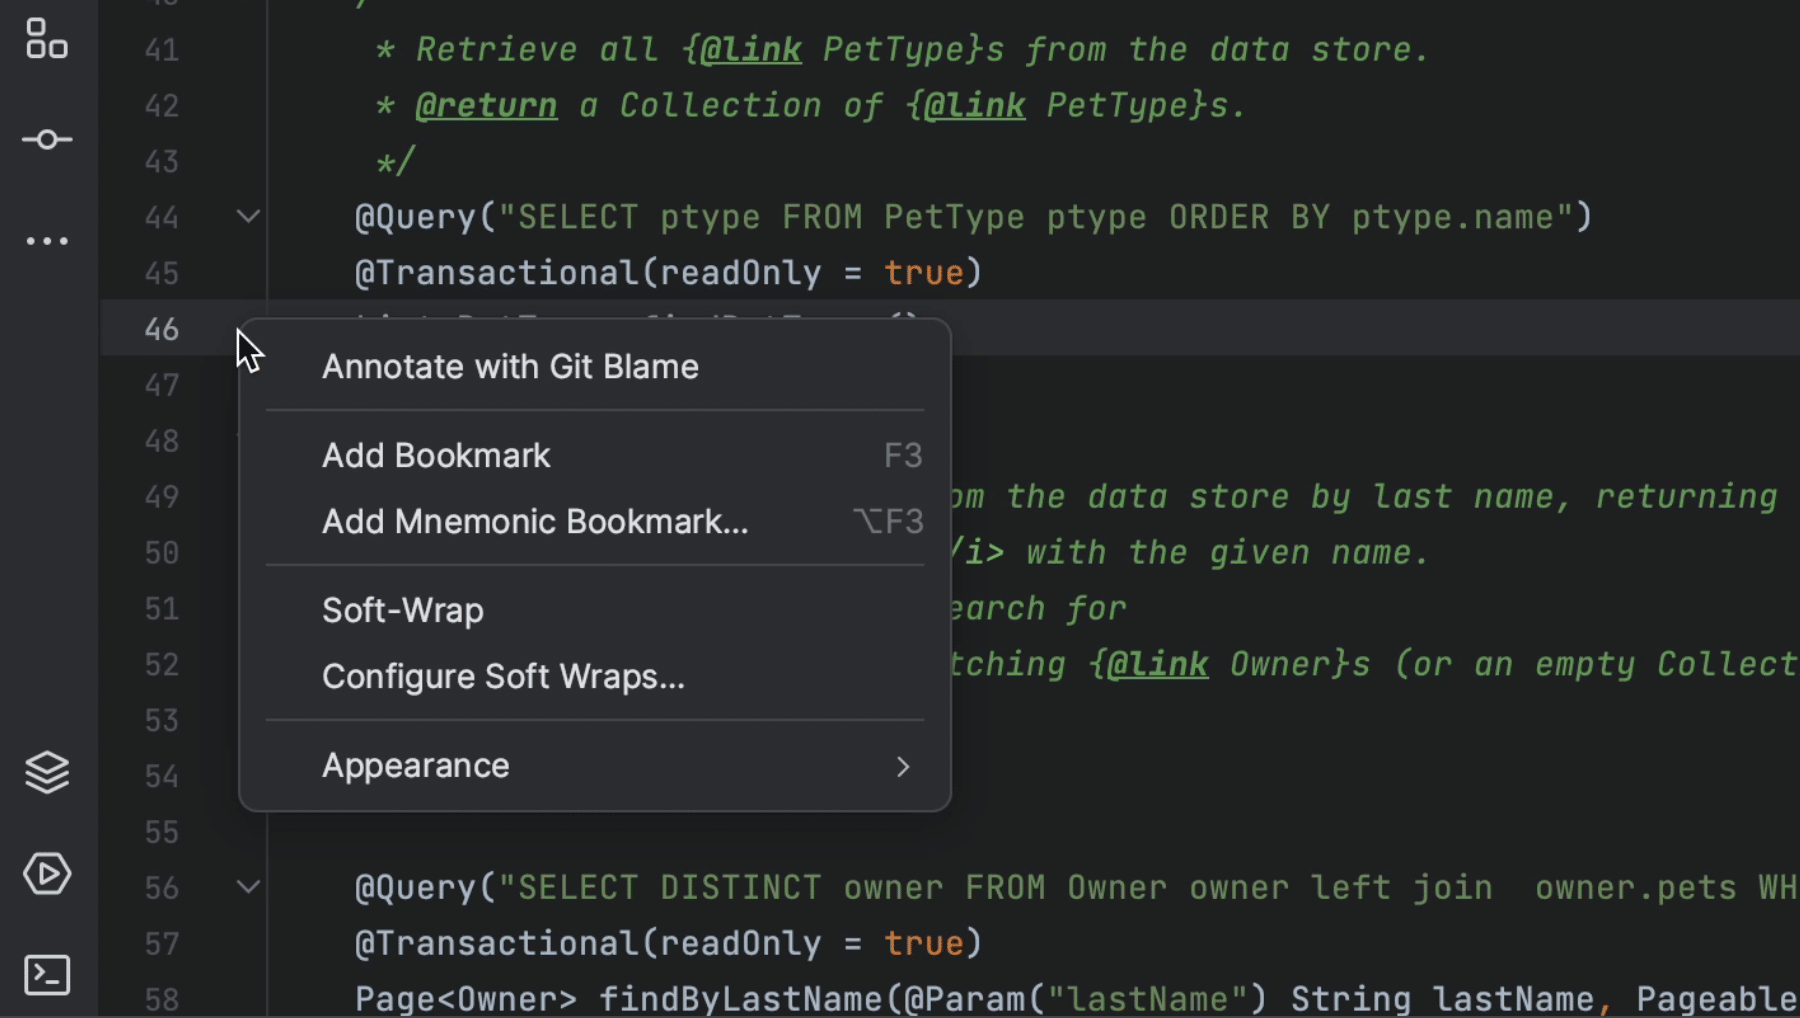
If we don't remember the shortcut, we can right-click the gutter next to the line of code we want to bookmark and select Add Bookmark.
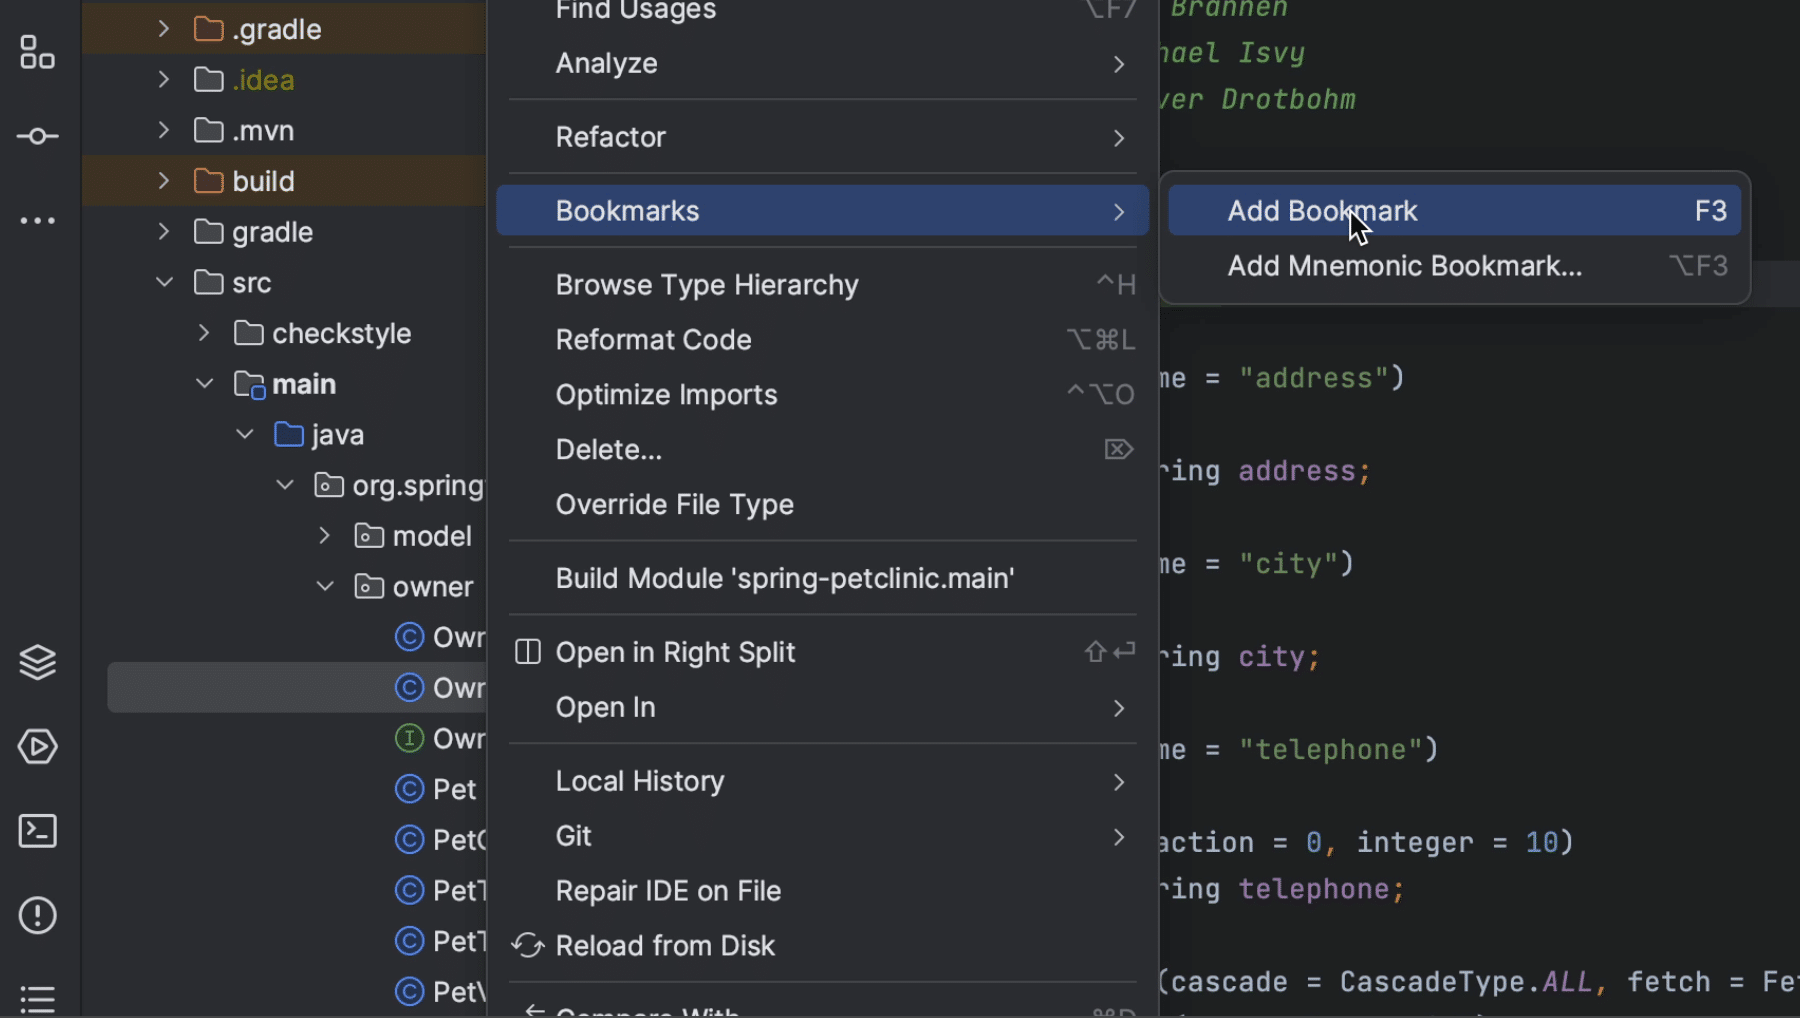
We can also bookmark files, packages, folders, and modules. We can open the Project Tool Window (⌘1 on macOS, or Alt+1 on Windows/Linux) and add an anonymous bookmark.
We can use the shortcut (F3 on macOS, or F11 on Windows/Linux) or we can also right-click the item we want to bookmark, and select Bookmarks | Add Bookmark. Note that anonymous bookmarks don't have an identifier, and we can create as many anonymous bookmarks as we like.
Add mnemonic bookmarks
We can also create bookmarks that are assigned to a digit (0 to 9) or letter (A to Z). To add a mnemonic line bookmark, press ⌥ F3 (on macOS) or Control+F11 (on Windows/Linux) and press the digit or letter to use as an identifier for this bookmark.
Again, we can also or right-click the gutter next to the line of code that you want to bookmark and select Add Mnemonic Bookmark.
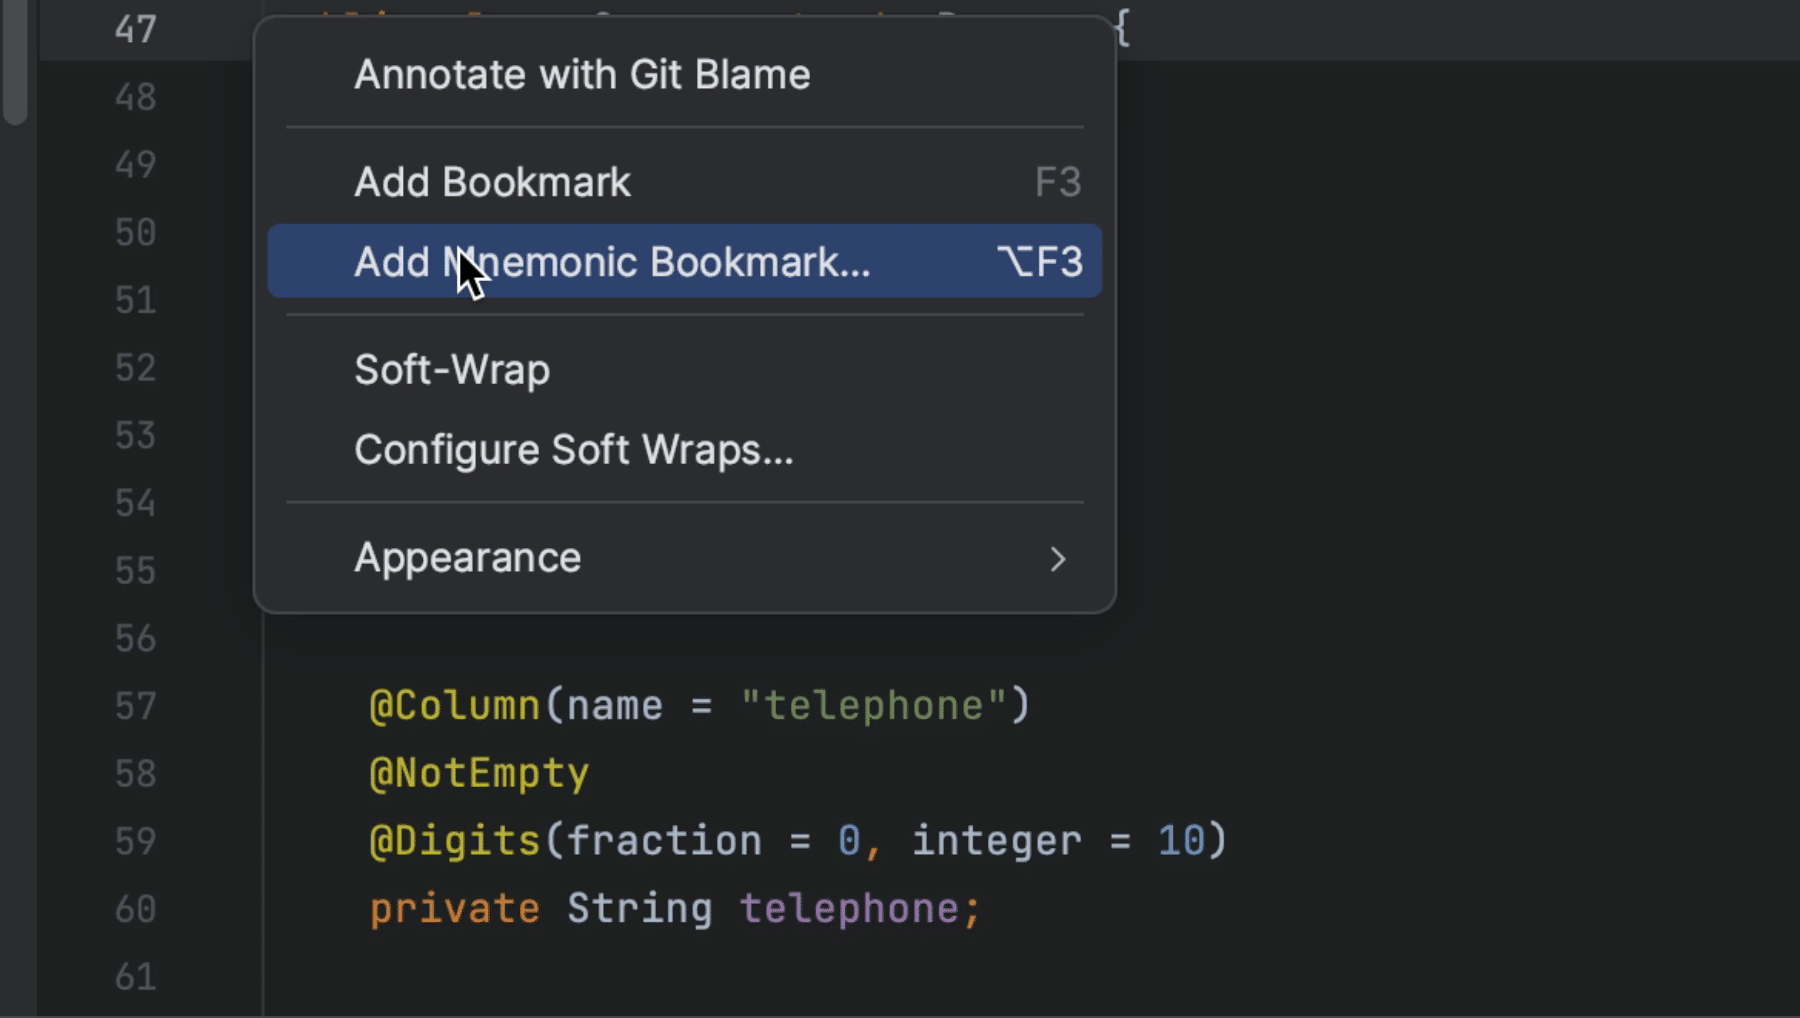
Optionally, we can provide a description for the new bookmark. We can double-click the digit or letter we want to assign.
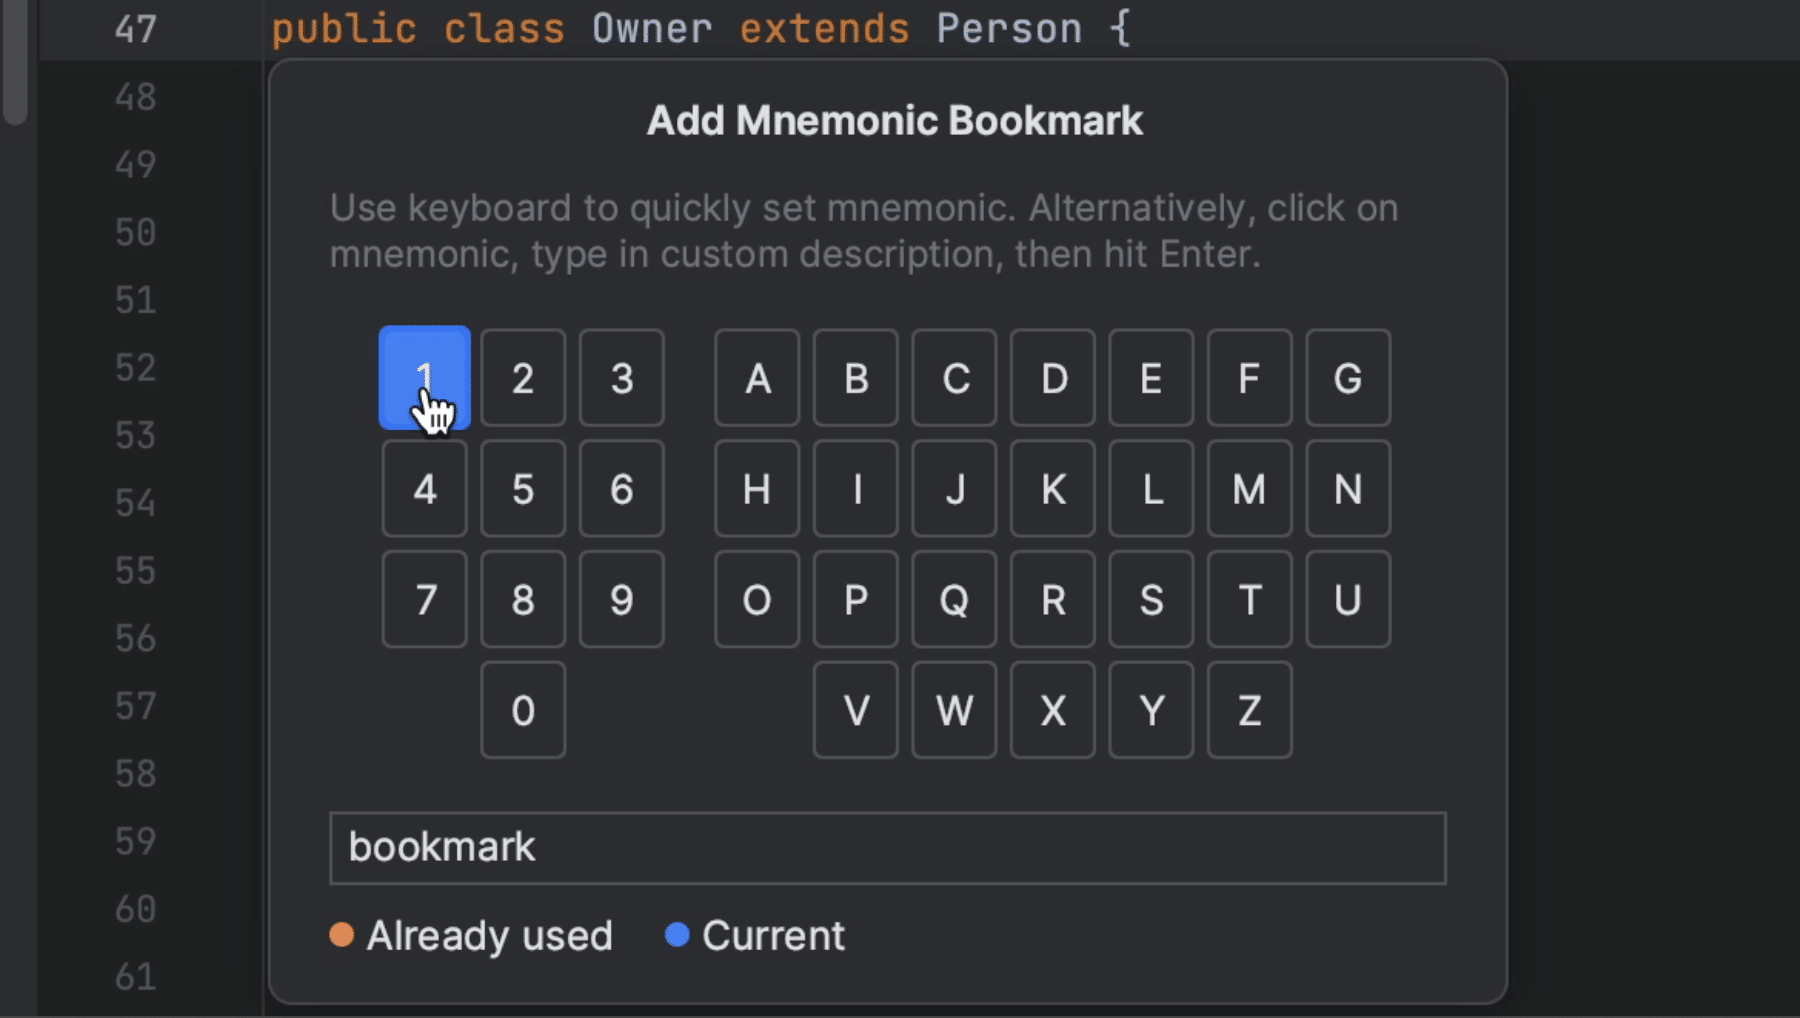
Lines marked with mnemonic bookmarks have the corresponding digit or letter icon in a frame.

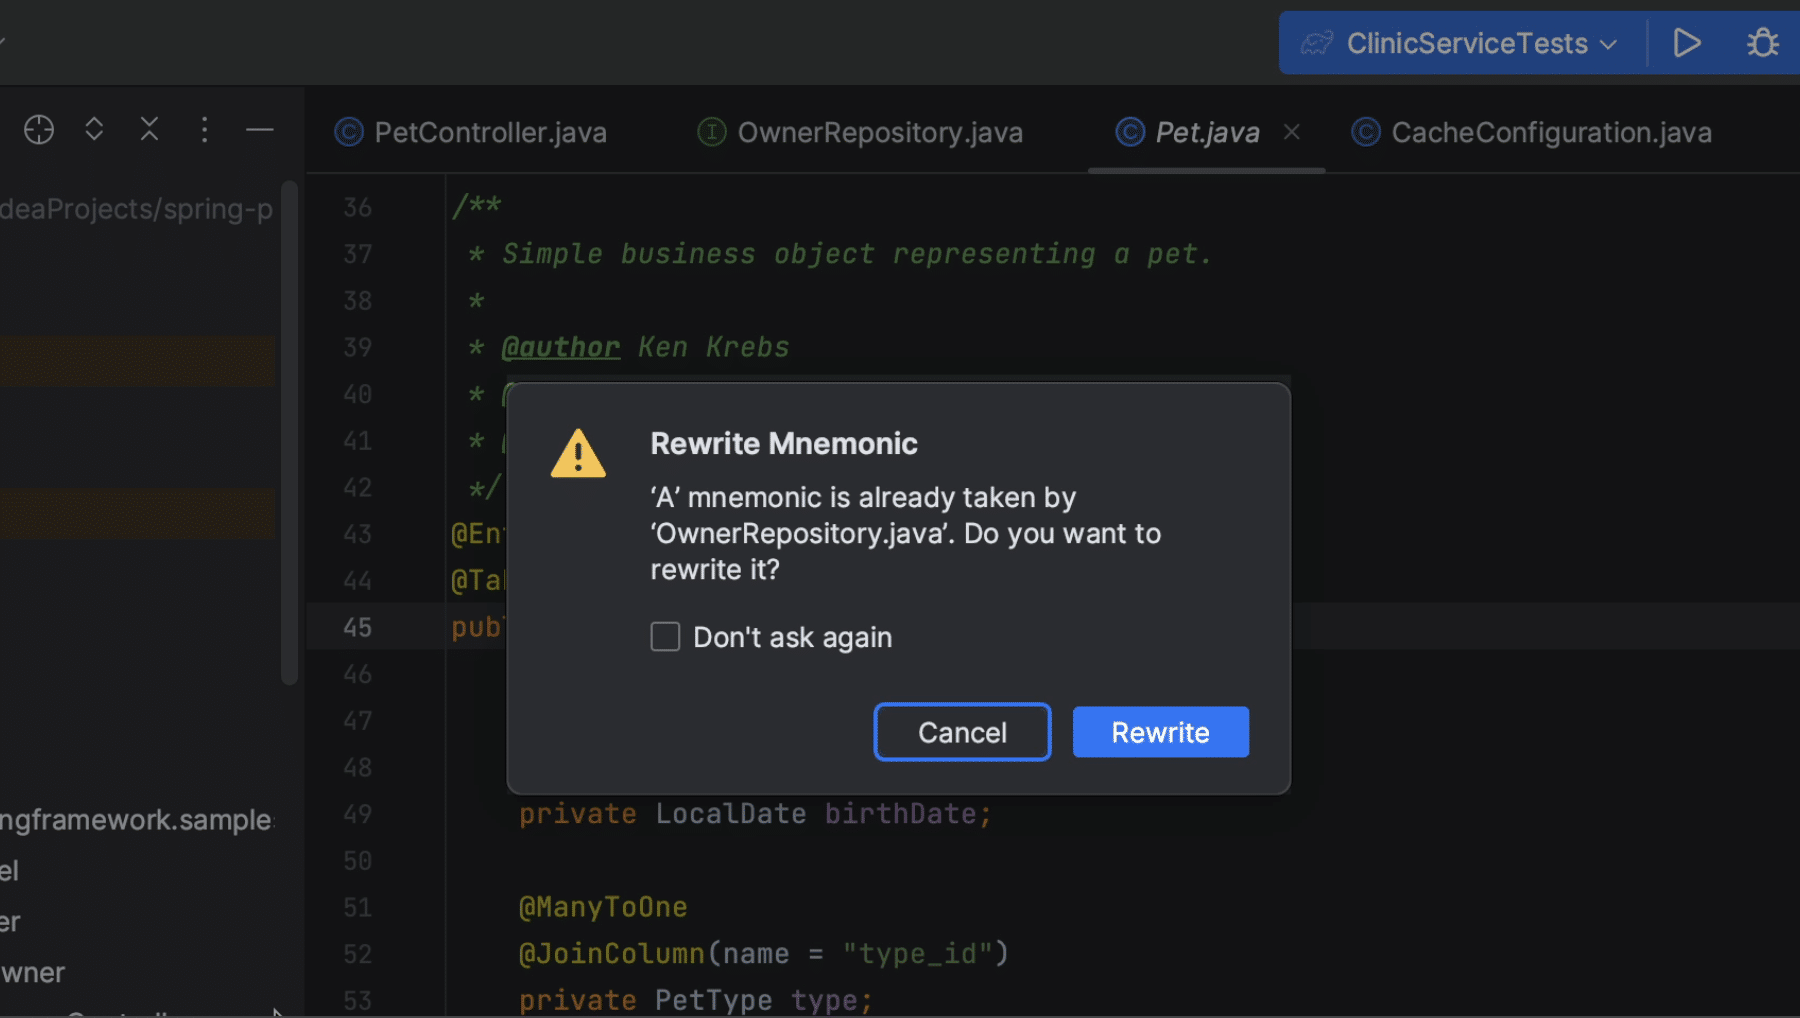
If the selected digit or letter is already in use, IntelliJ IDEA will ask you whether you want to overwrite an existing bookmark with the new one. When we select the Don't ask again option, the IDE will silently overwrite mnemonics.
Navigate to bookmarks
There are several options to navigate to the bookmarks we have created.
Show line bookmarks
To see all line bookmarks that we have in the code, we can open the Bookmarks popup by pressing ⌘ F3 (on macOS) or Shift+F11 (on Windows/Linux) or go to Edit | Bookmarks | Show Line Bookmarks.
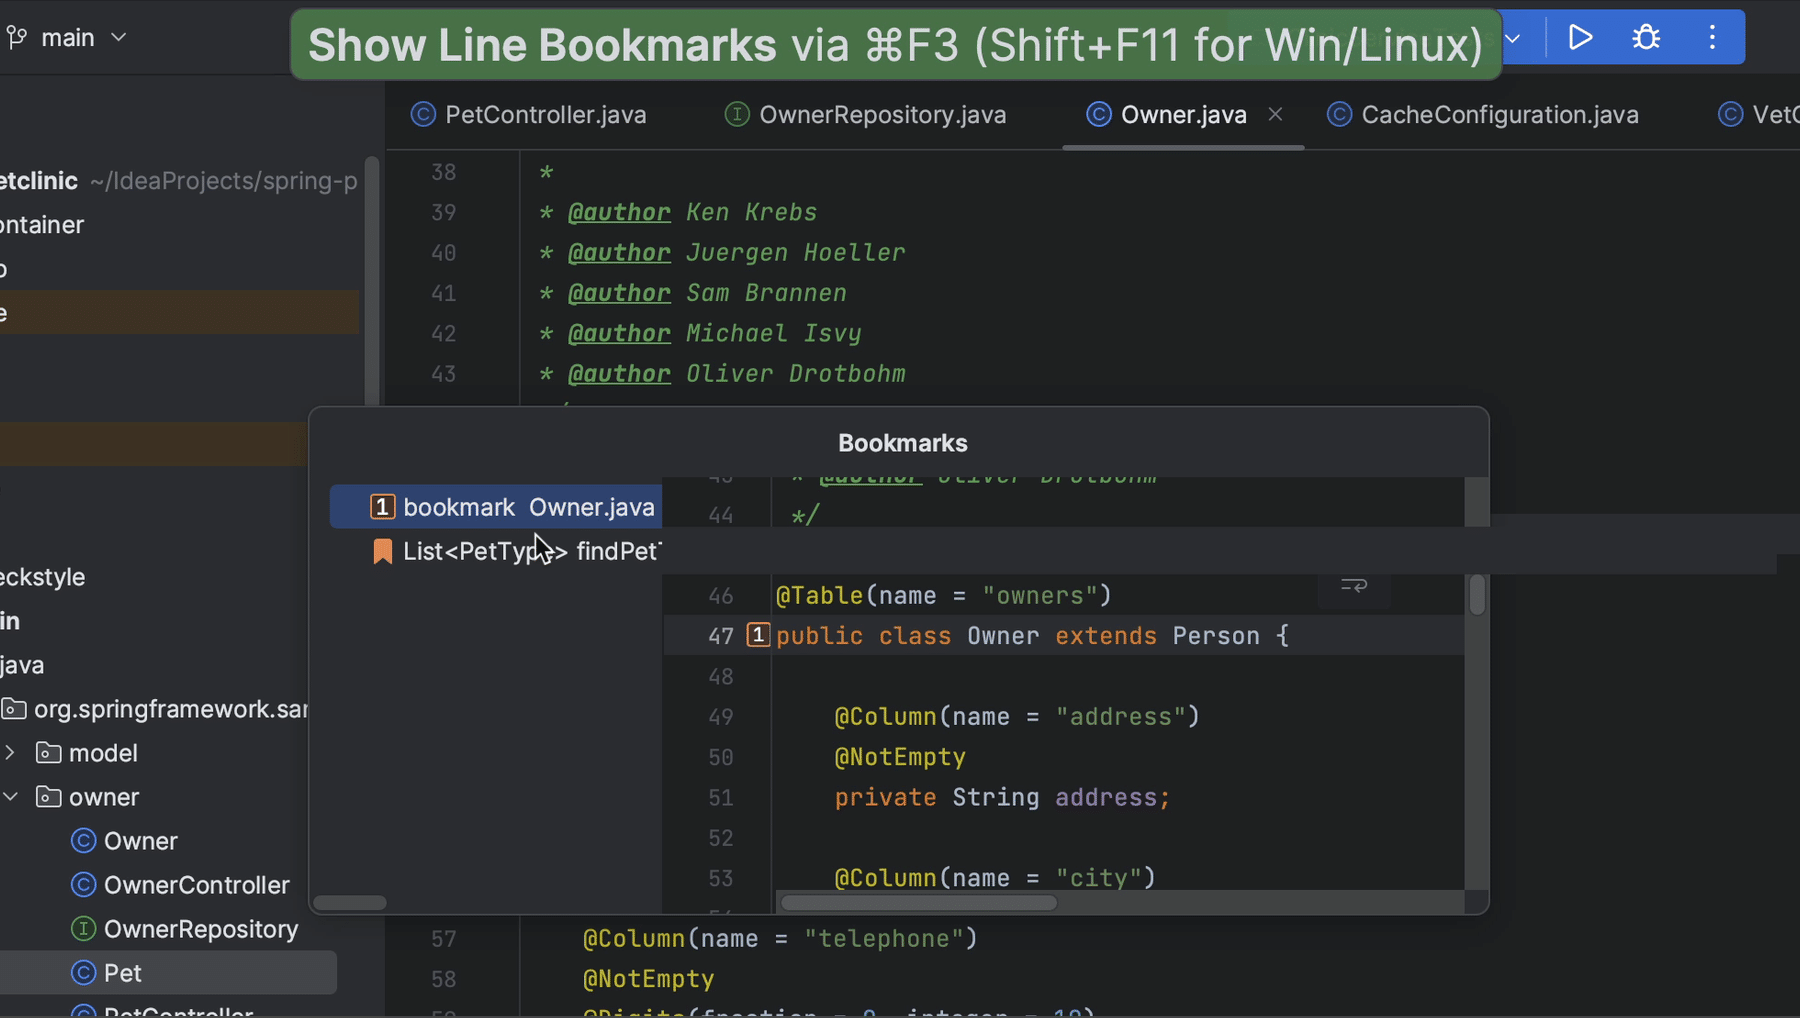
Notice that this list does not contain any project items like files or classes that we have bookmarked.
We can select the bookmark we want to navigate to, either with up and down arrows and pressing Return (on macOS) or Enter (on Windows/Linux), or by double-clicking it with our mouse. For mnemonic bookmarks, we can select the corresponding digit or letter.

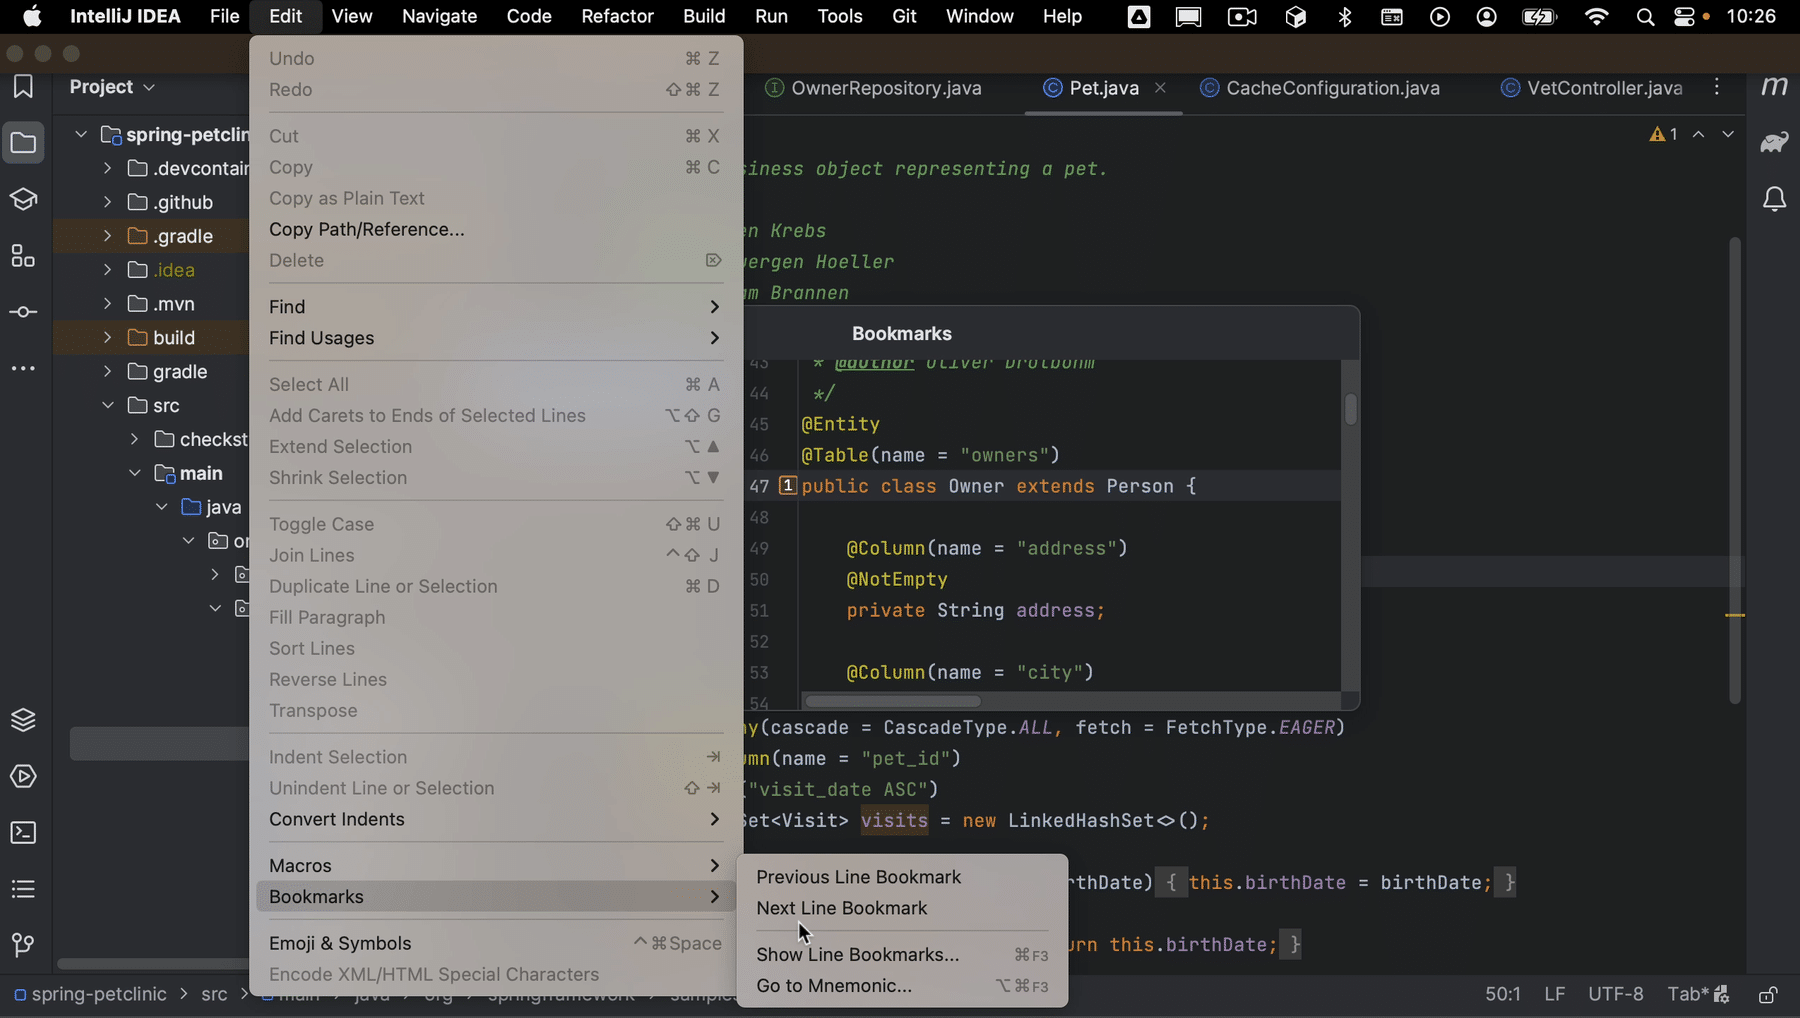
Jump to mnemonic bookmark
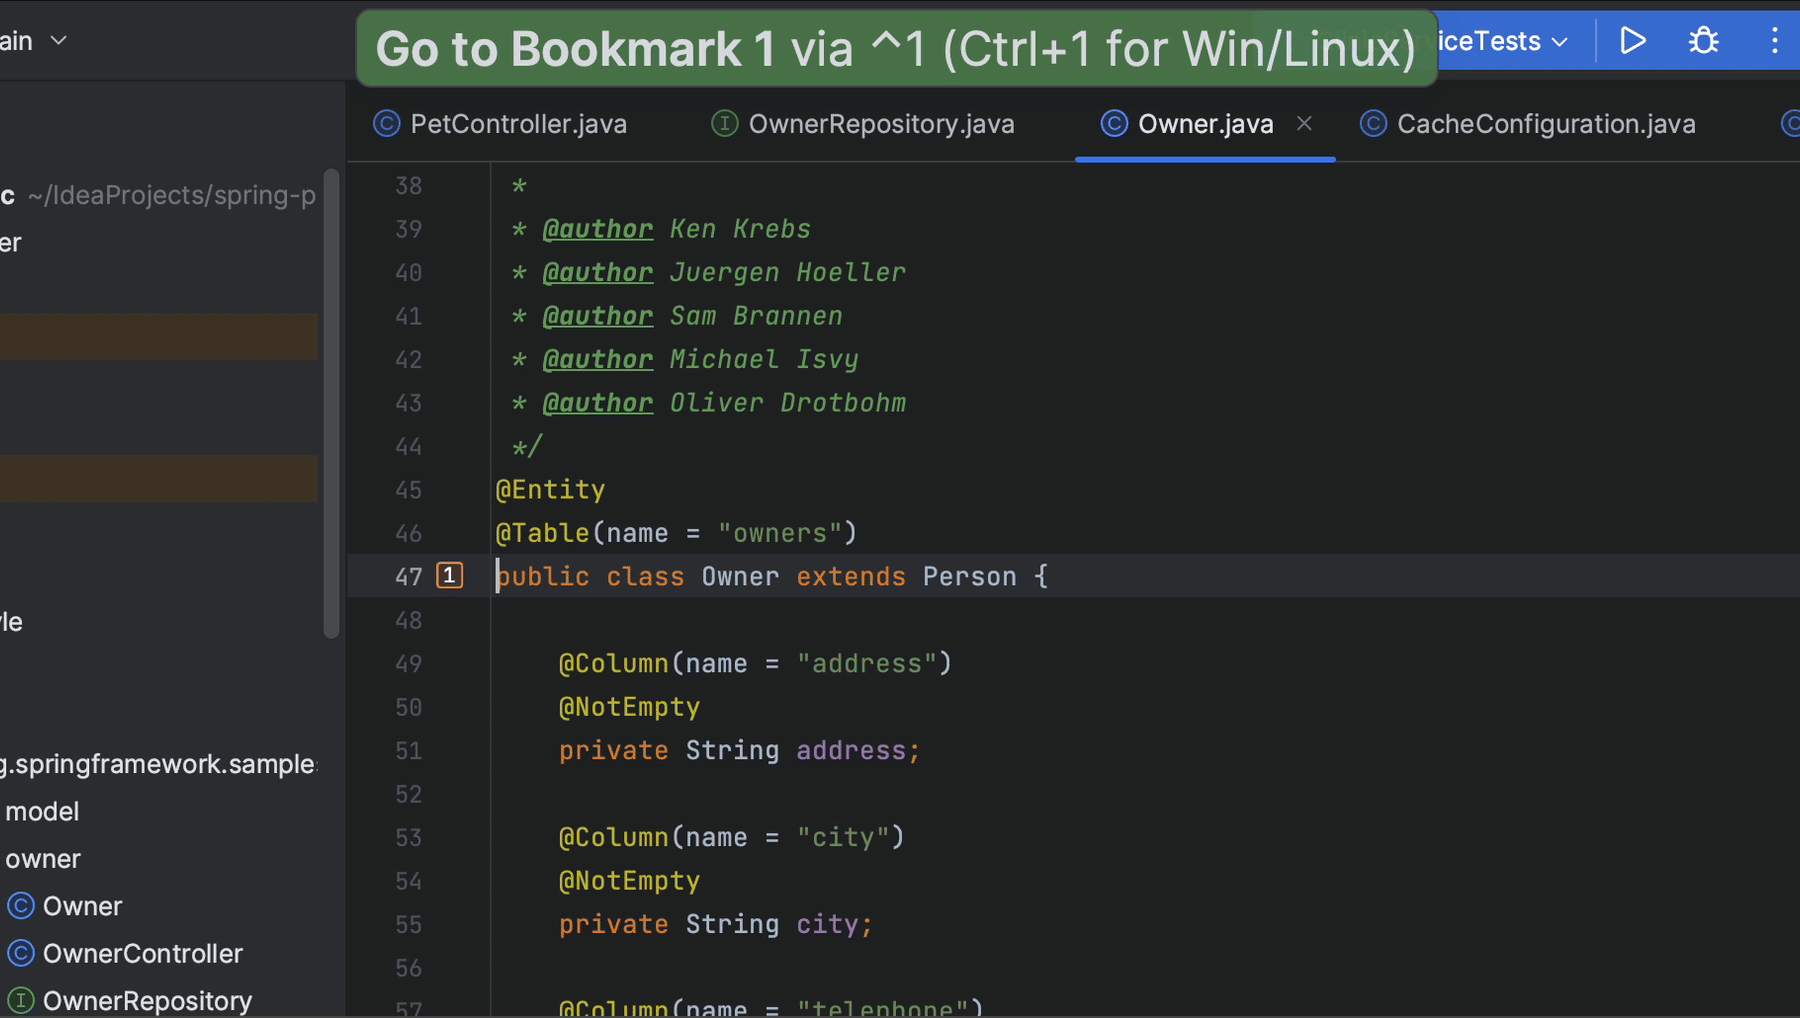
To jump straight to a mnemonic bookmark, hold ^ (on macOS) or Control (on Windows/Linux) and press the mnemonic digit or letter on the keyboard.
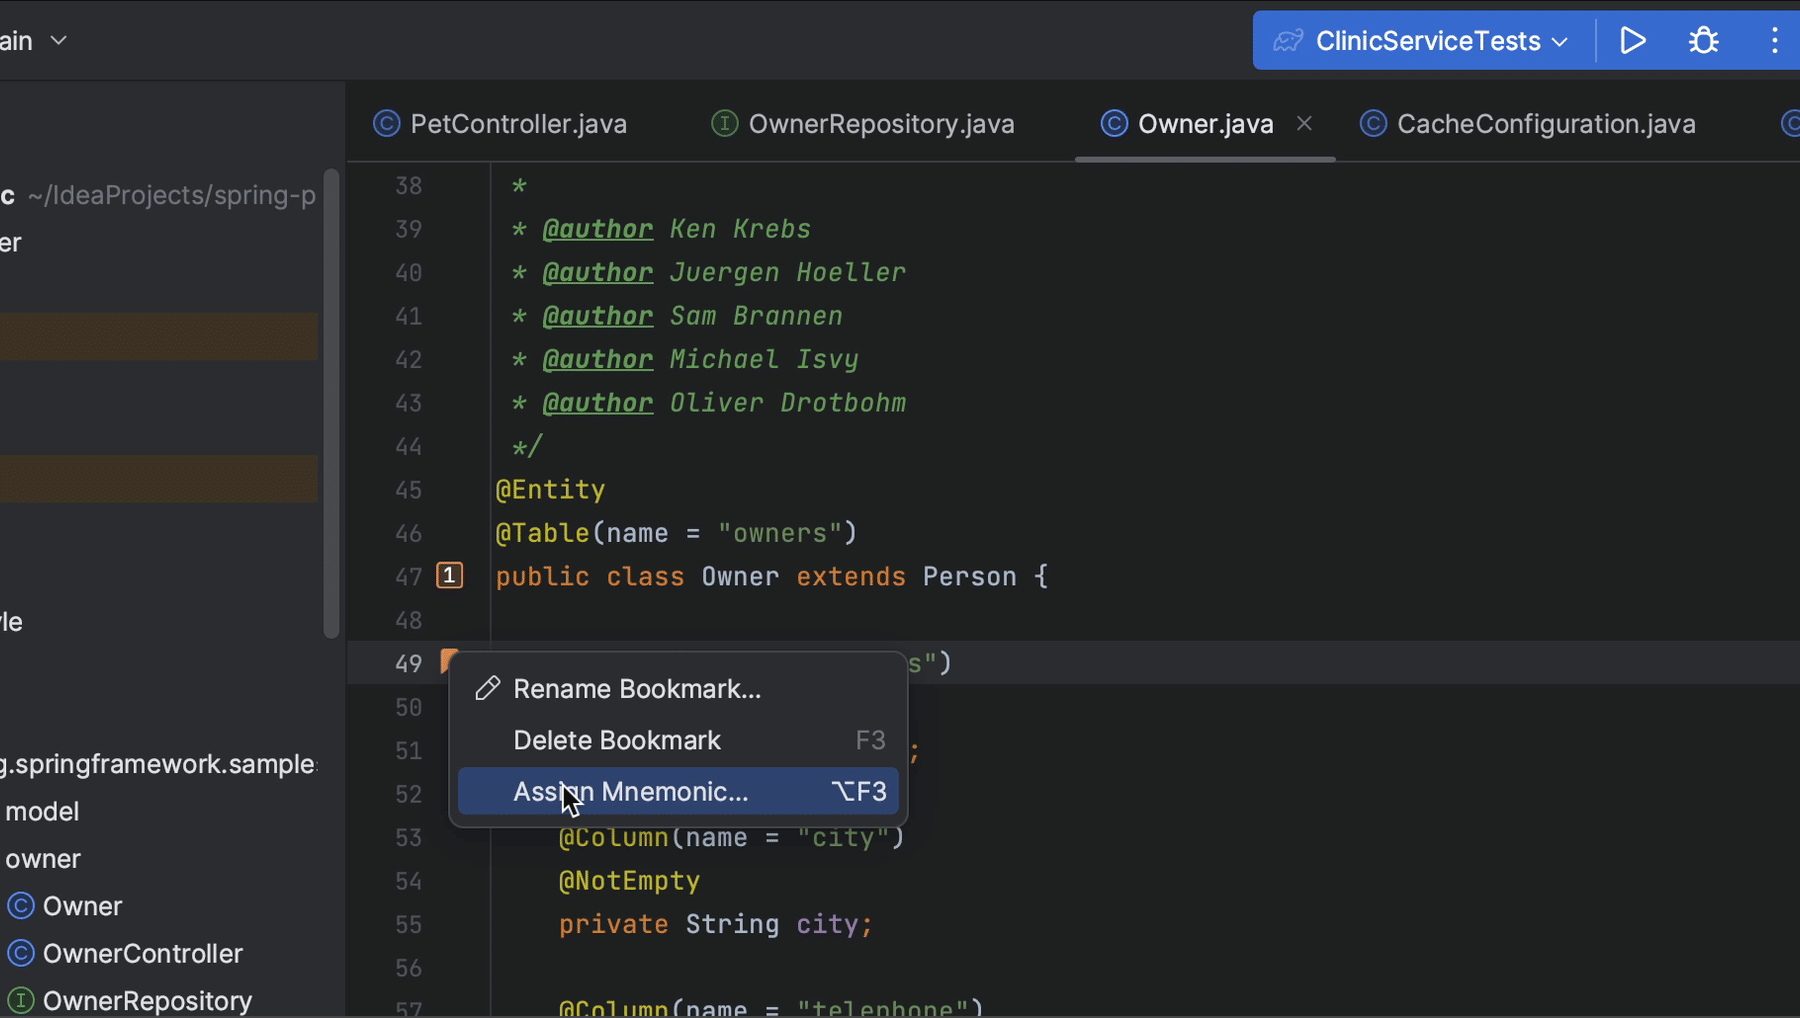
This doesn't work with anonymous bookmarks, but we can assign a mnemonic to an existing anonymous bookmark, either using the shortcut, or by clicking the bookmark in the gutter and selecting Assign Mnemonic.
This works in the Bookmarks popup too!
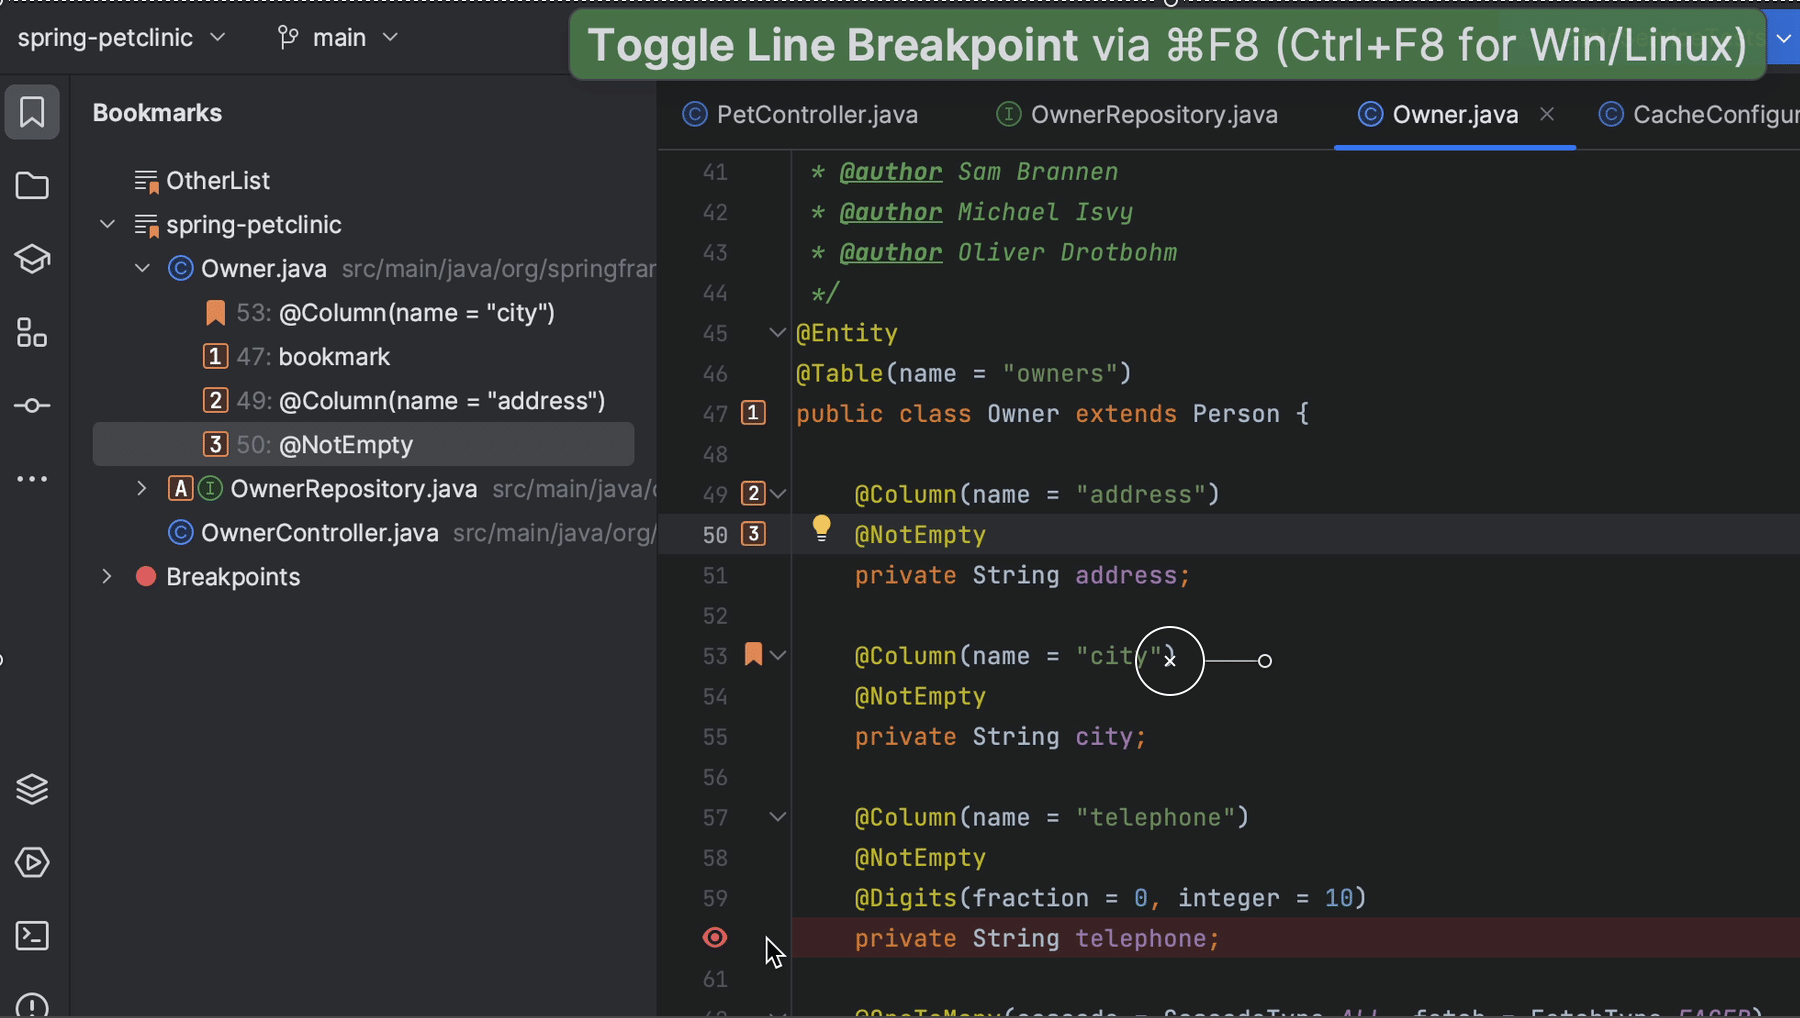
Bookmarks tool window
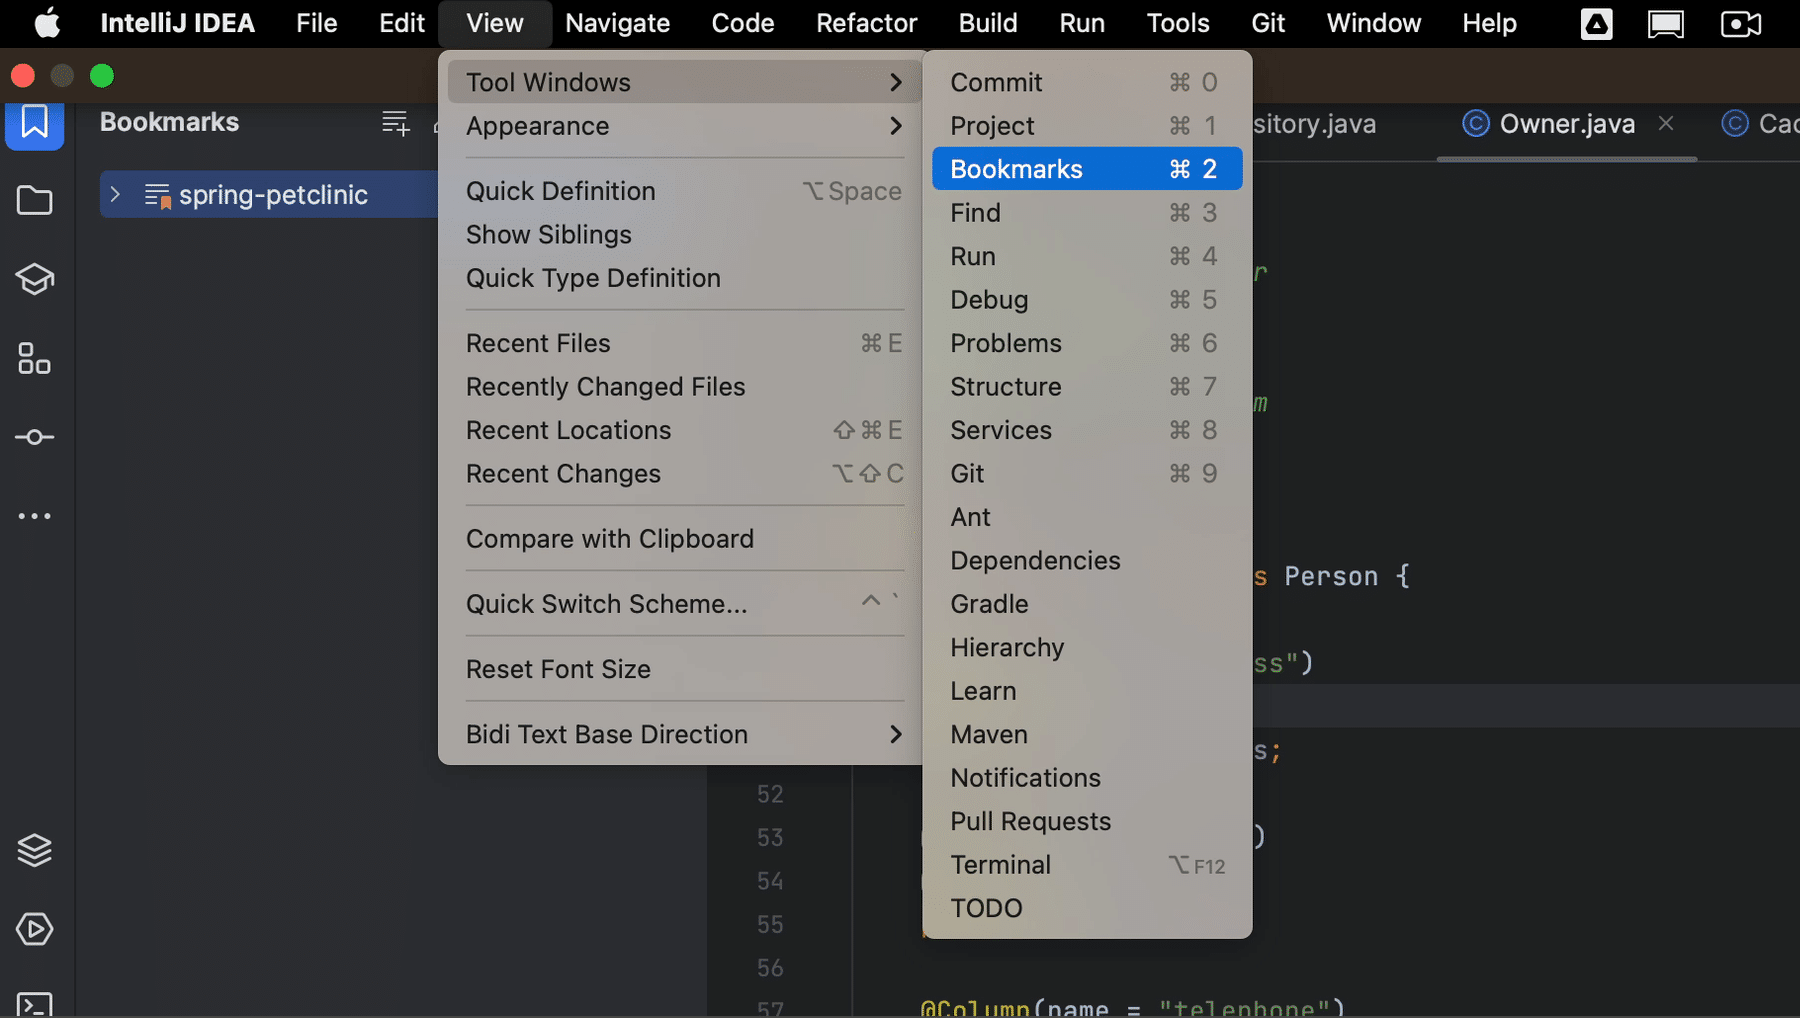
To see all our bookmarks, we can open the Bookmarks tool window by pressing ⌘ 2 (on macOS) or Alt+2 (on Windows/Linux), or by selecting View | Tool Windows | Bookmarks from the main menu.
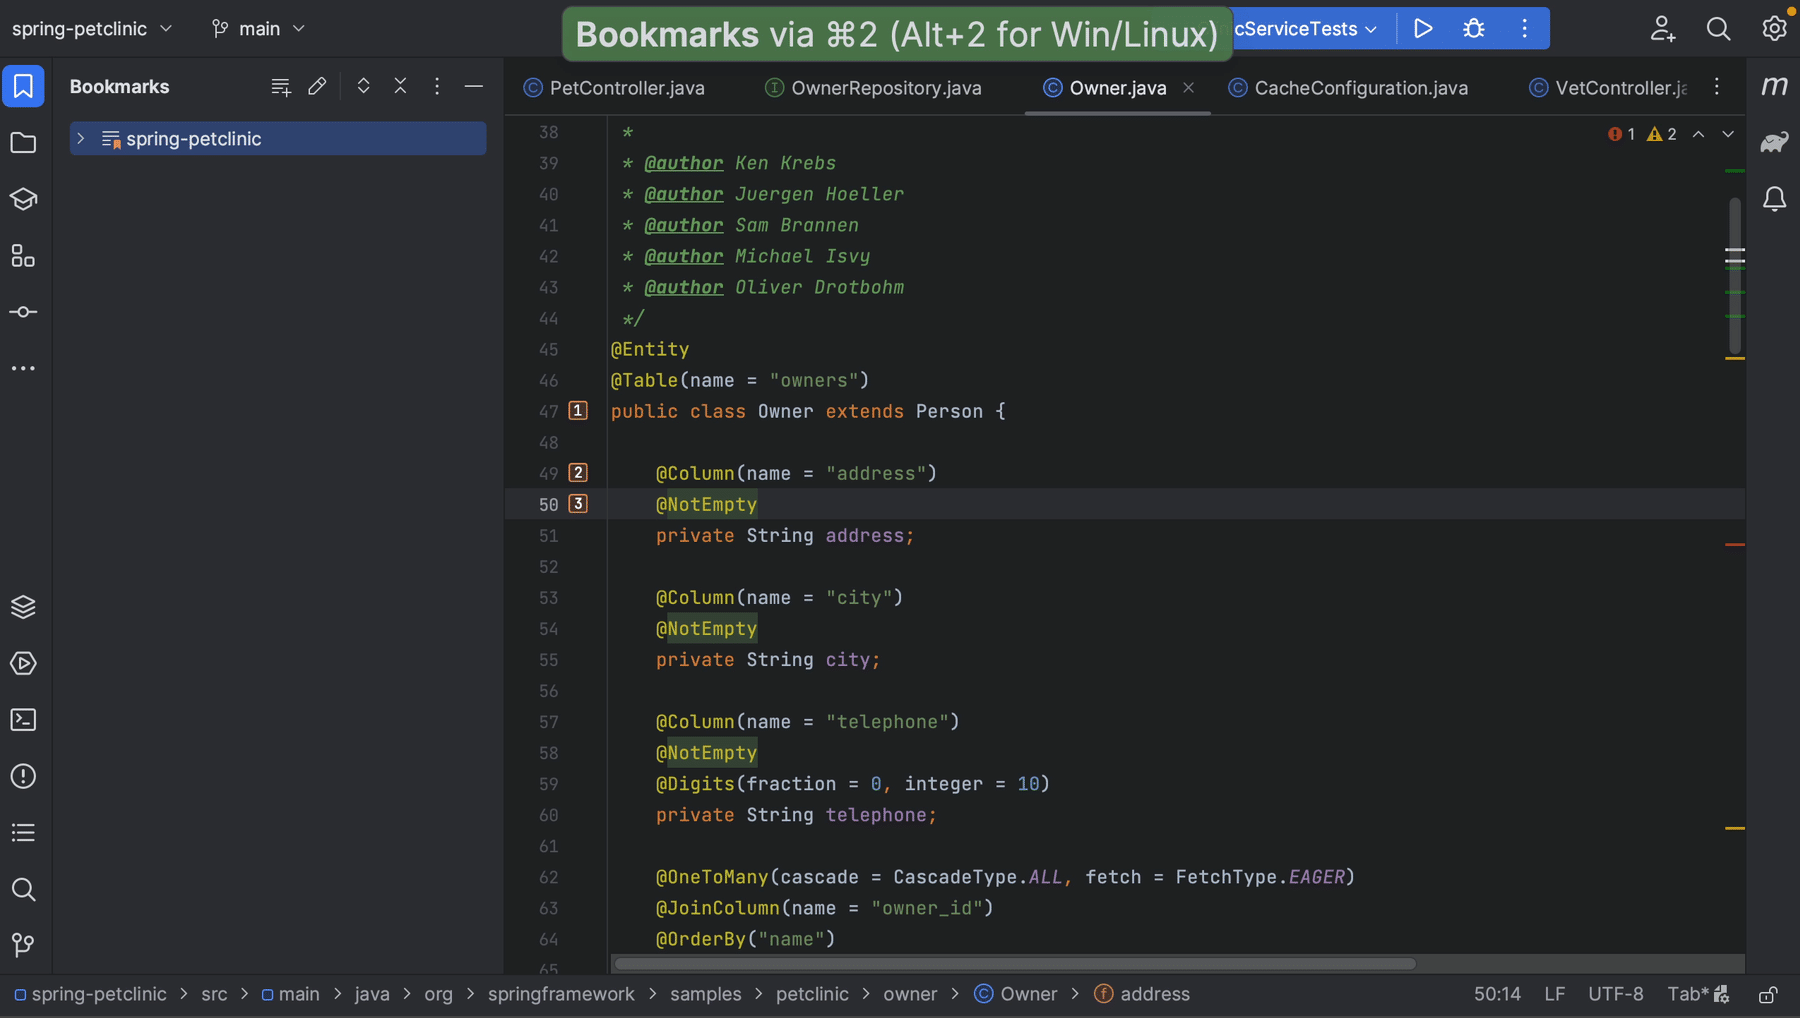
IntelliJ IDEA adds your bookmarks to the predefined list in the Bookmarks tool window that is created automatically and has the same name as the project. In this example, multiple bookmarks in the same file are grouped together.
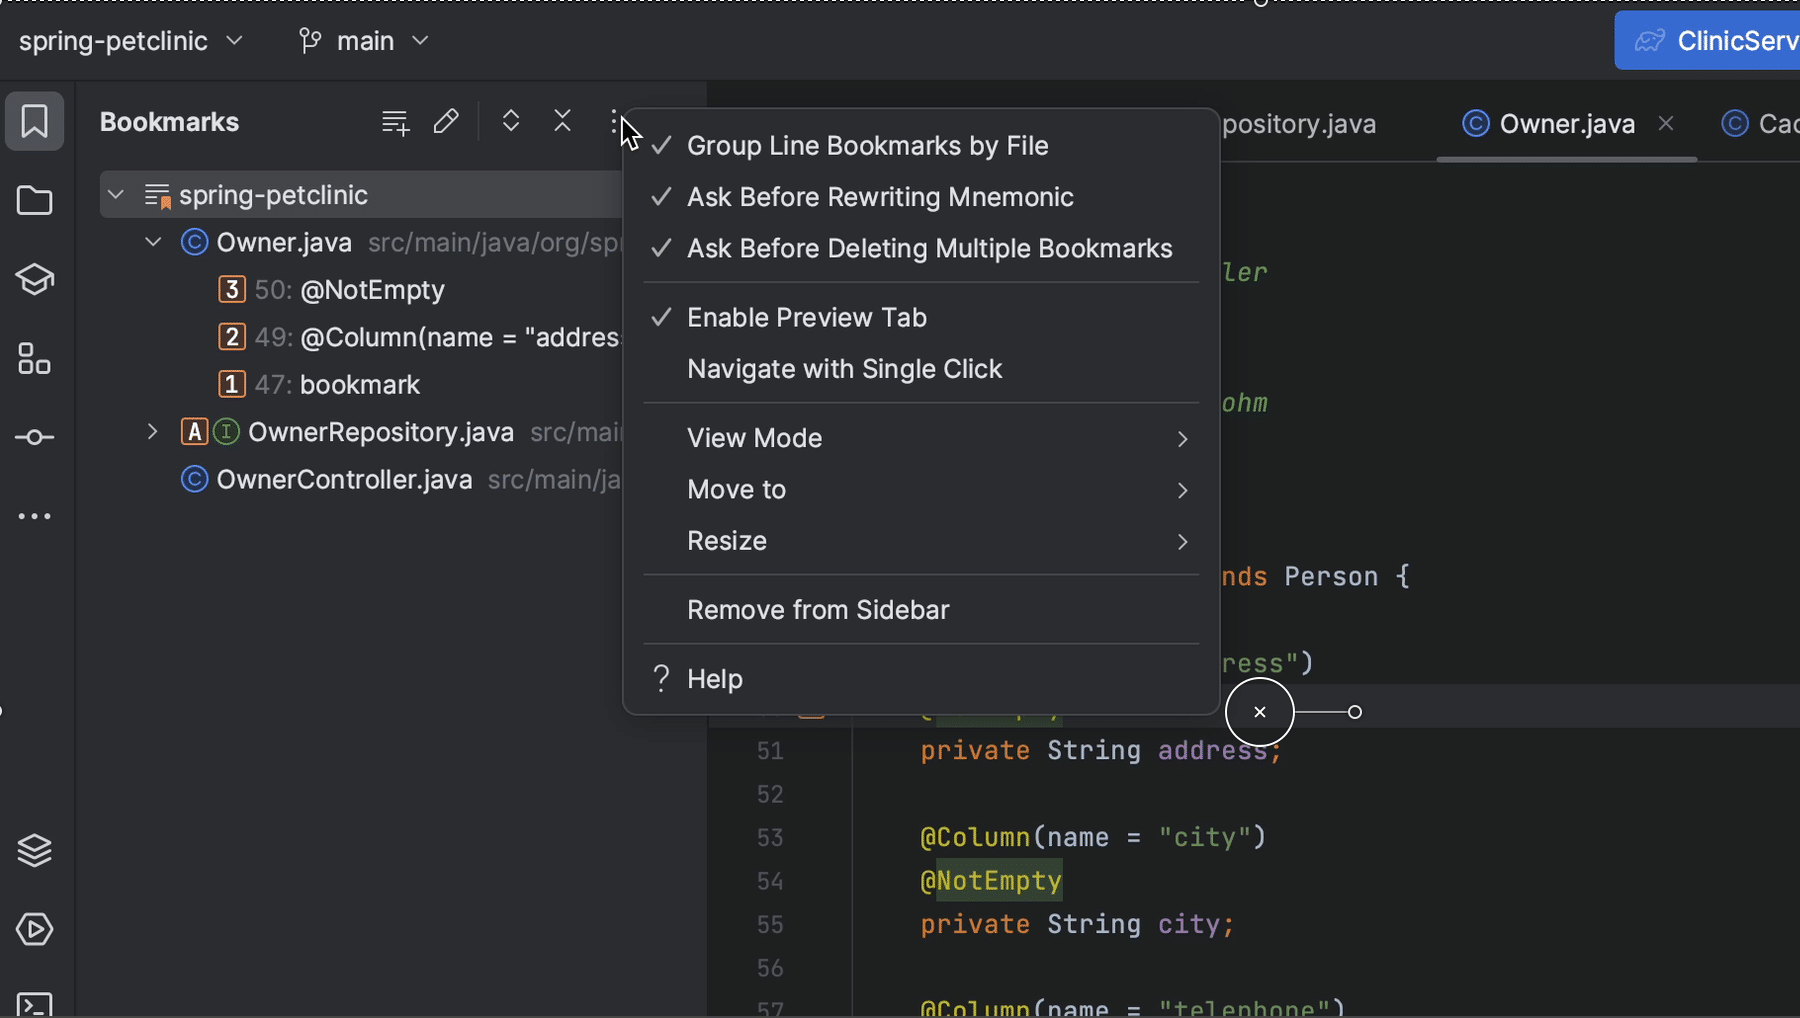
We can also turn that off in the Options menu, by deselecting Group Line Bookmarks by File. As we can see, there are several other options as well. We won't dive into all of them, but be aware there are some options you can configure to your liking.
Bookmarks lists
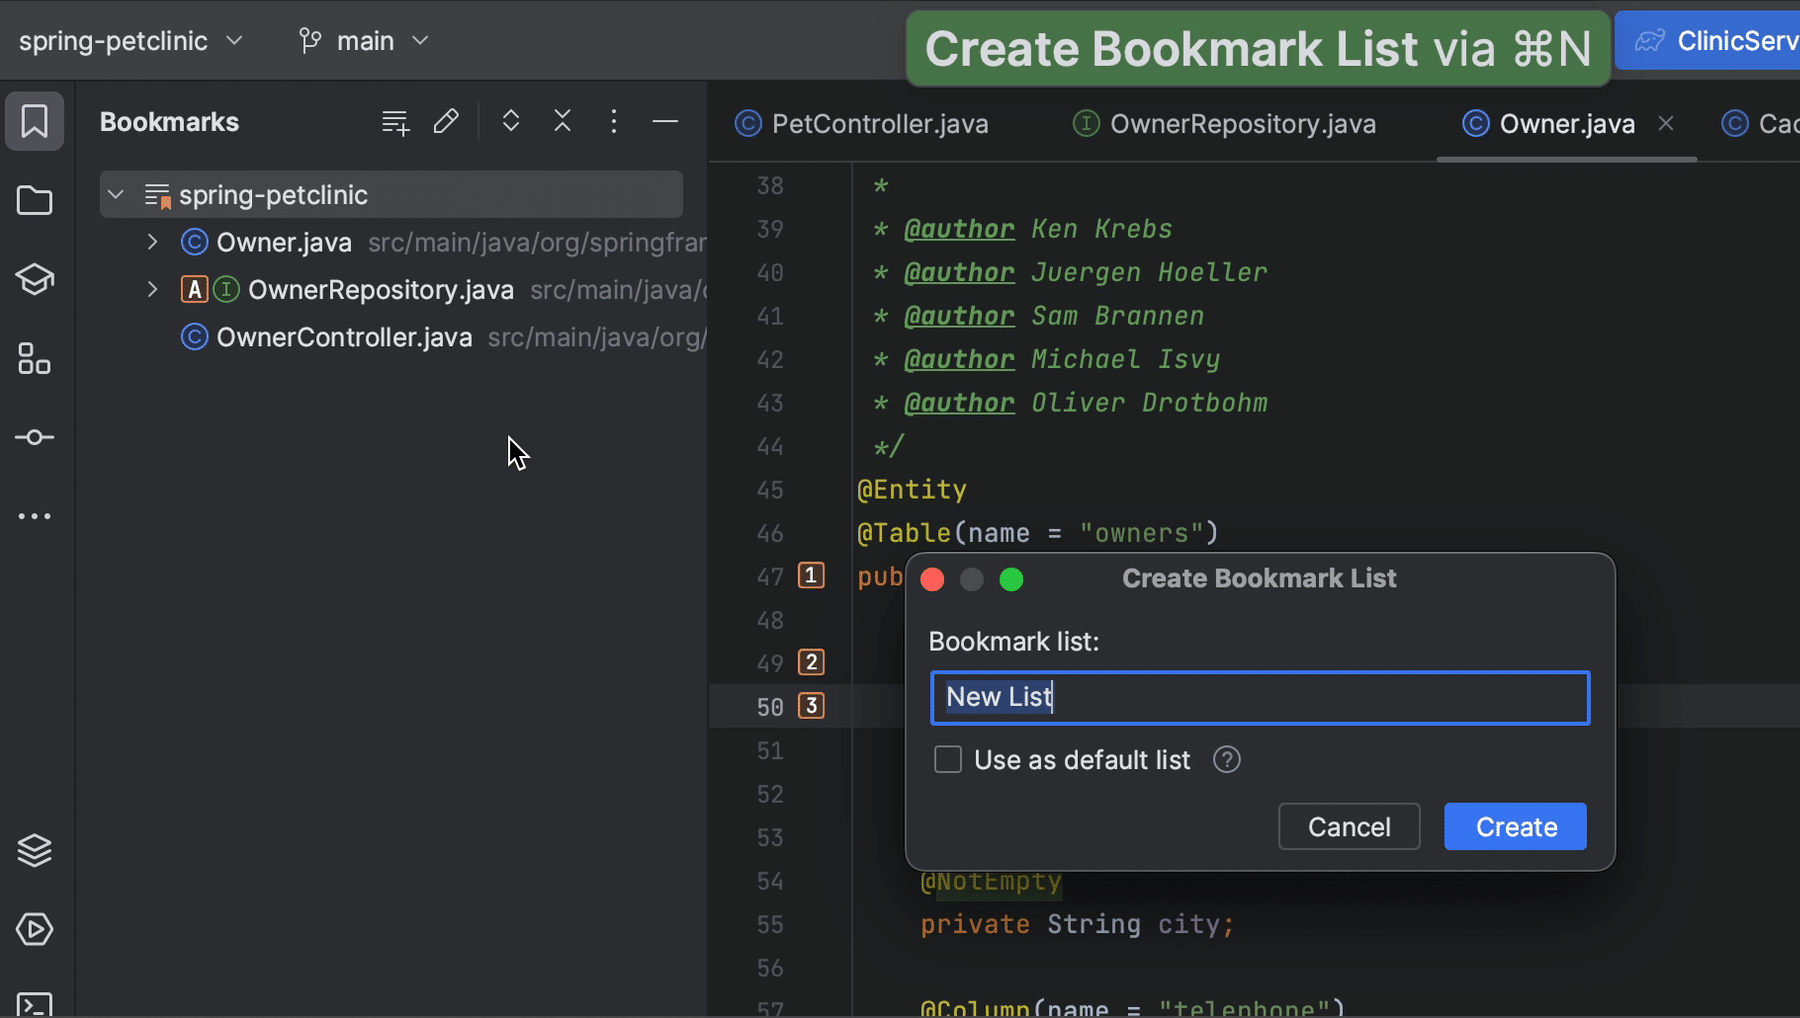
Another option we do want to show you here is that you can create more lists.
We can add a new list using the shortcut (⌘ N on macOS or Alt+Insert on Windows/Linux) or by clicking the Create Bookmark List button. We can add a name for the new list.
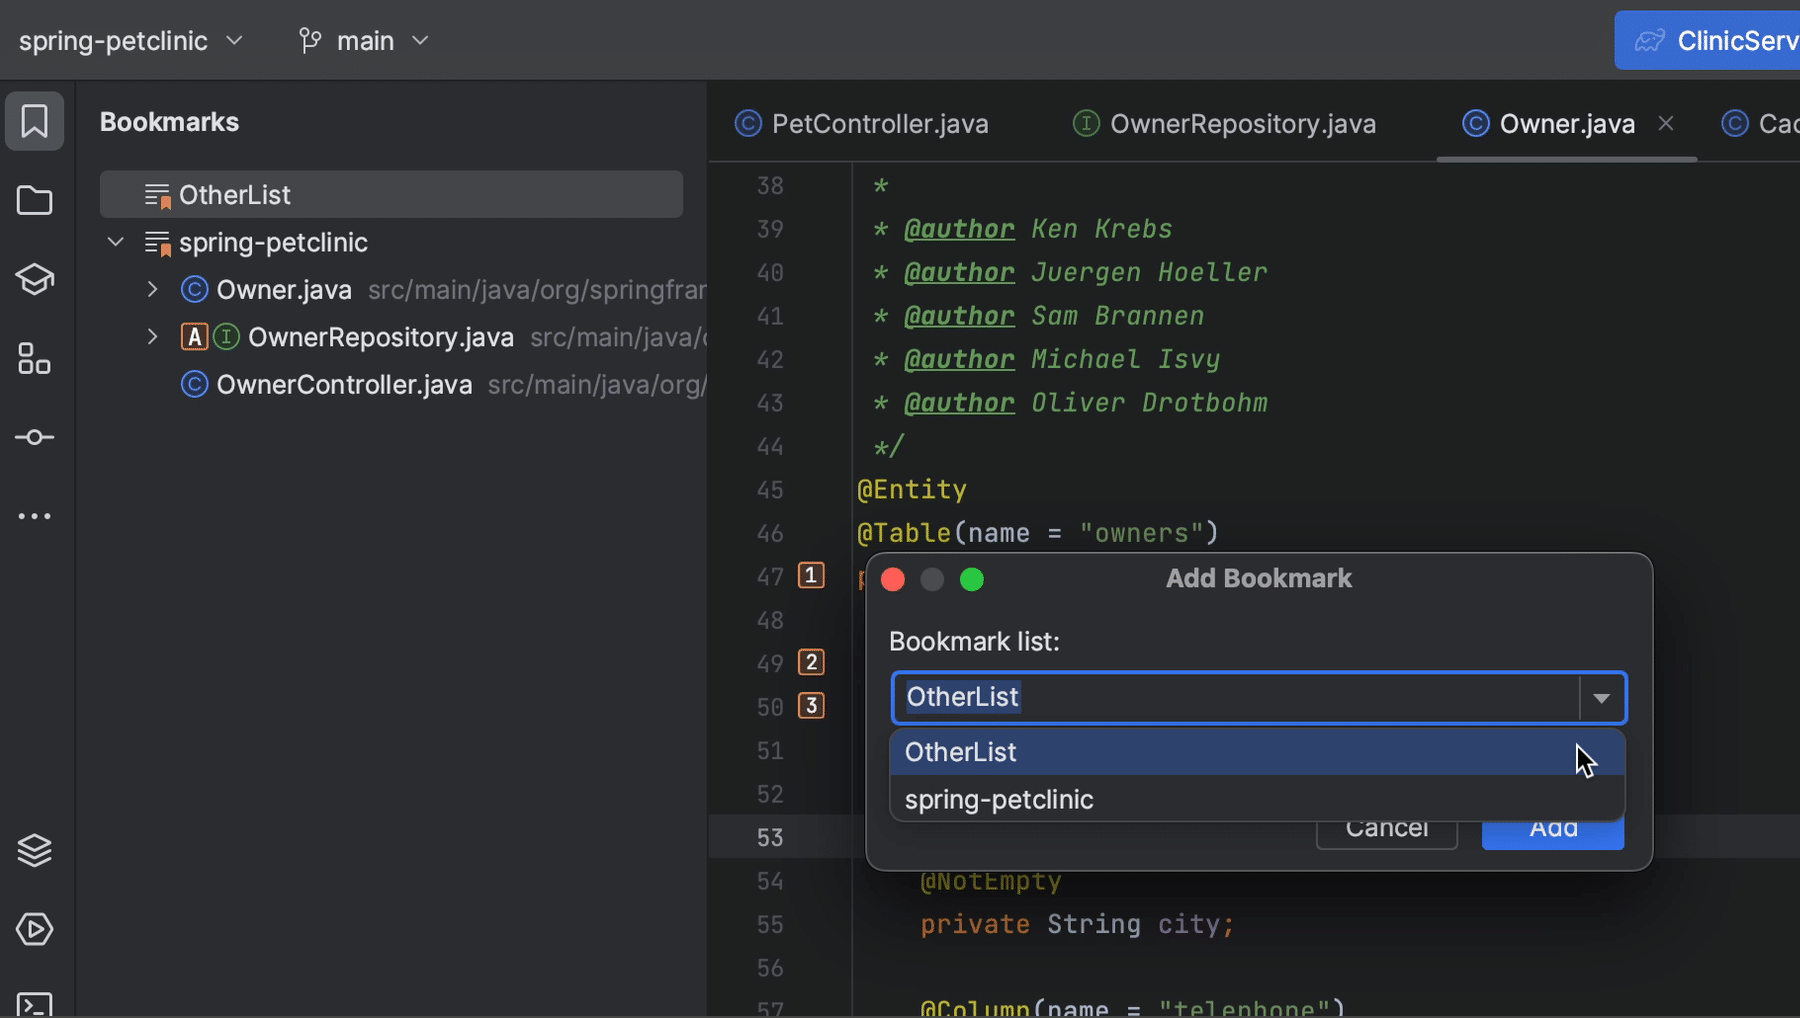
If there are multiple lists, and we create a new bookmark, we can select which list to add it to in the Add Bookmark popup.
We can also select the list to use as the default by checking the option Use as default list.
In the Bookmarks tool window, we can move bookmarks to another list by dragging them to the other list.
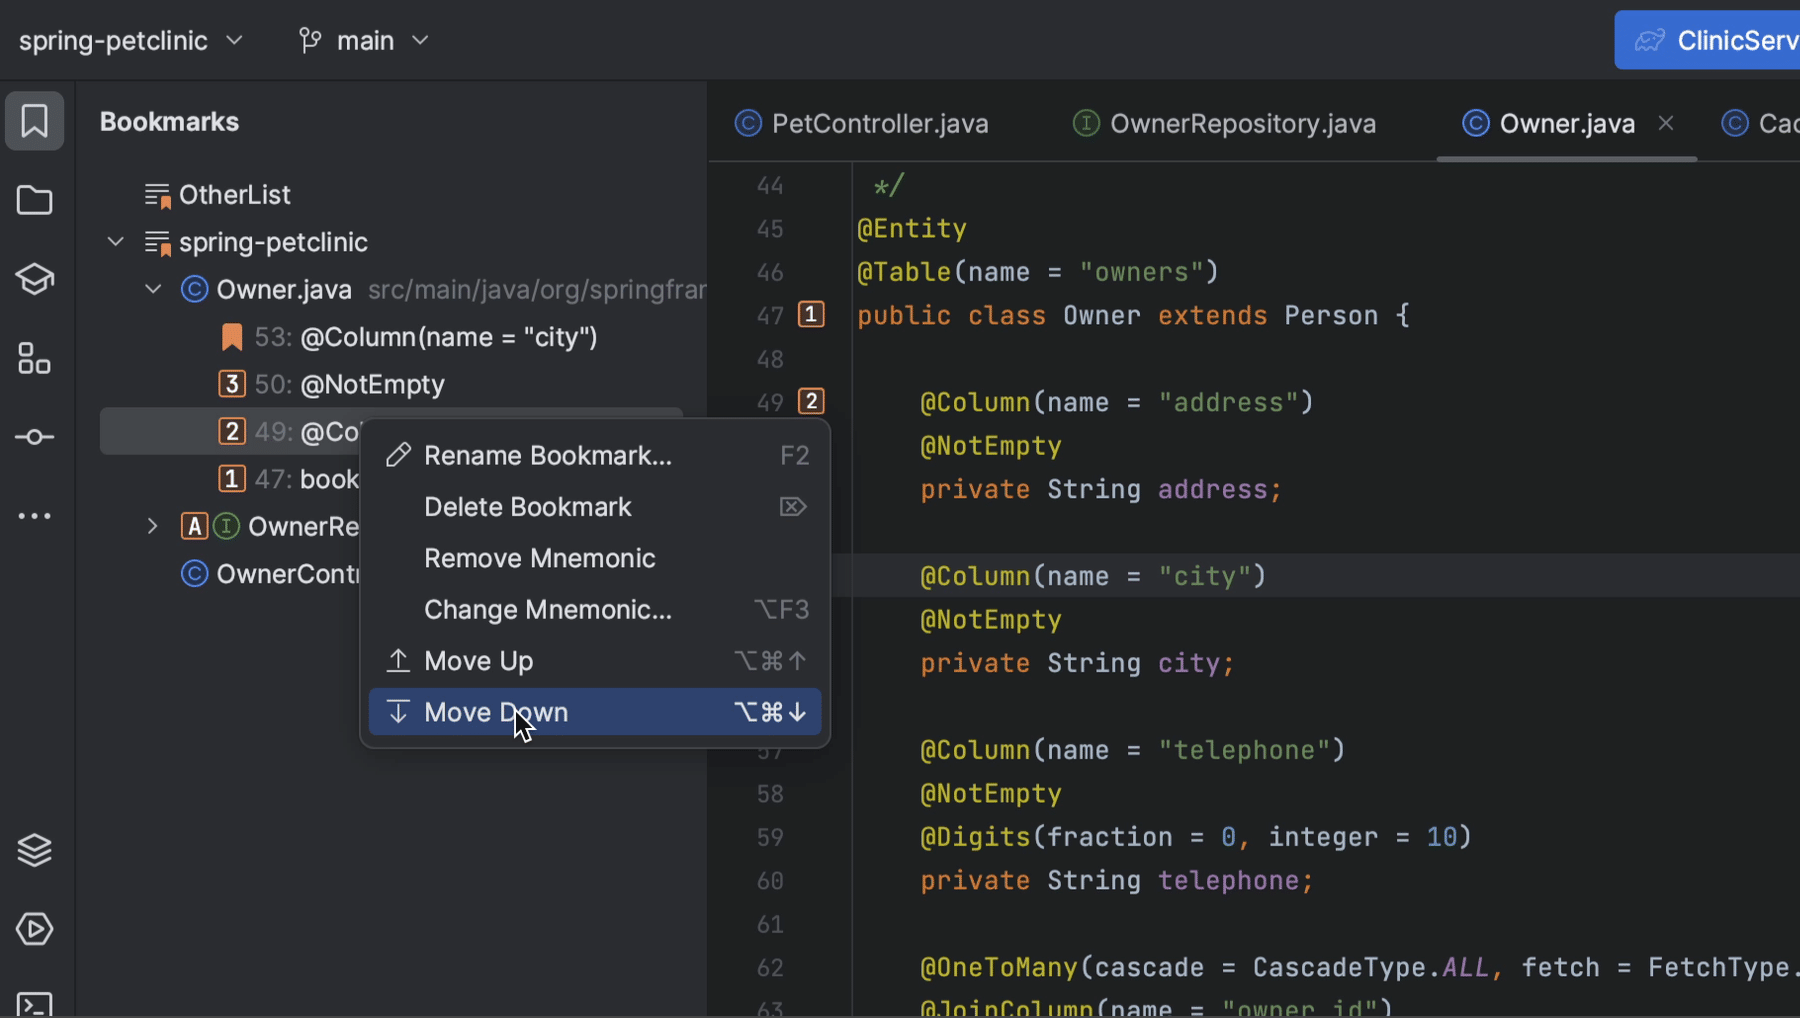
And we can sort bookmarks by selecting a bookmark and using Move down (⌥ ⌘ ↓ on macOS, or Control+Alt+↓ on Windows/Linux) or Move up (⌥ ⌘ ↑ on macOS, or Control+Alt+↑ on Windows/Linux).
Fun fact: The Bookmarks tool window also shows all breakpoints that are automatically added to the dedicated list once you place them in your code.
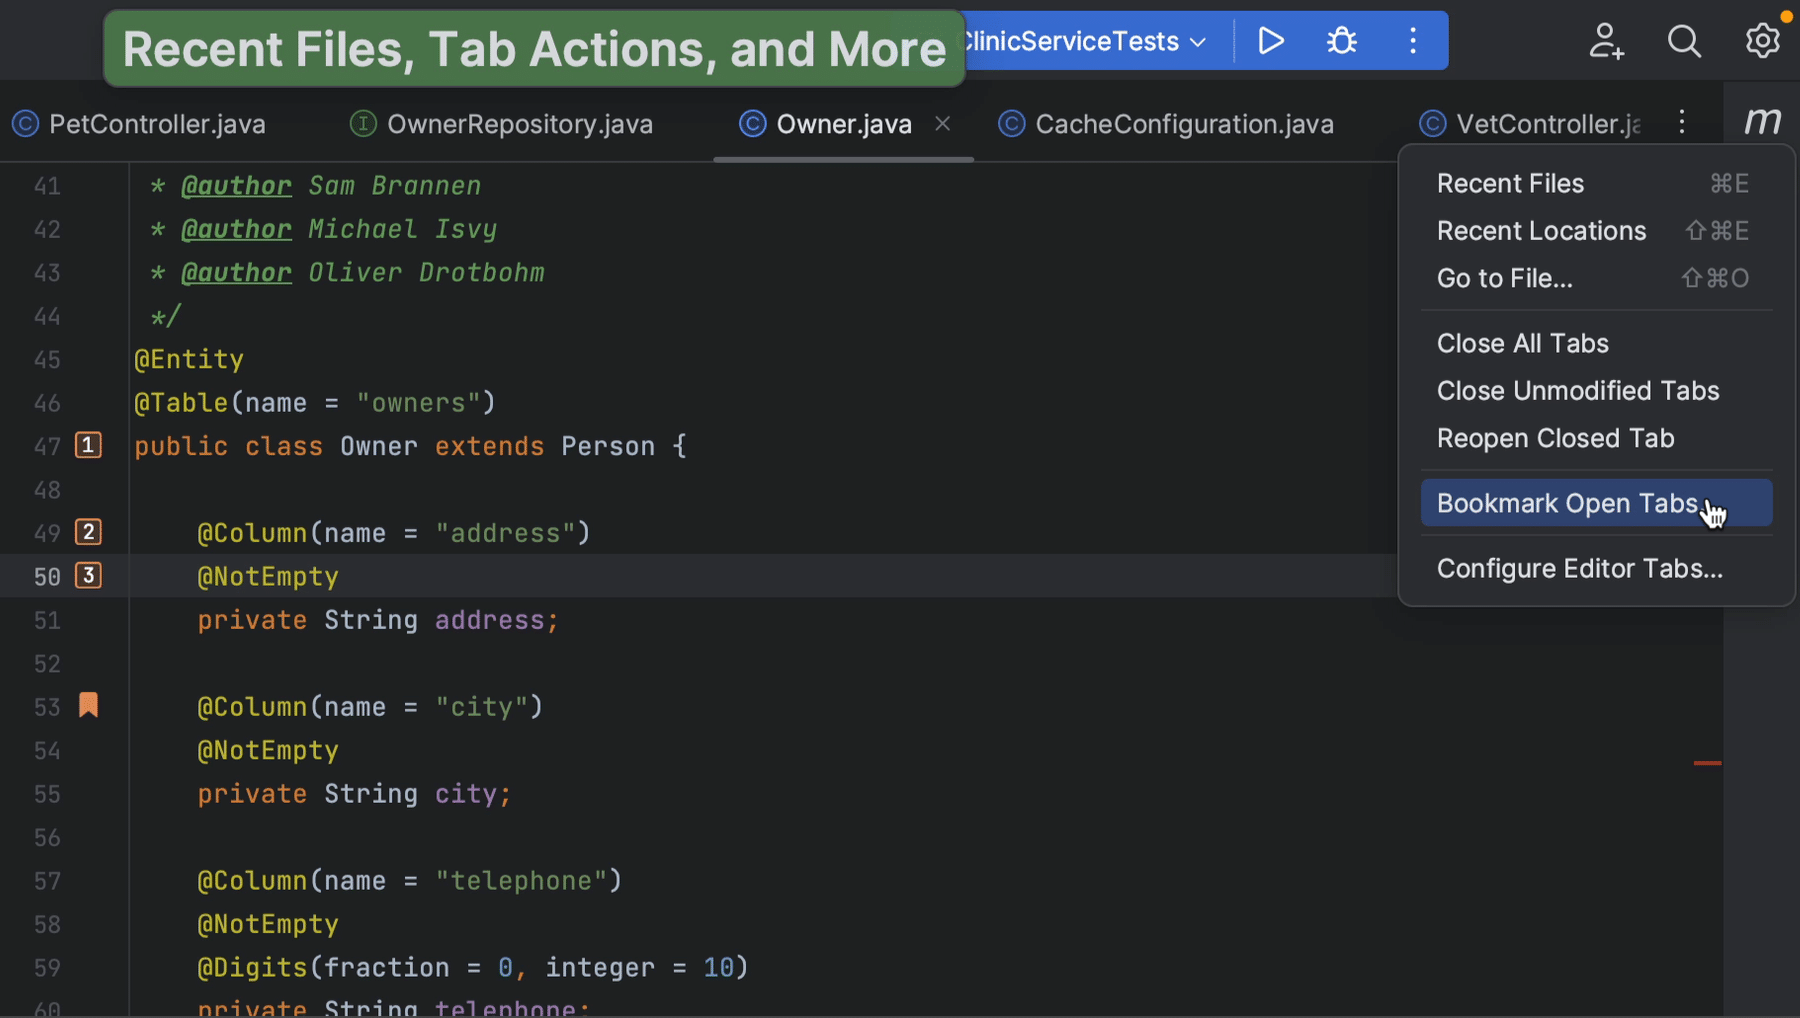
Bookmark editor tabs
Finally, we can also bookmark editor tabs. Click the ... to the right of the tabs and select Bookmark Open Tabs.
We can enter a name for this list in the Create Bookmark List popup.

Summary and Shortcuts
As we've seen, bookmarks allow us to "save" certain interesting locations in the code base, so we can easily go back to them later.
Now we know how to create bookmarks and how to navigate to bookmarks we have created.
IntelliJ IDEA Shortcuts Used
Here are the IntelliJ IDEA shortcuts that we used.
| Name | macOS Shortcut | Windows / Linux Shortcut |
|---|---|---|
| Recent files | ⌘ E | Ctrl+E |
| Open / Close Project Tool Window | ⌘ 1 | Alt+1 |
| Add anonymous bookmark | F3 | F11 |
| Add mnemonic bookmark | ⌥ F3 | Ctrl+F11 |
| Open bookmarks popup | ⌘ F3 | Shift+F11 |
| Jump to mnemonic bookmark | ^ + mnemonic | Ctrl+mnemonic |
| Open Bookmarks Tool Window | ⌘ 2 | Alt+2 |
| Create Bookmark List | ⌘ N | Alt+Insert |
| Move down | ⌥ ⌘ ↓ | Ctrl+Alt+↓ |
| Move up | ⌥ ⌘ ↑ | Ctrl+Alt+↑ |
Related Links
- (video) JetBrains - Using bookmarks in IntelliJ IDEA
- (documentation) JetBrains IntelliJ IDEA – Bookmarks
- (guide) JetBrains IntelliJ IDEA Guide – Bookmarks
- (documentation) JetBrains IntelliJ IDEA –Breakpoints
- (code) Spring PetClinic
- March 07, 2023
- 6 min read
Marit van Dijk is a Java Champion and Developer Advocate at JetBrains with over 20 years of software development experience. She's passionate about building great software with great people, and making developers' lives easier. Marit regularly presents at international conferences and shares her expertise through webinars, podcasts, blog posts, videos, and tutorials. She's also a contributor to the book "97 Things Every Java Programmer Should Know" (O’Reilly Media).


Comments (2)
Uwe
3 years agoThere is a small error in the shortcut table. You have to switch anonymous (F11) and mnemonic (ctrl + F11) shortcut. :-)
Marit van Dijk
3 years agoThanks for pointing that out, Uwe! Fixed now ;)